Final Renders & Evaluation (MP 15)

Final Major Project

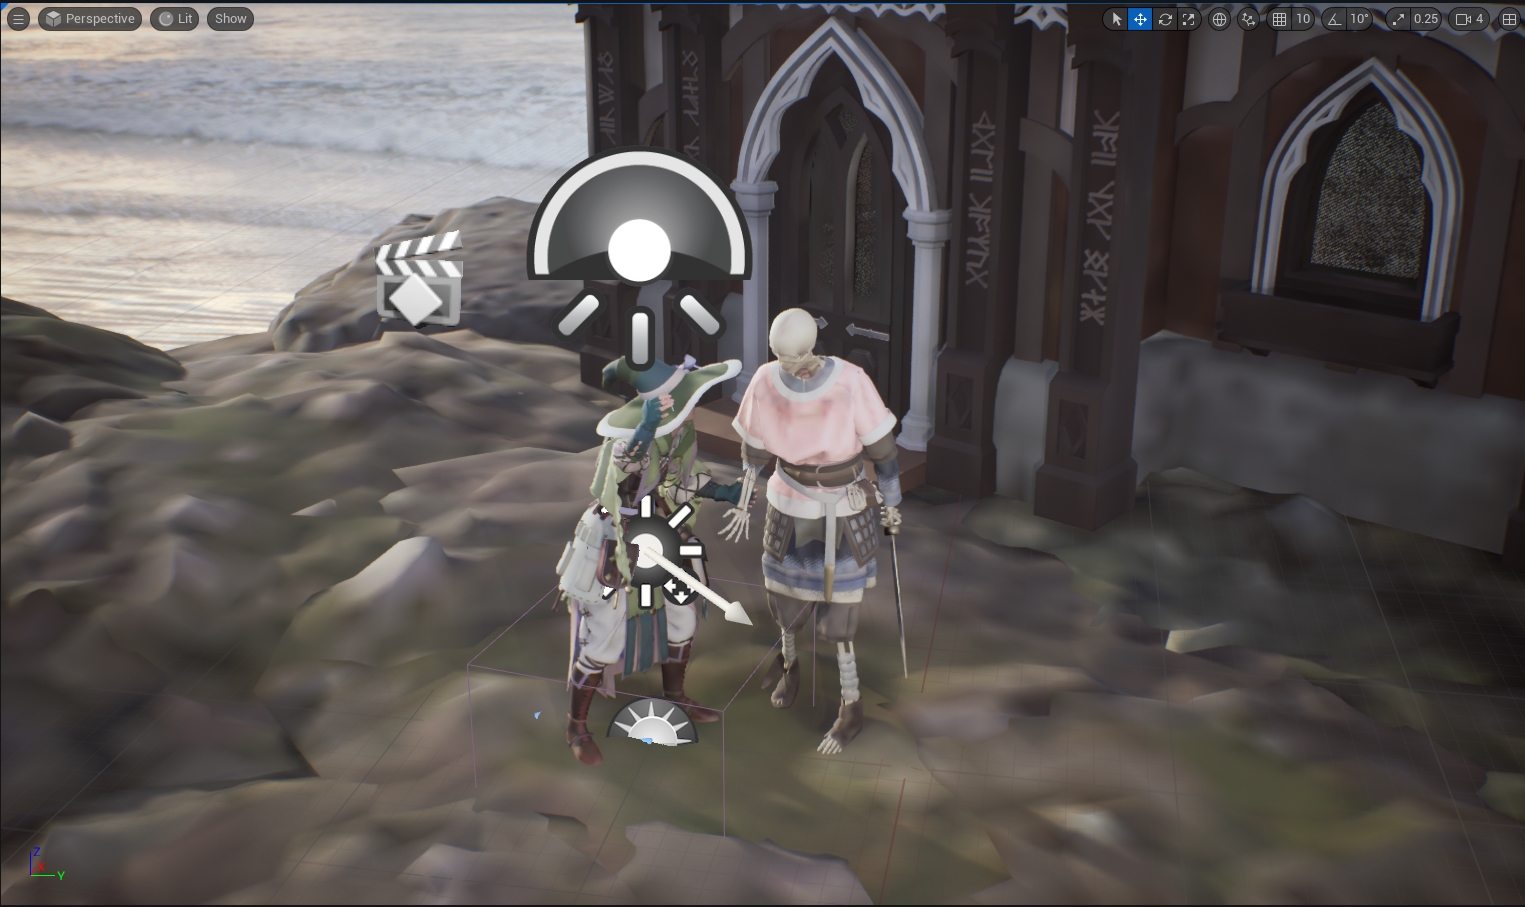
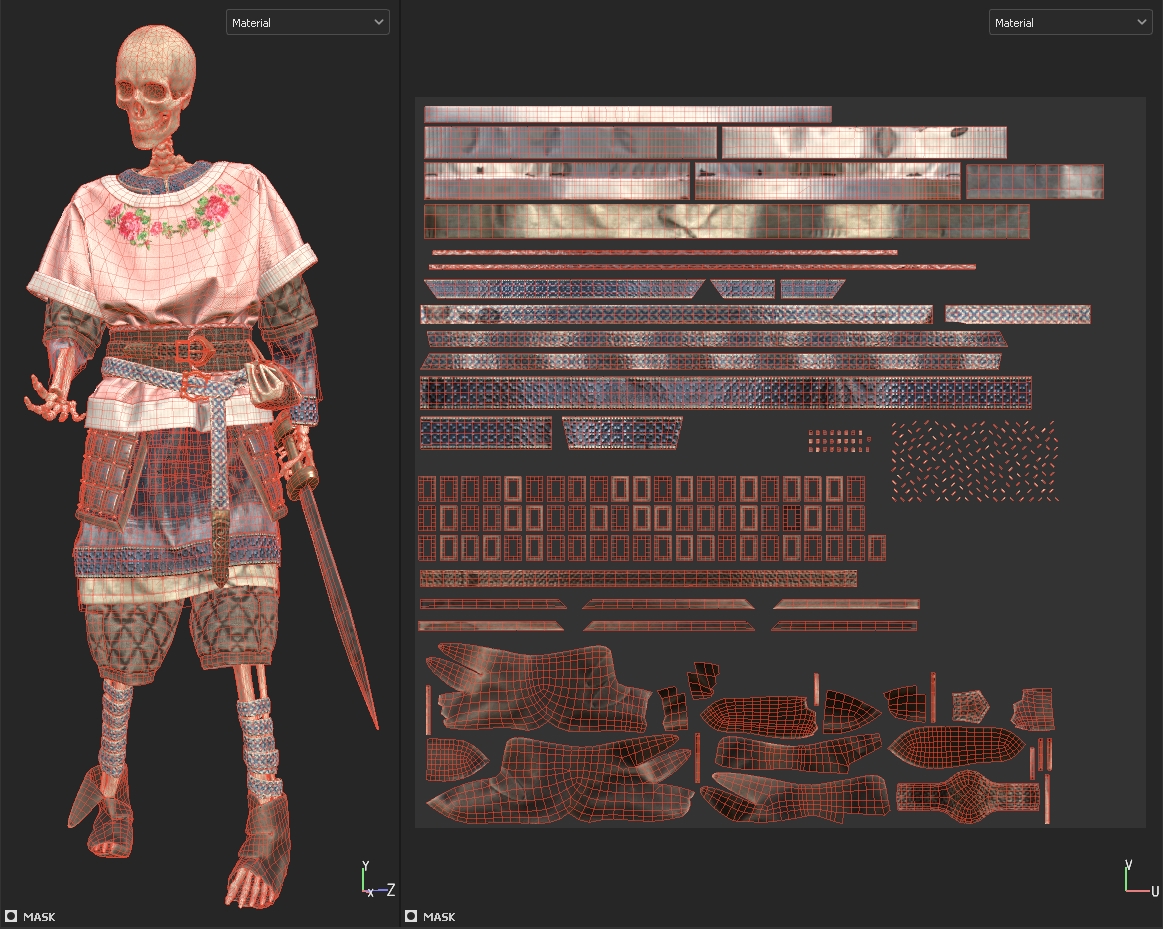
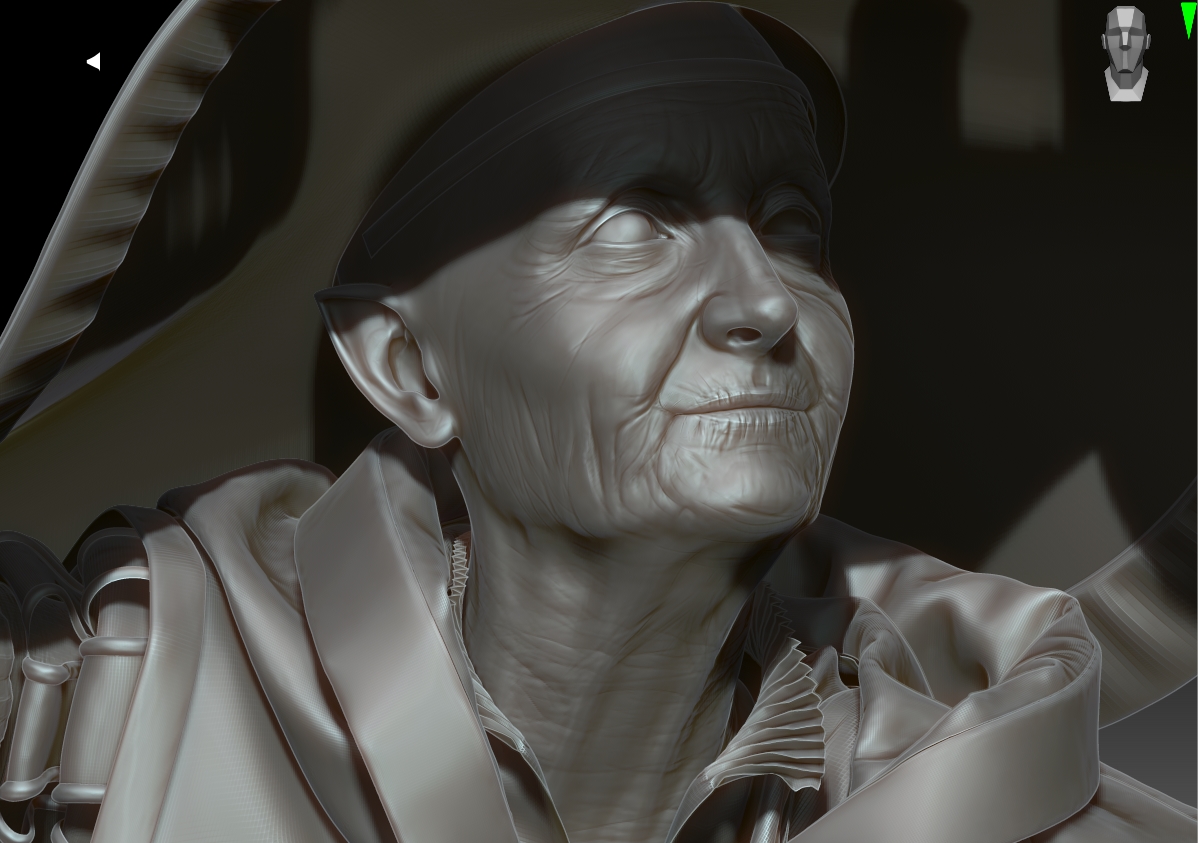
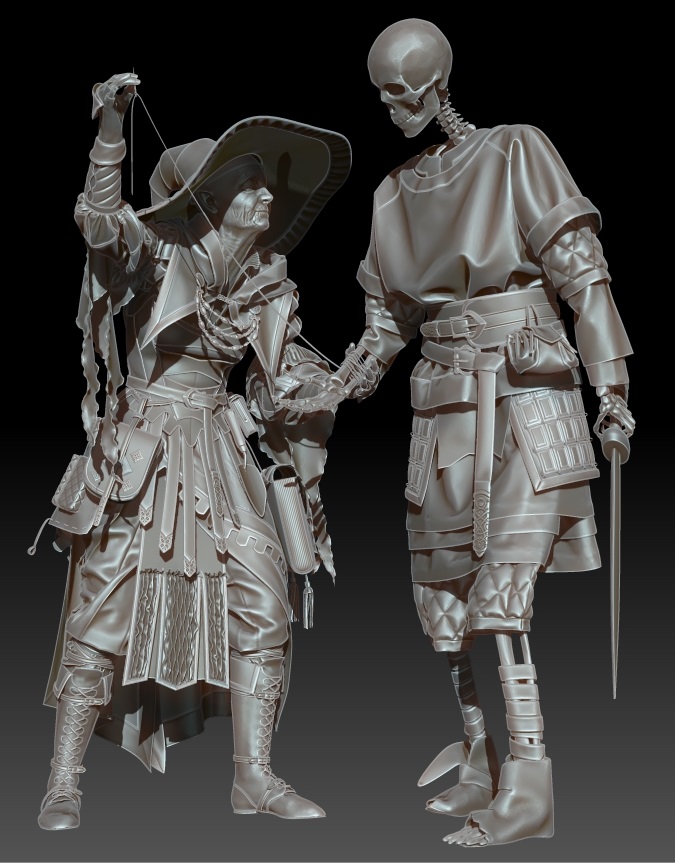
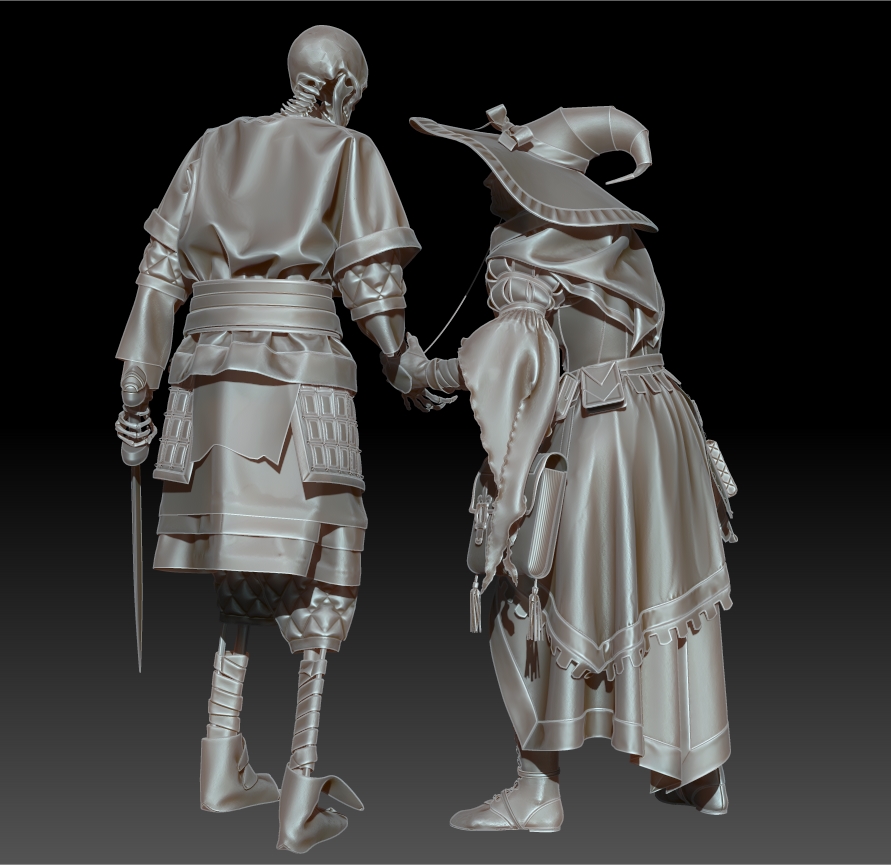
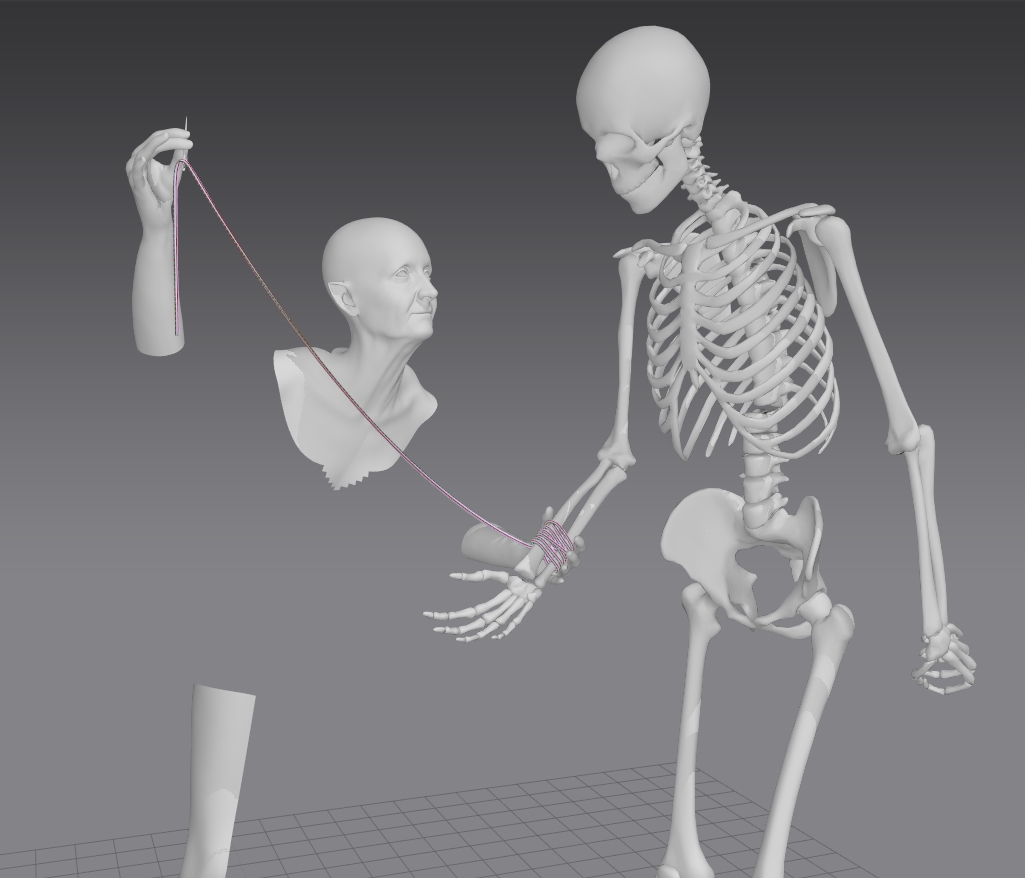
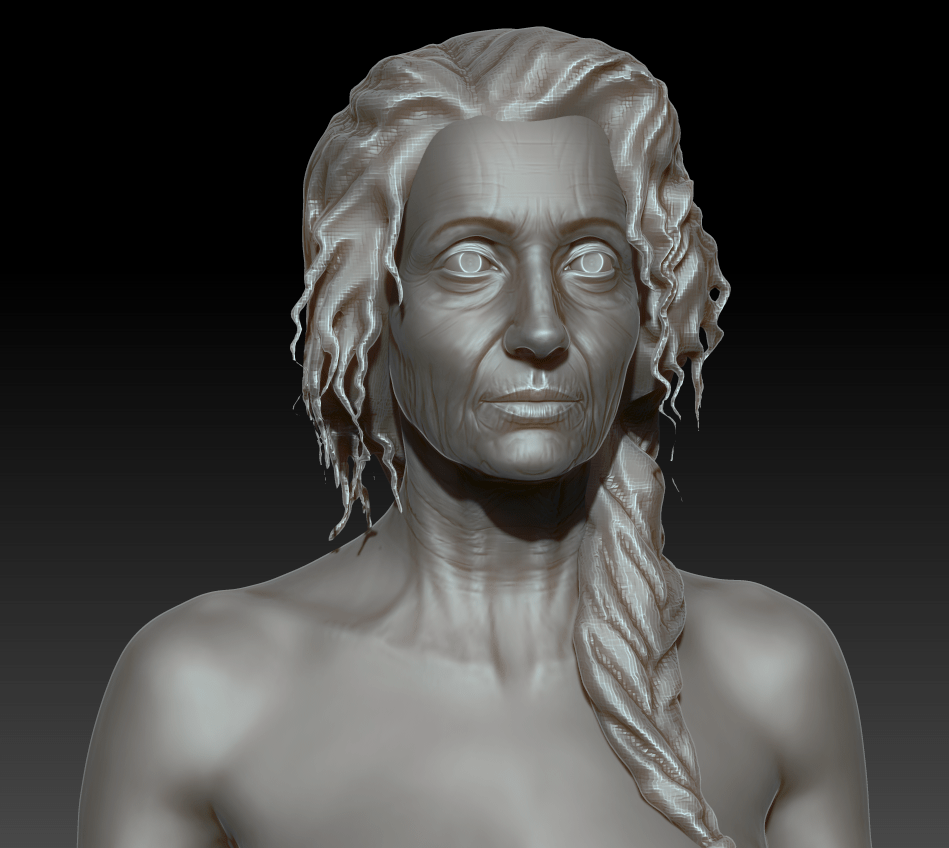
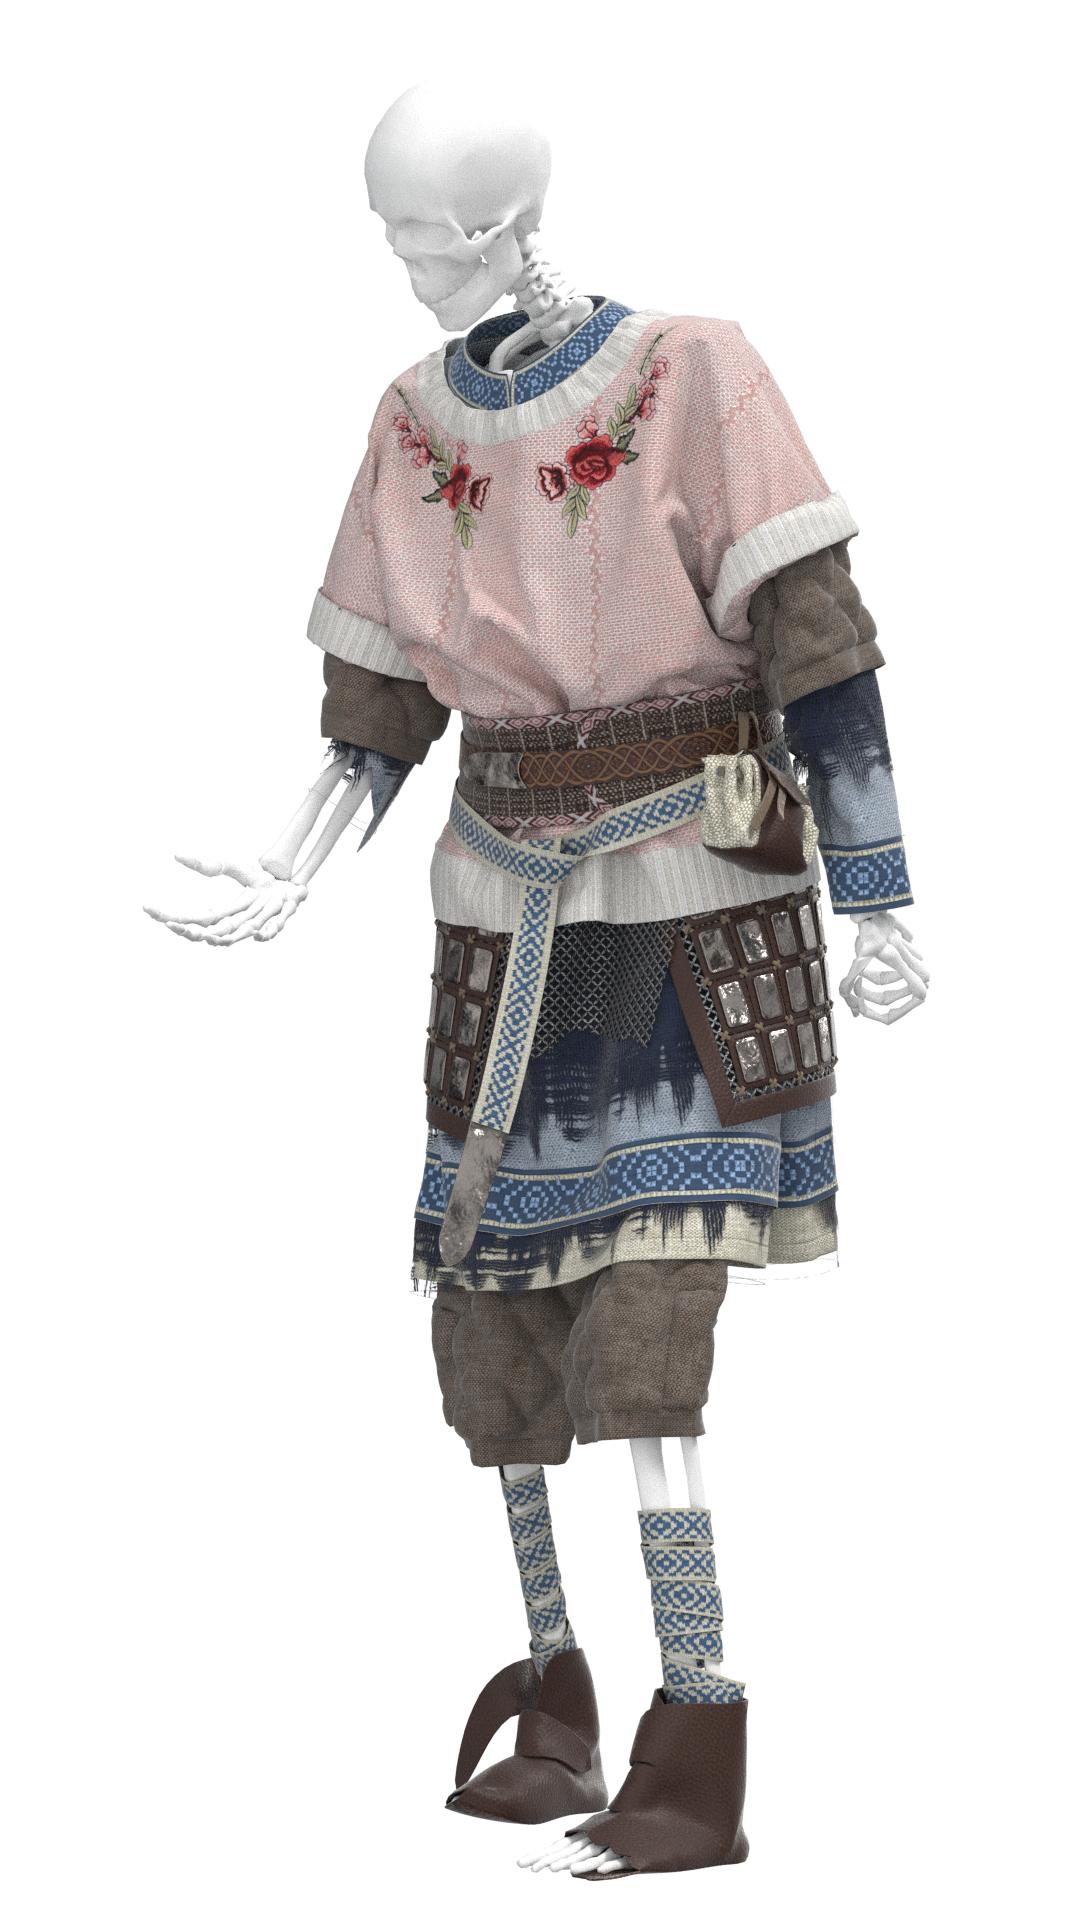
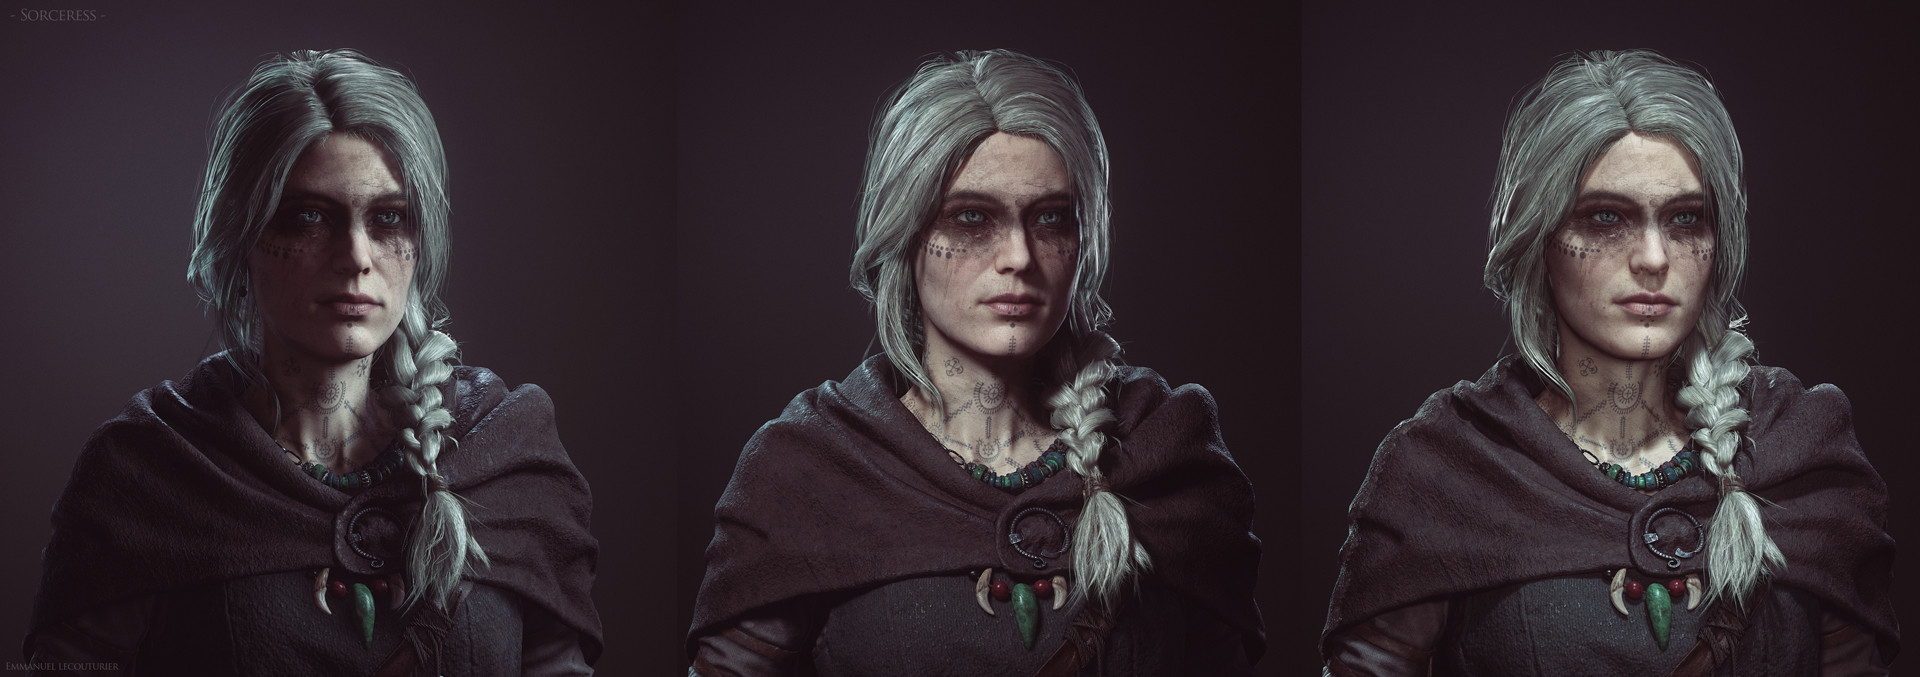
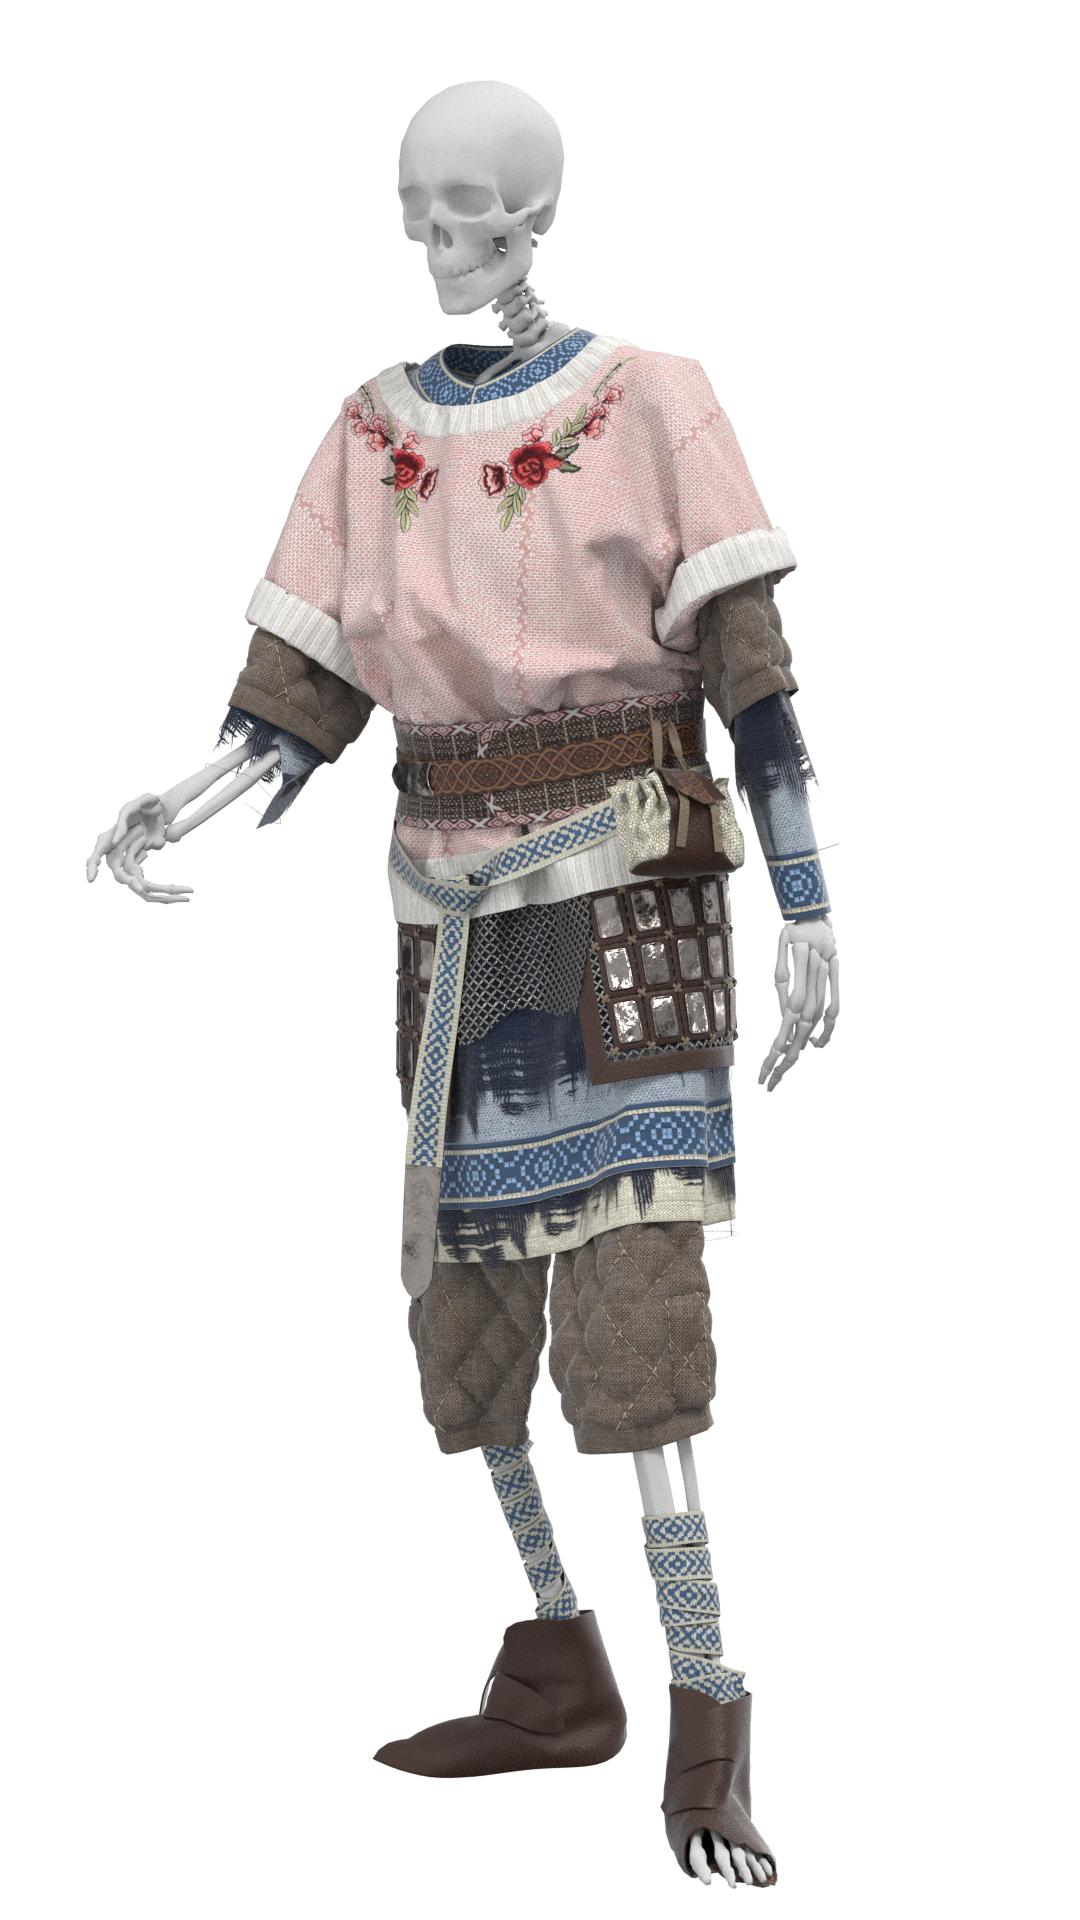
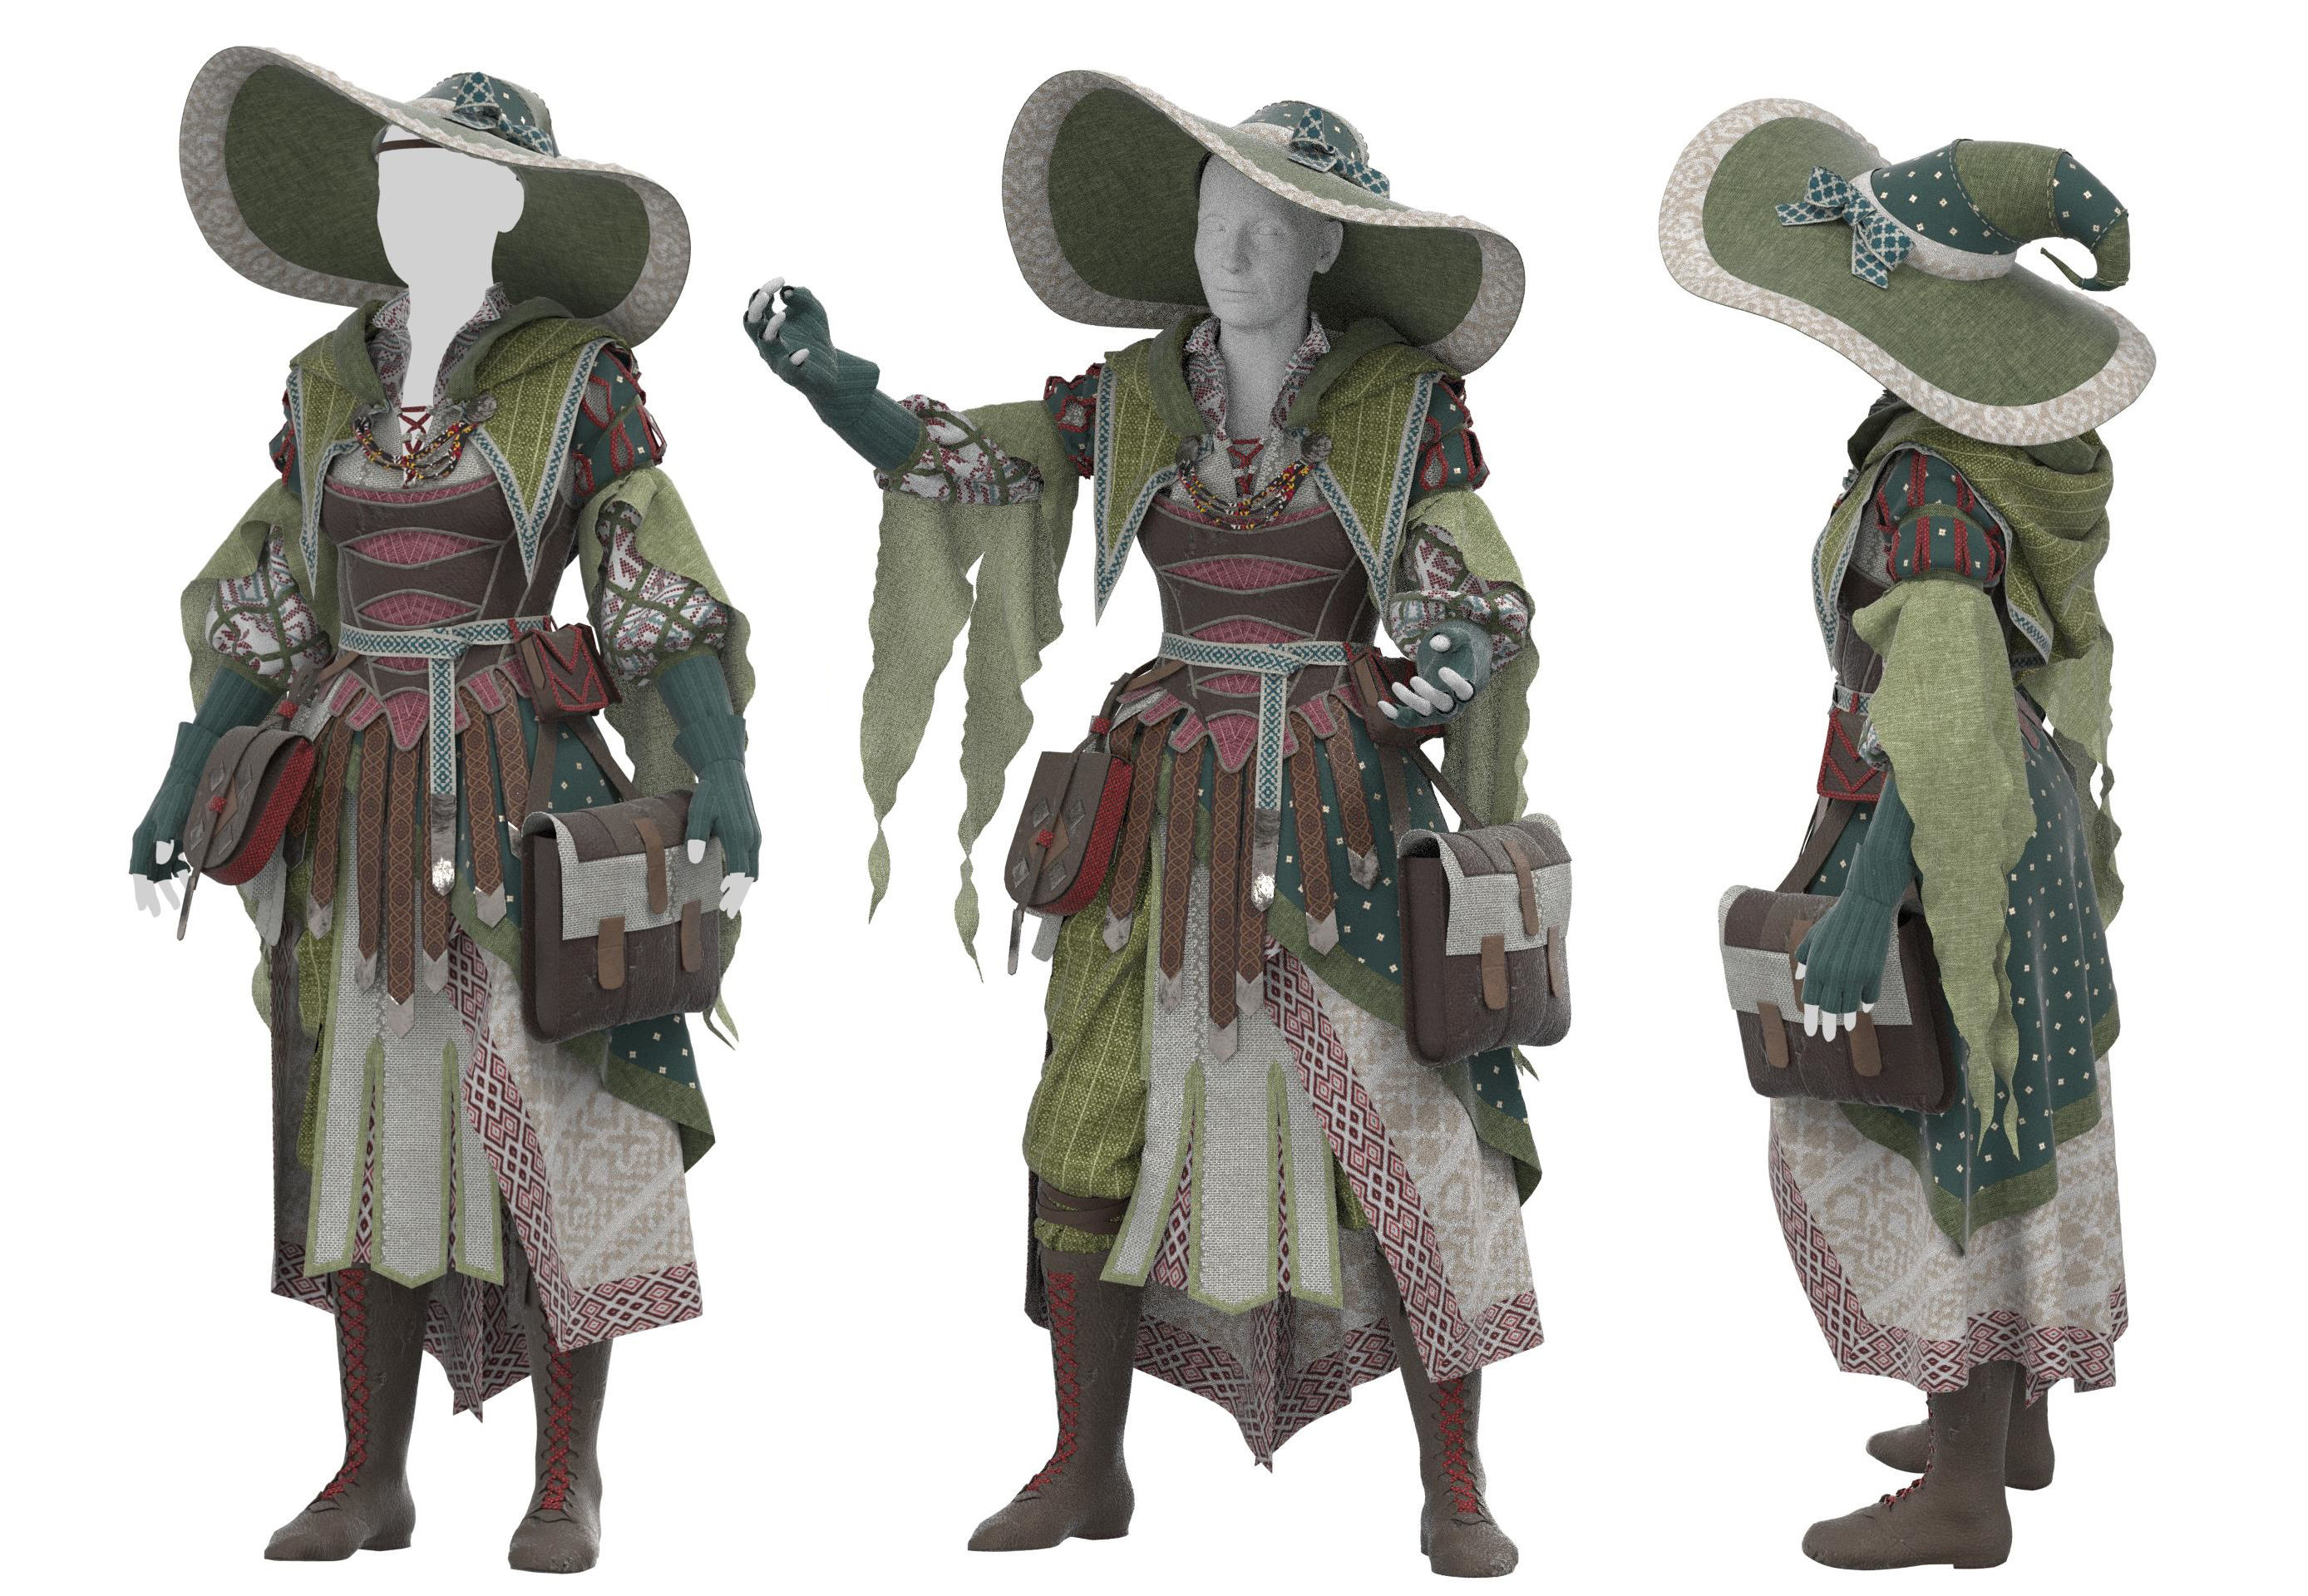
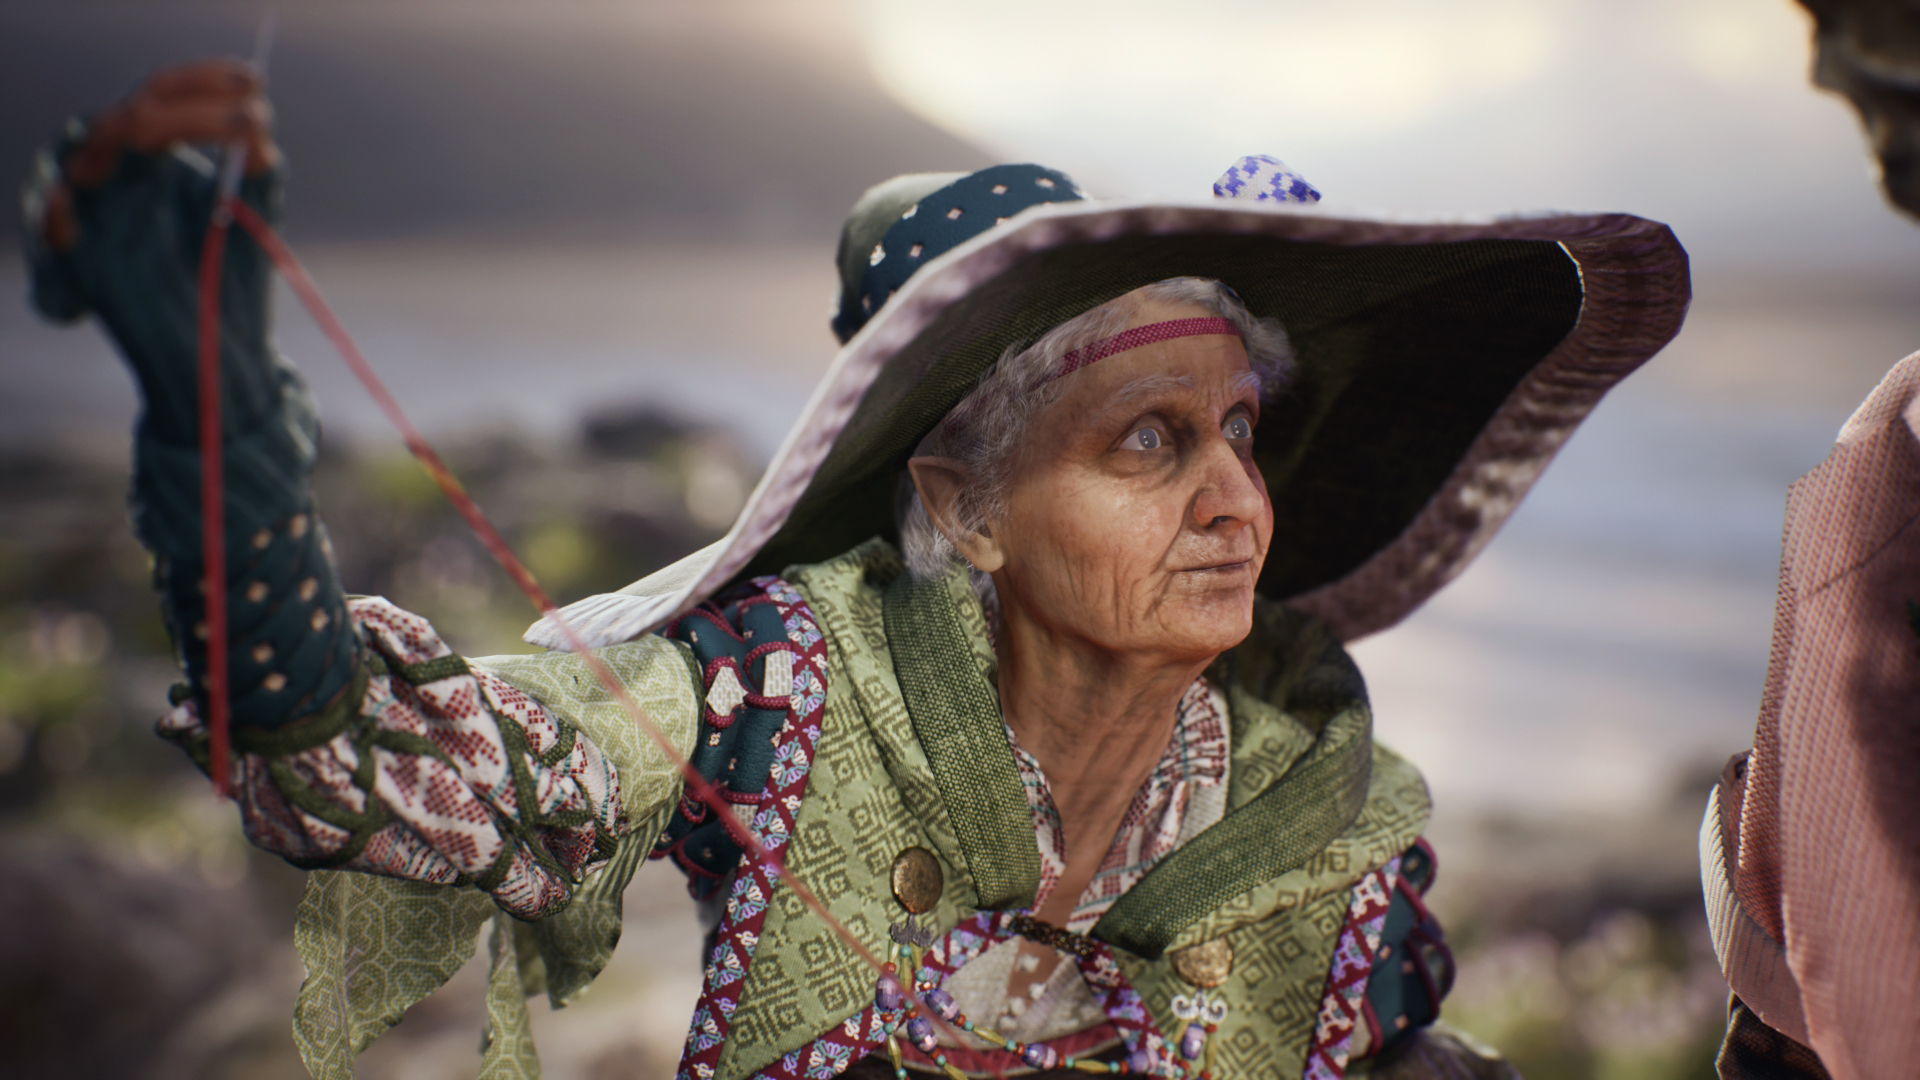
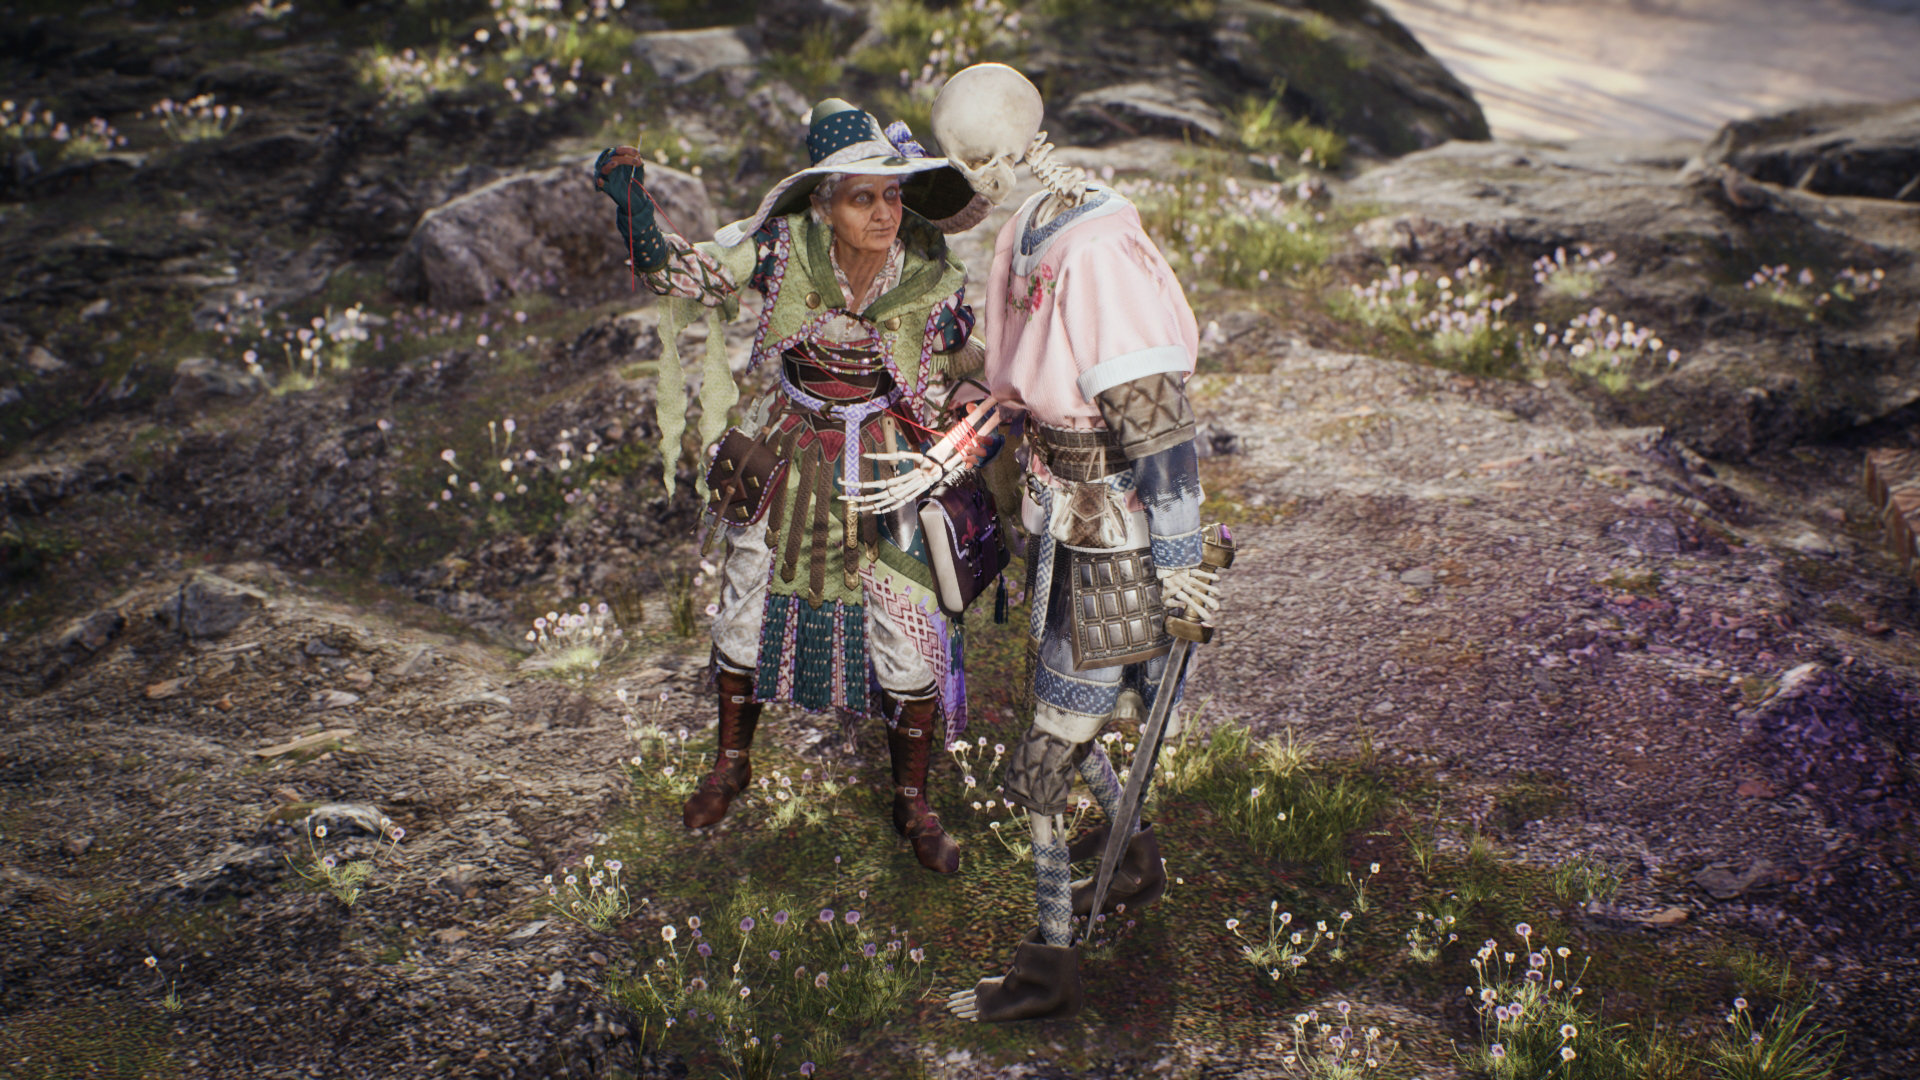
Overall, I’m very happy with my master’s project result – there are areas that I’d like to tweak and adjust before publishing a final version to my public socials, but those changes aren’t necessary to call these finished pieces. Looking back at my original checklist at the beginning of the semester, I’ve managed to complete all but two: adding additional elements to the skeleton (rotting flesh and sinew) and creating the necromancer’s hair with hair cards as opposed to a cached XGen groom. The latter is, I believe, a currently acceptable method for creating hair for games, but it remains less efficient than the traditional haircards and it’s a skill I keep putting off mastering.

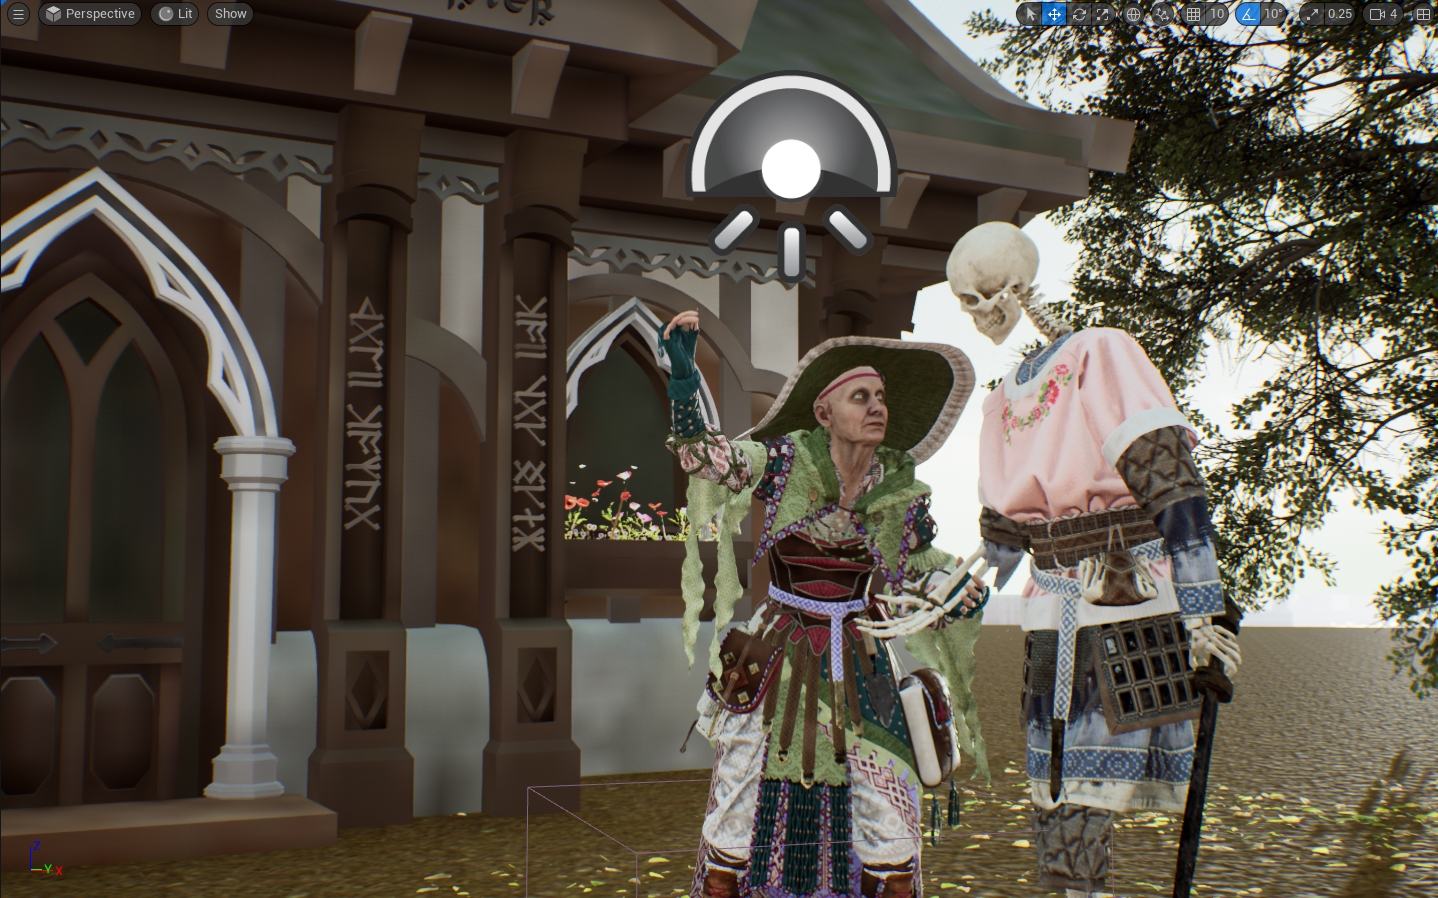
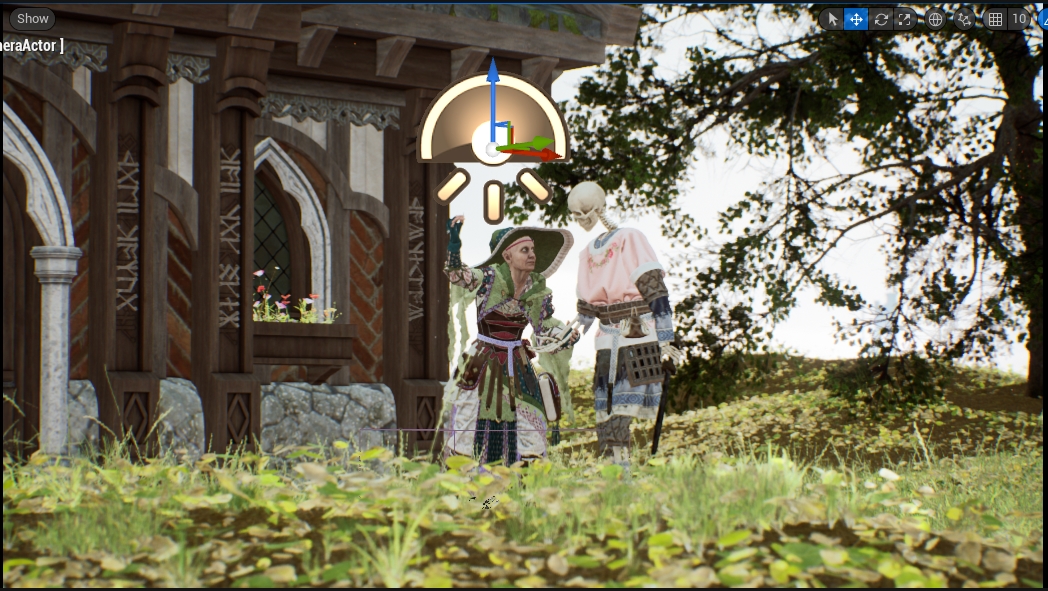
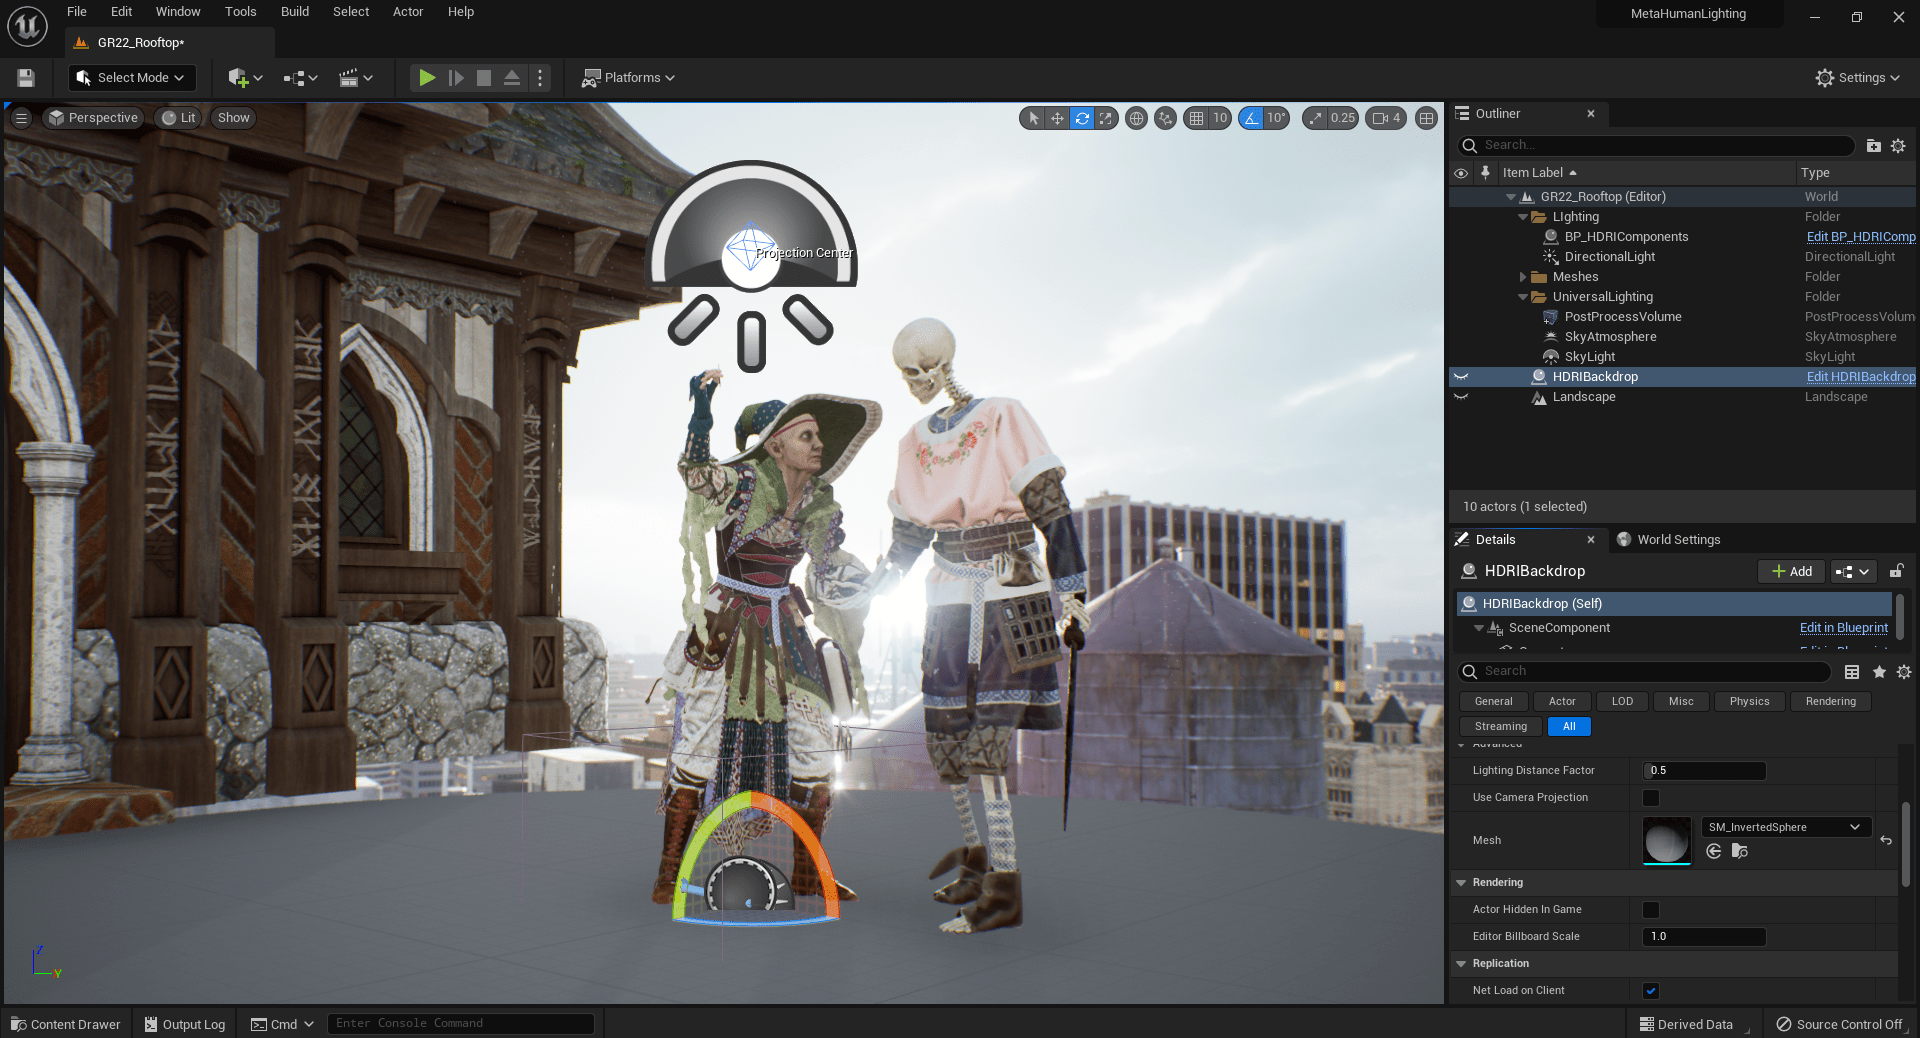
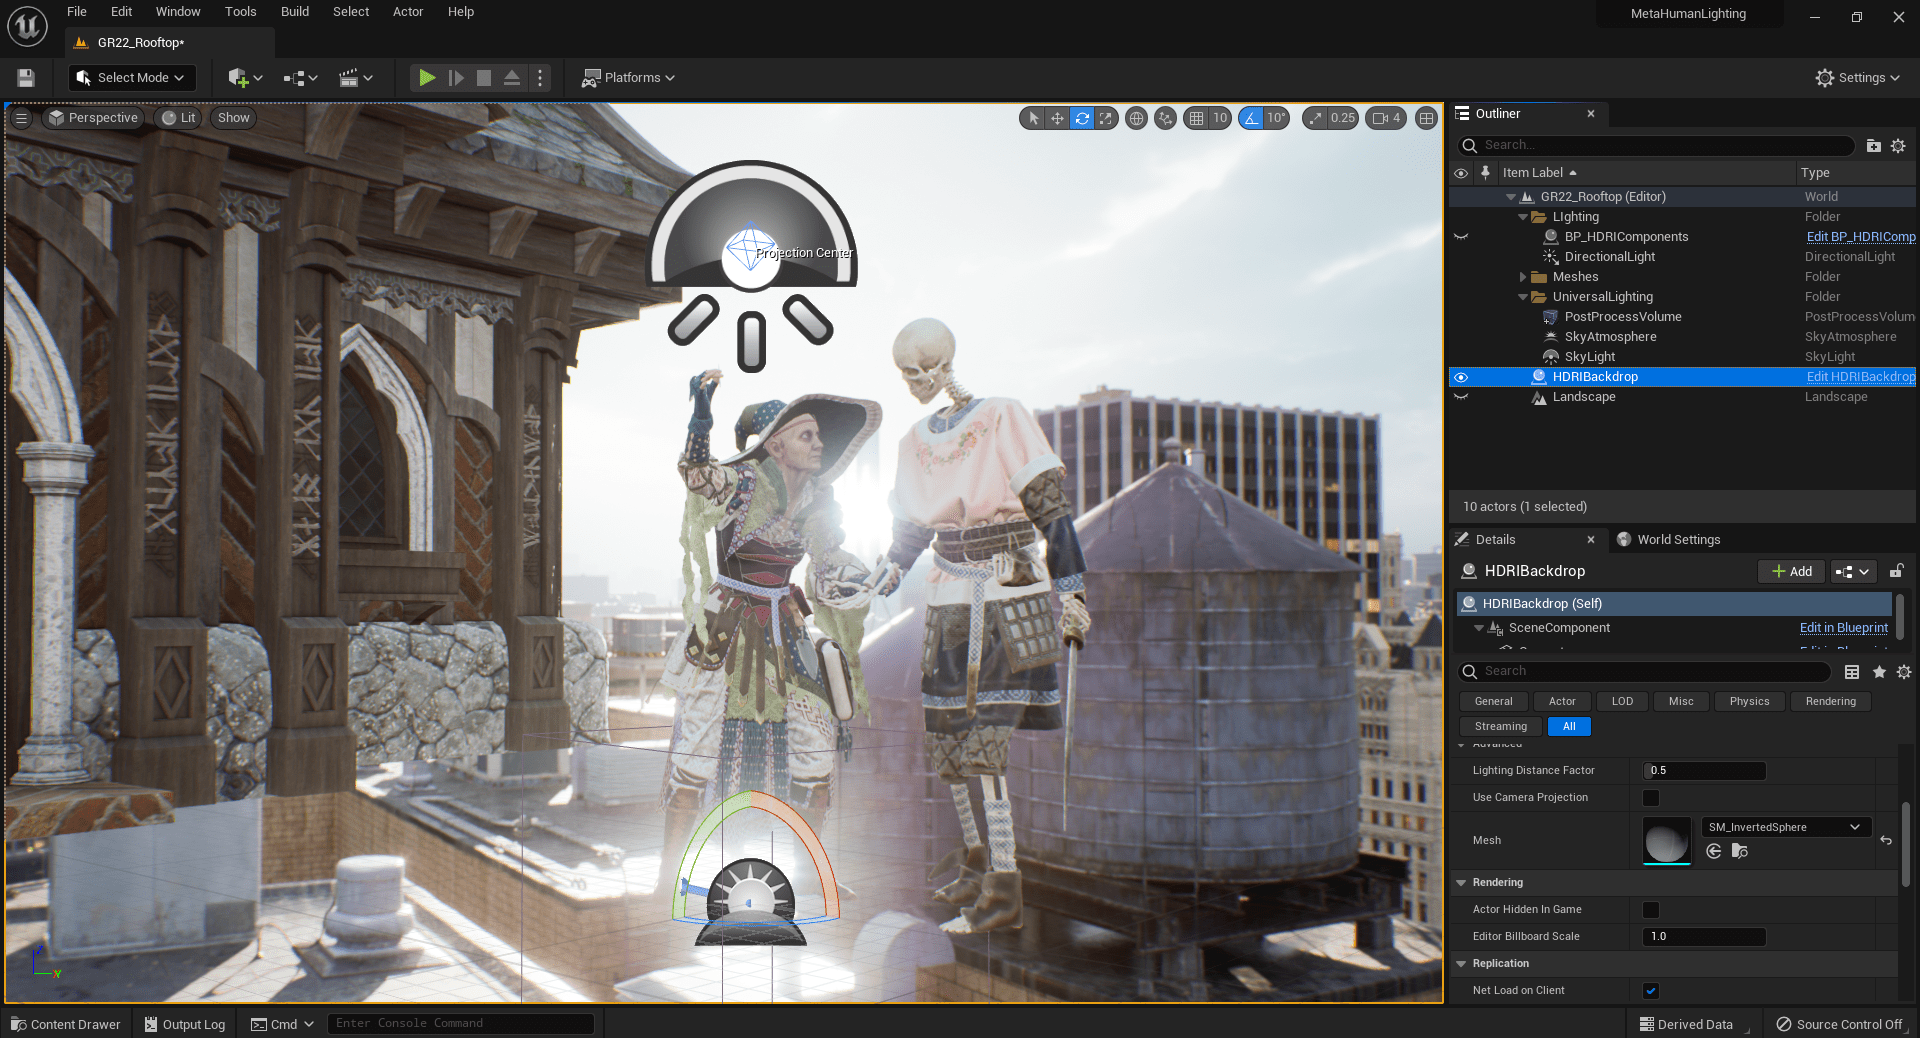
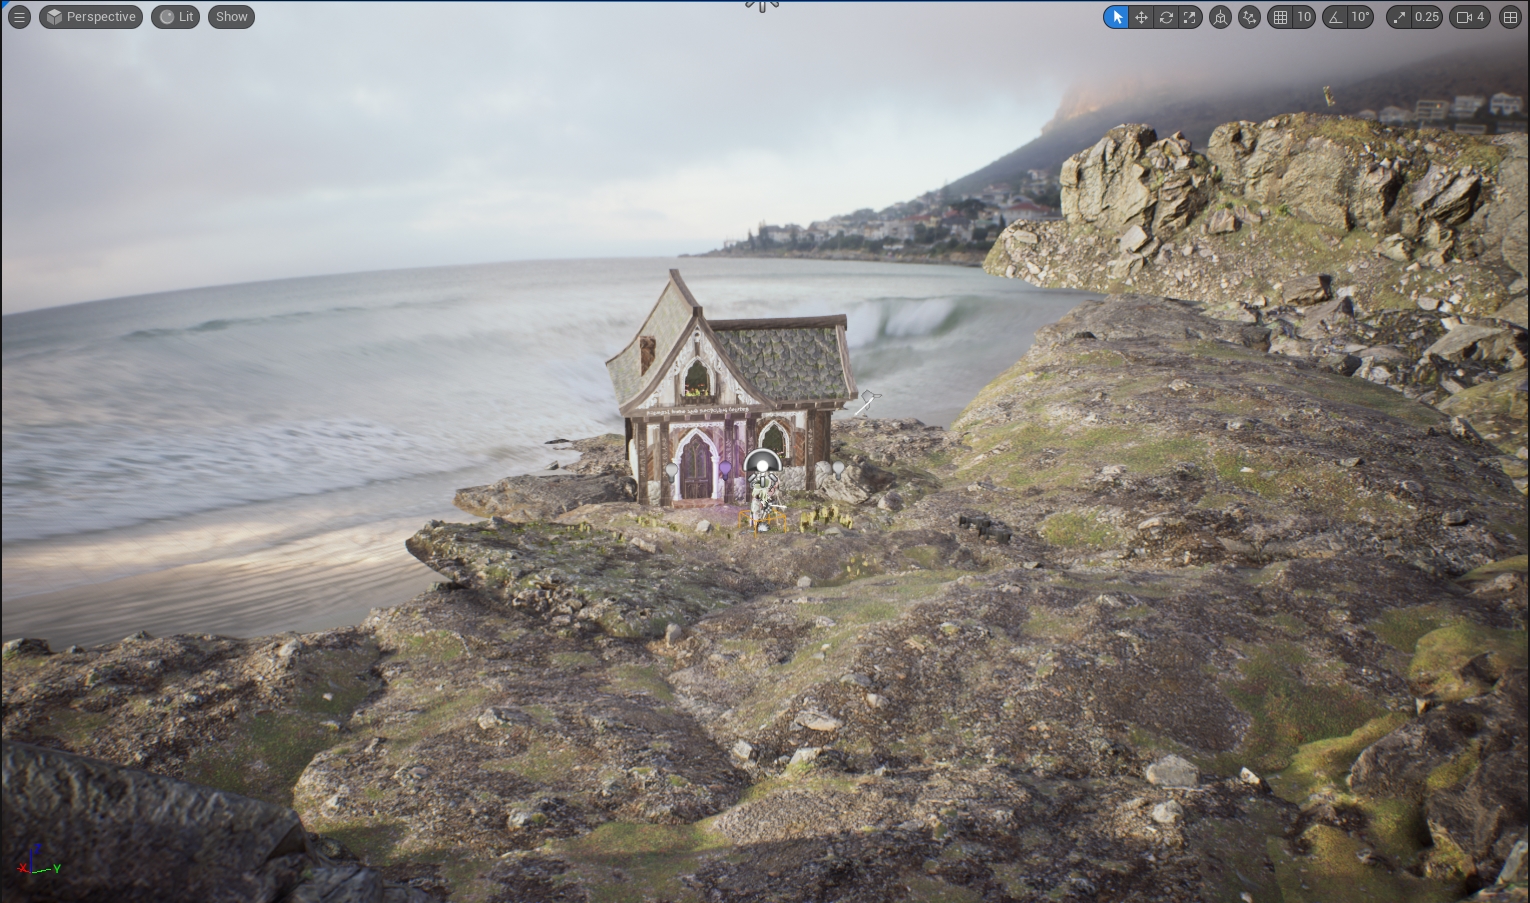
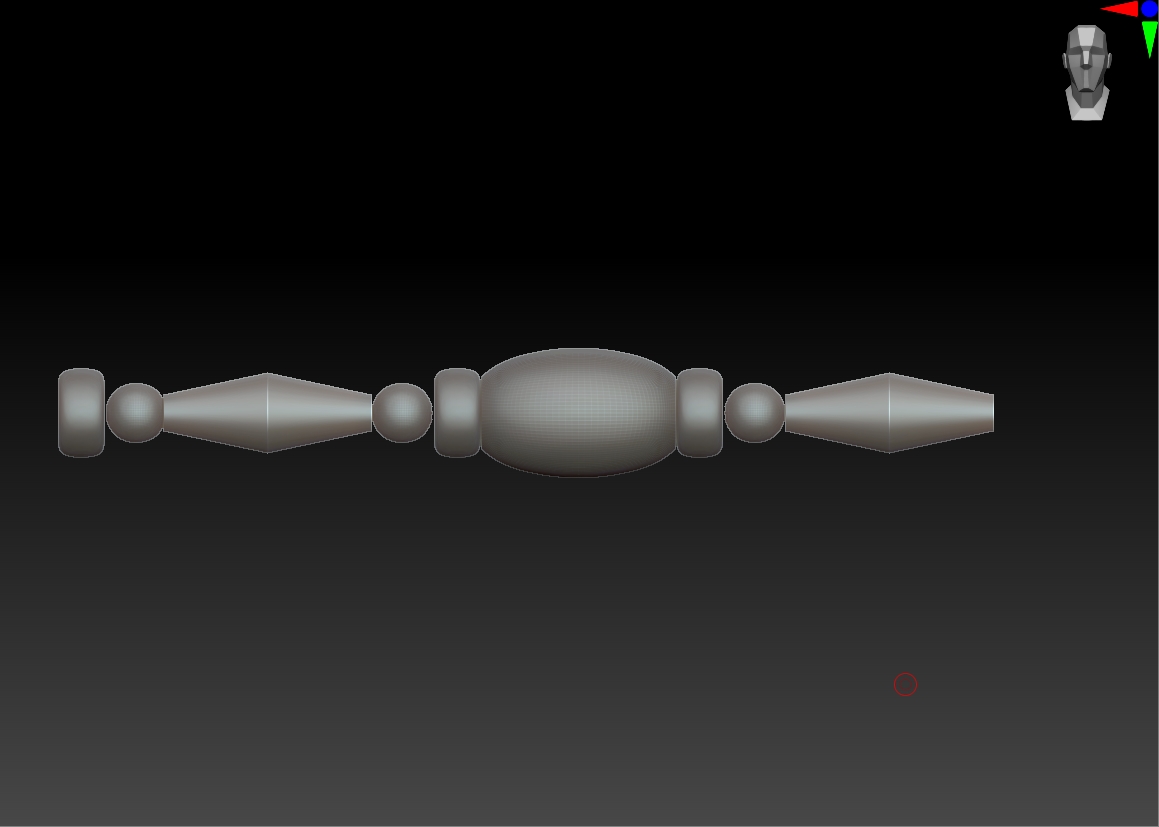
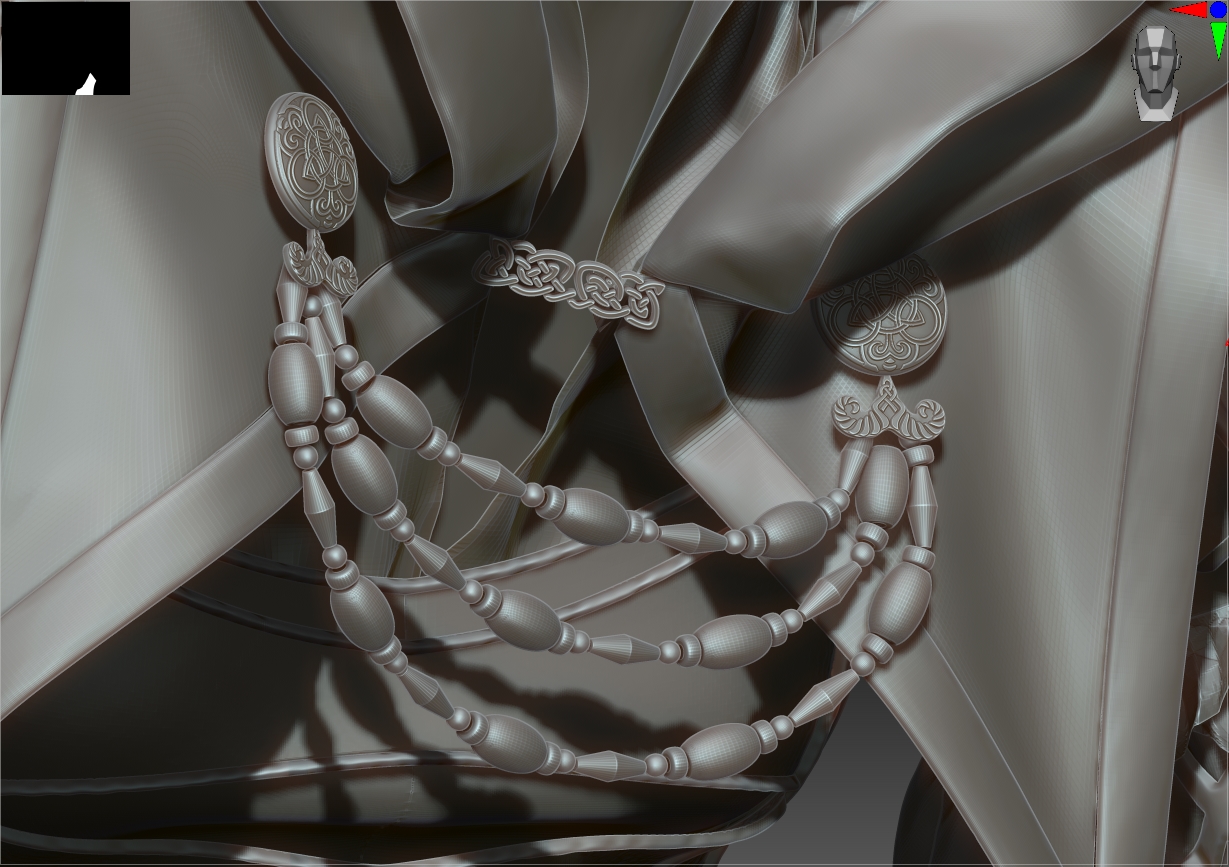
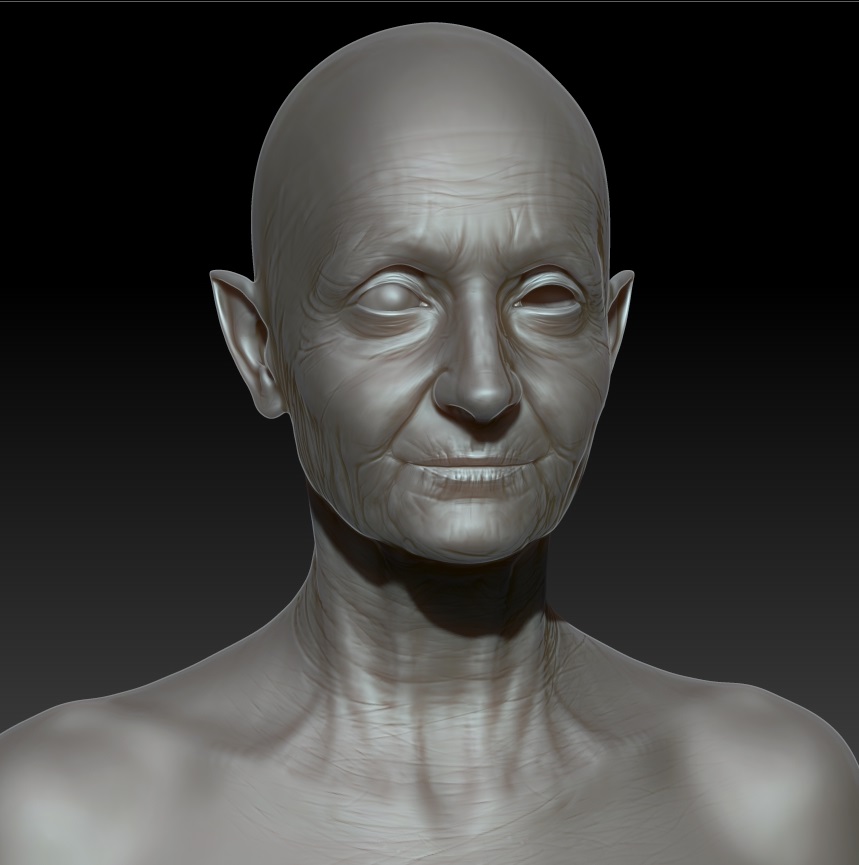
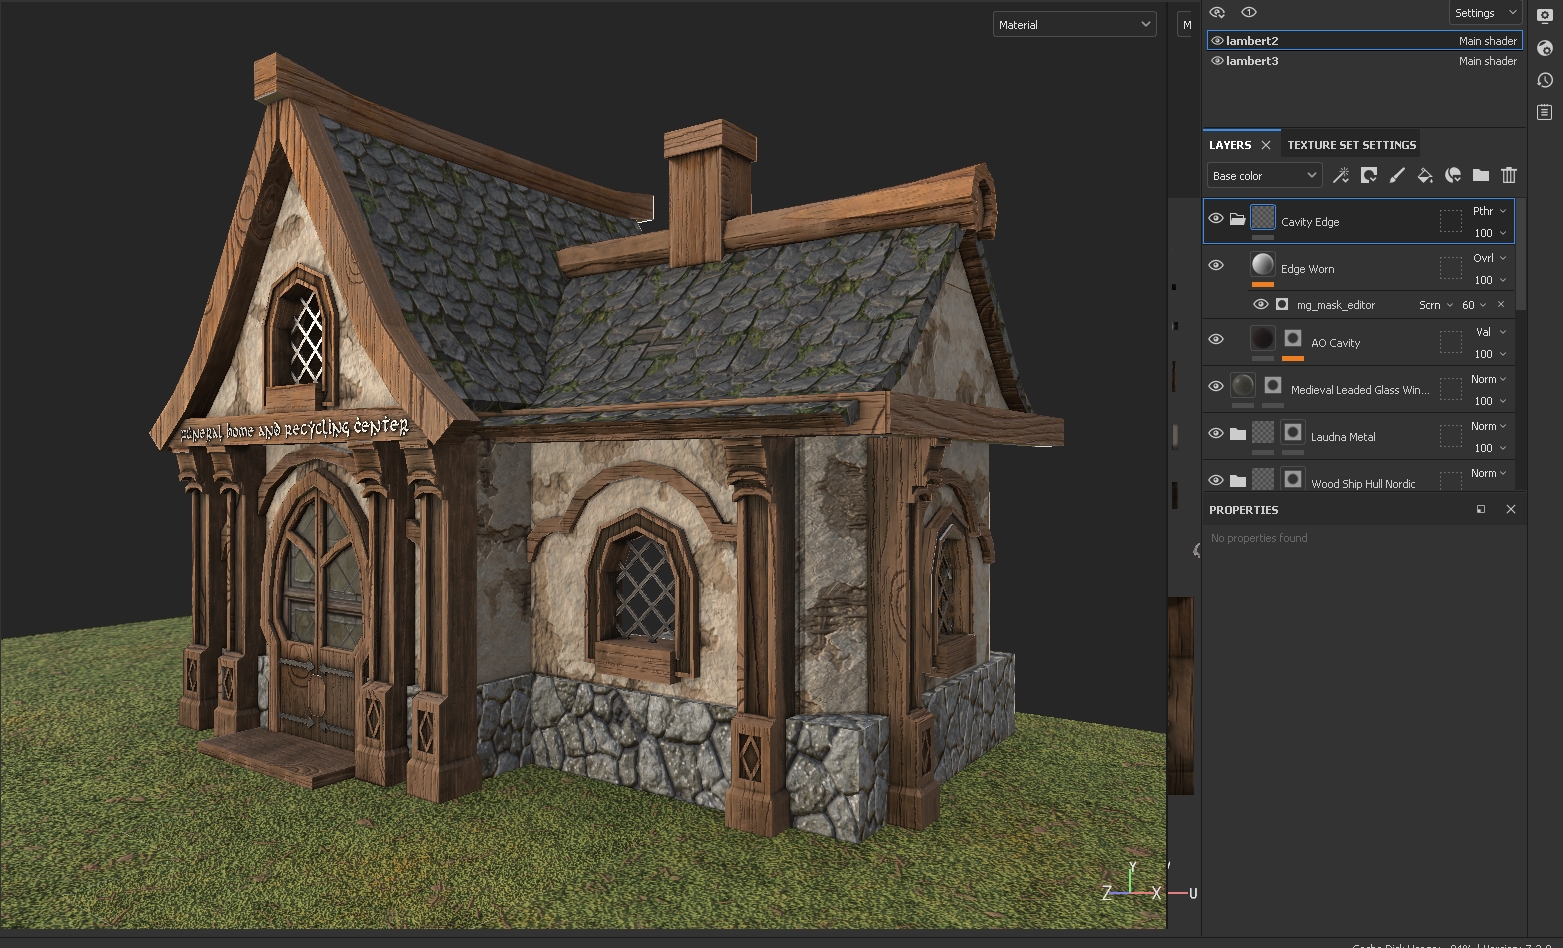
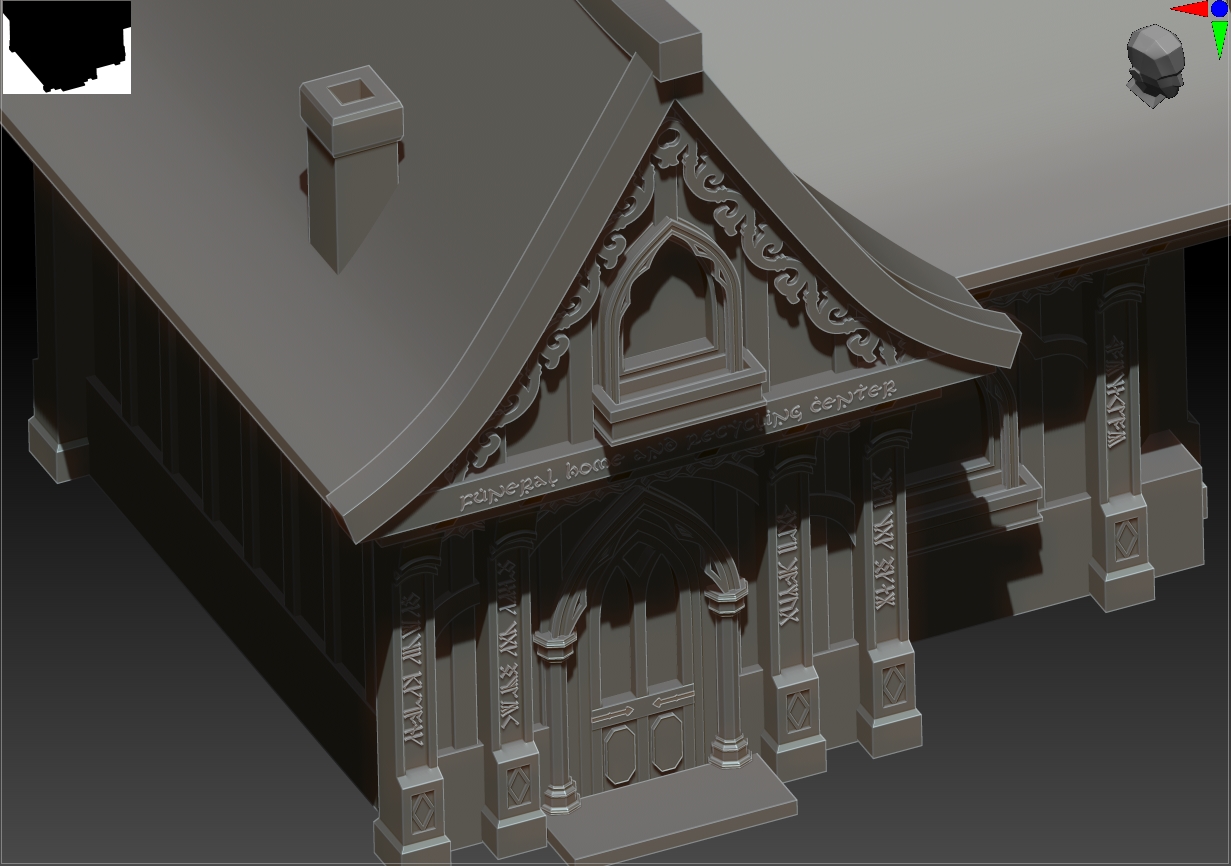
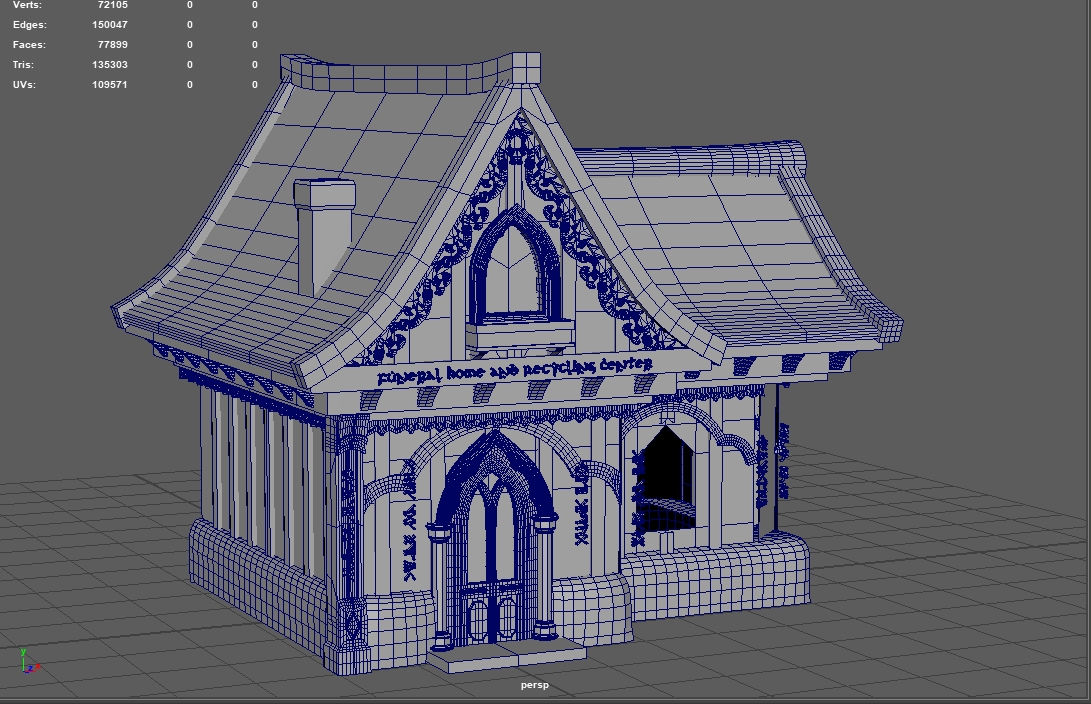
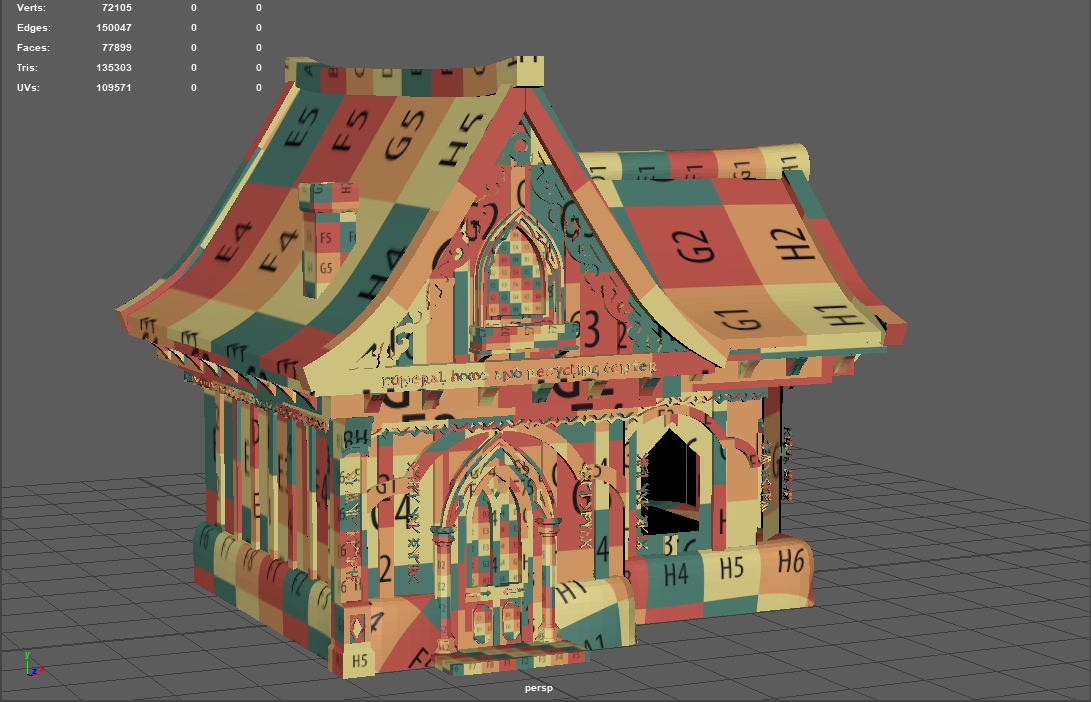
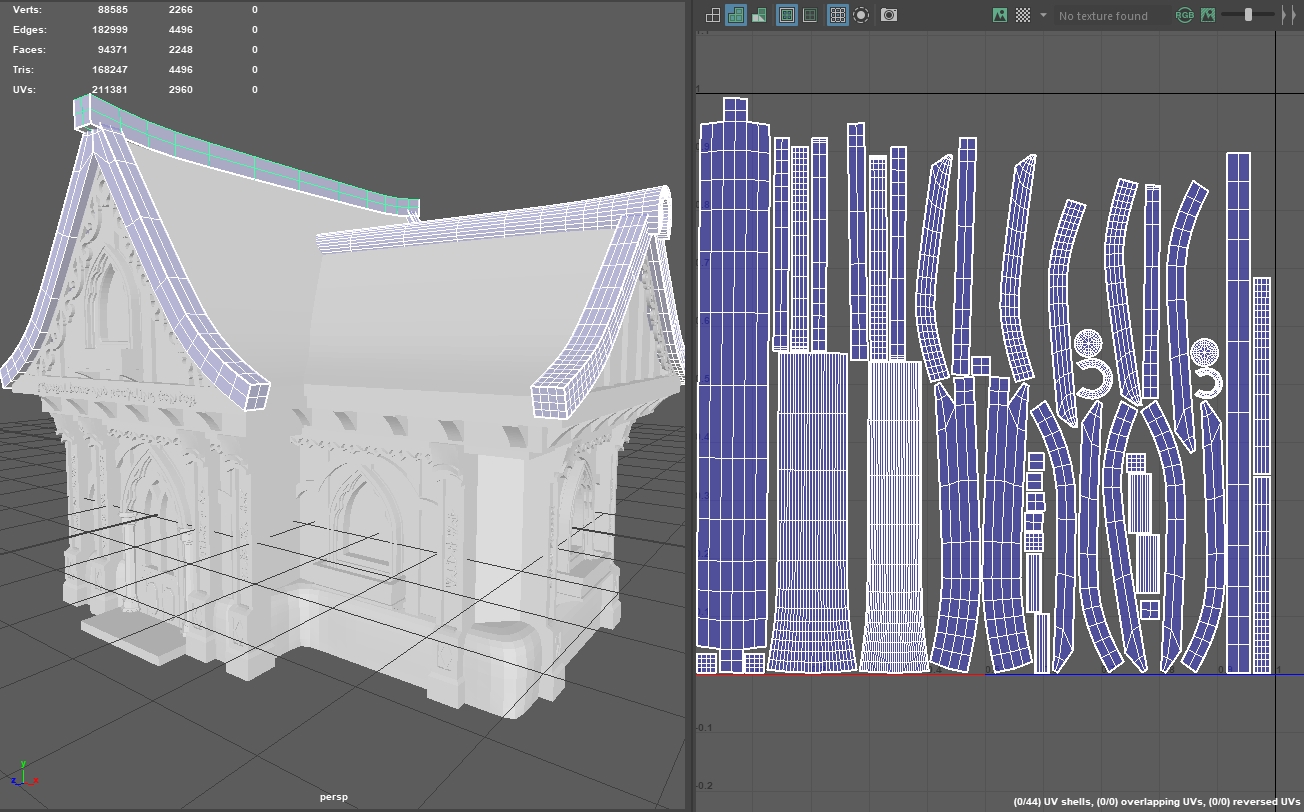
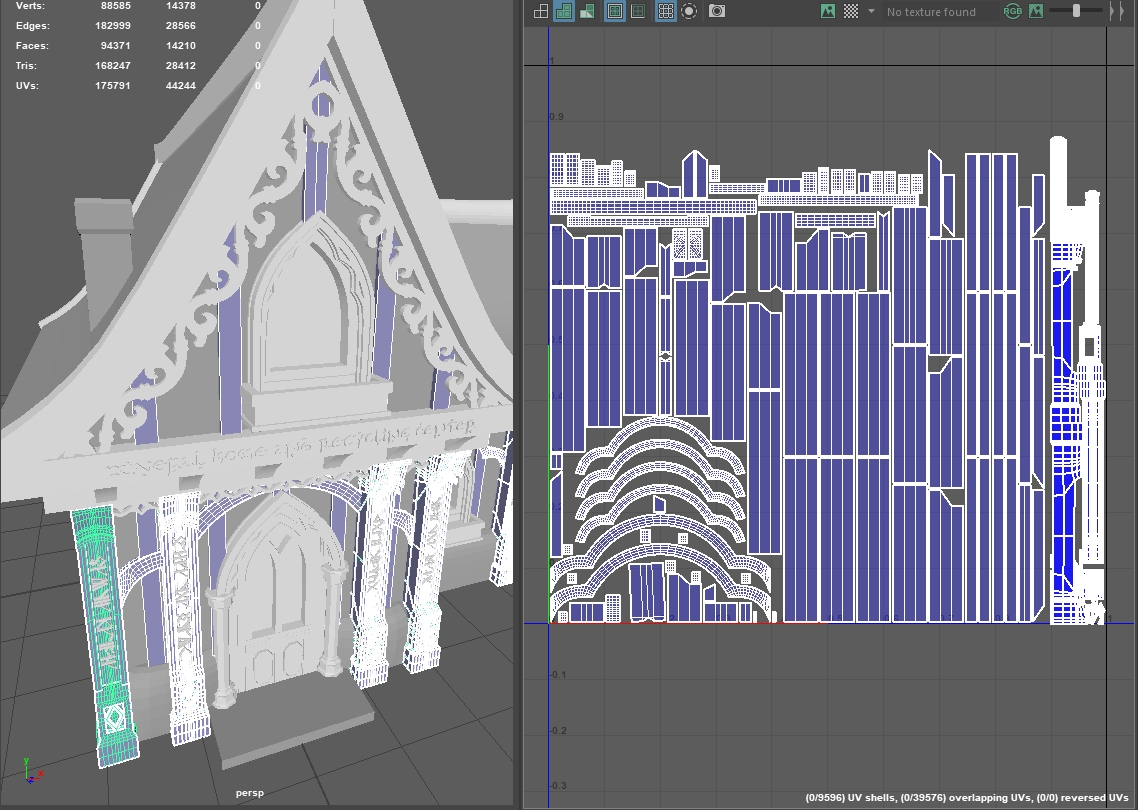
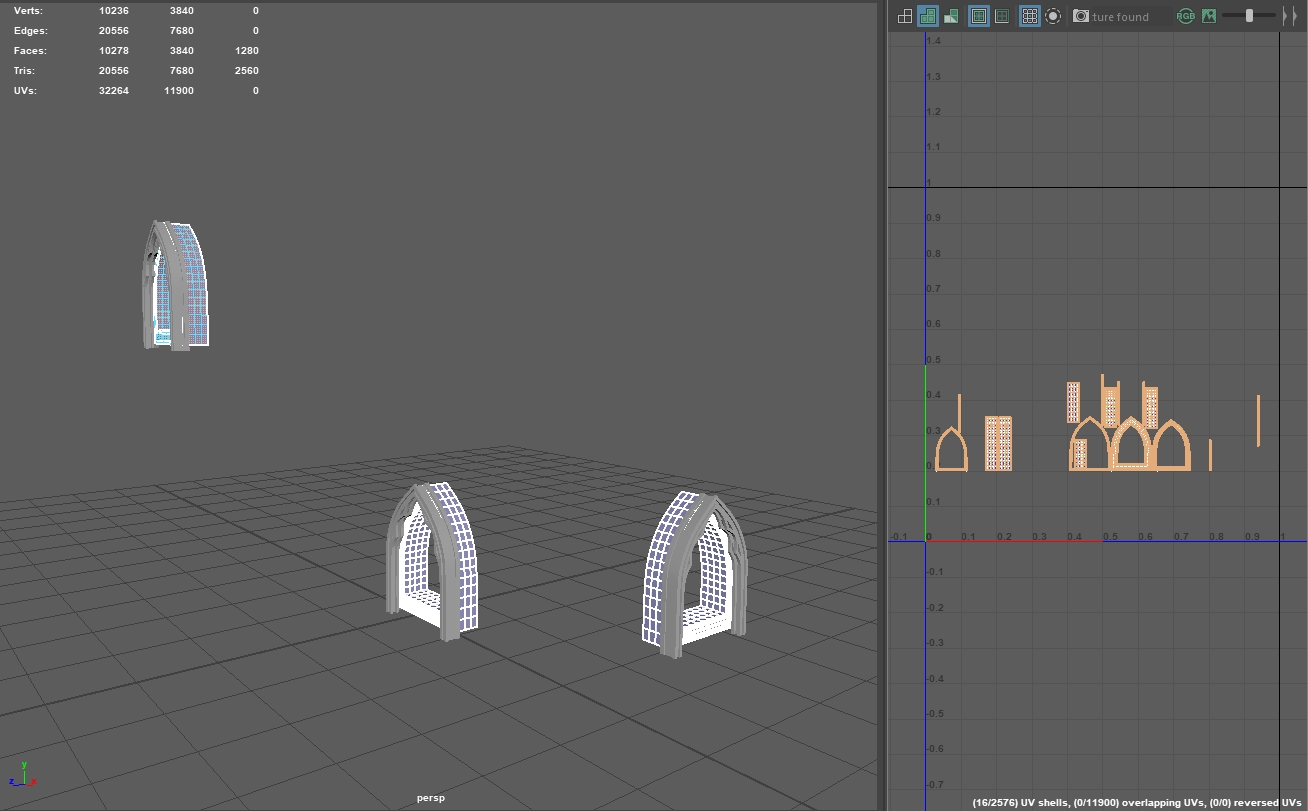
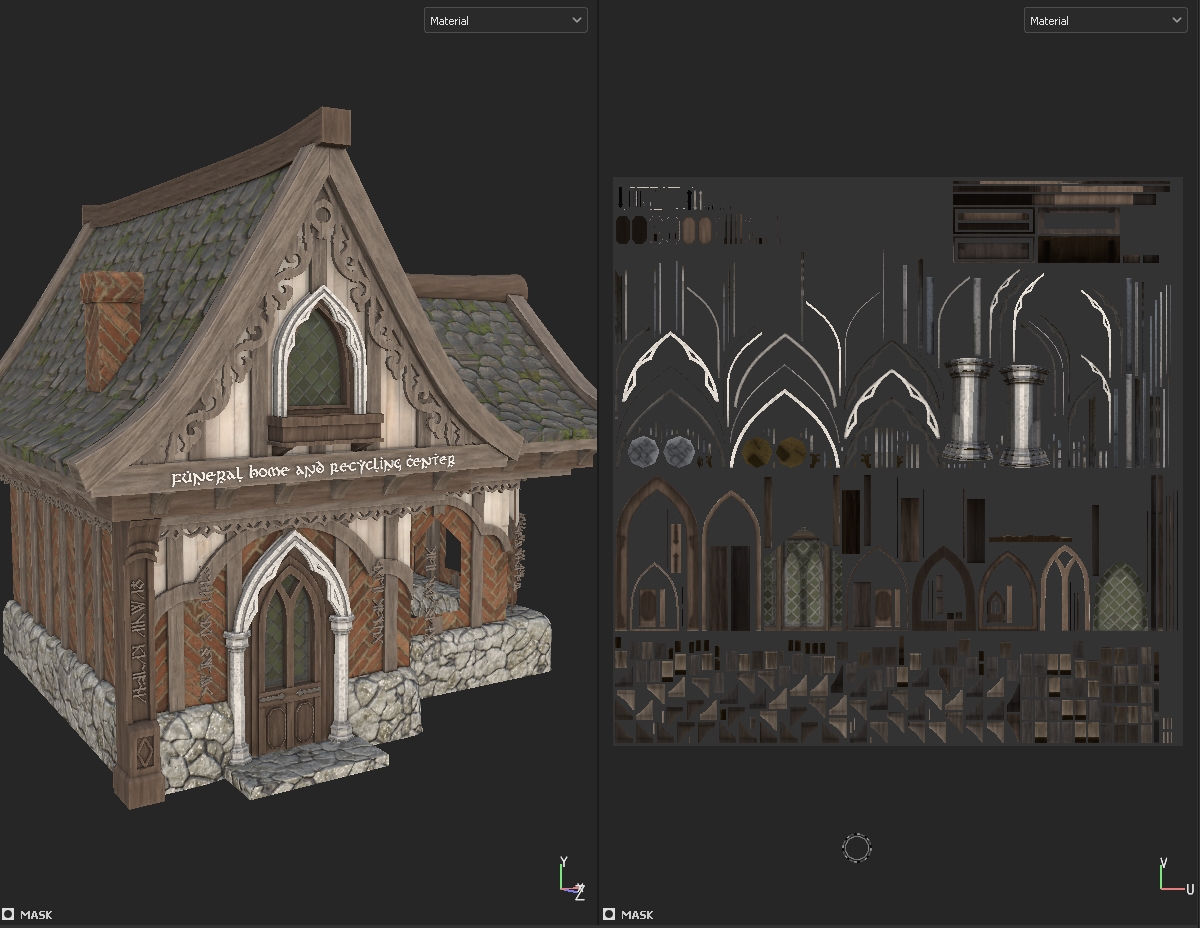
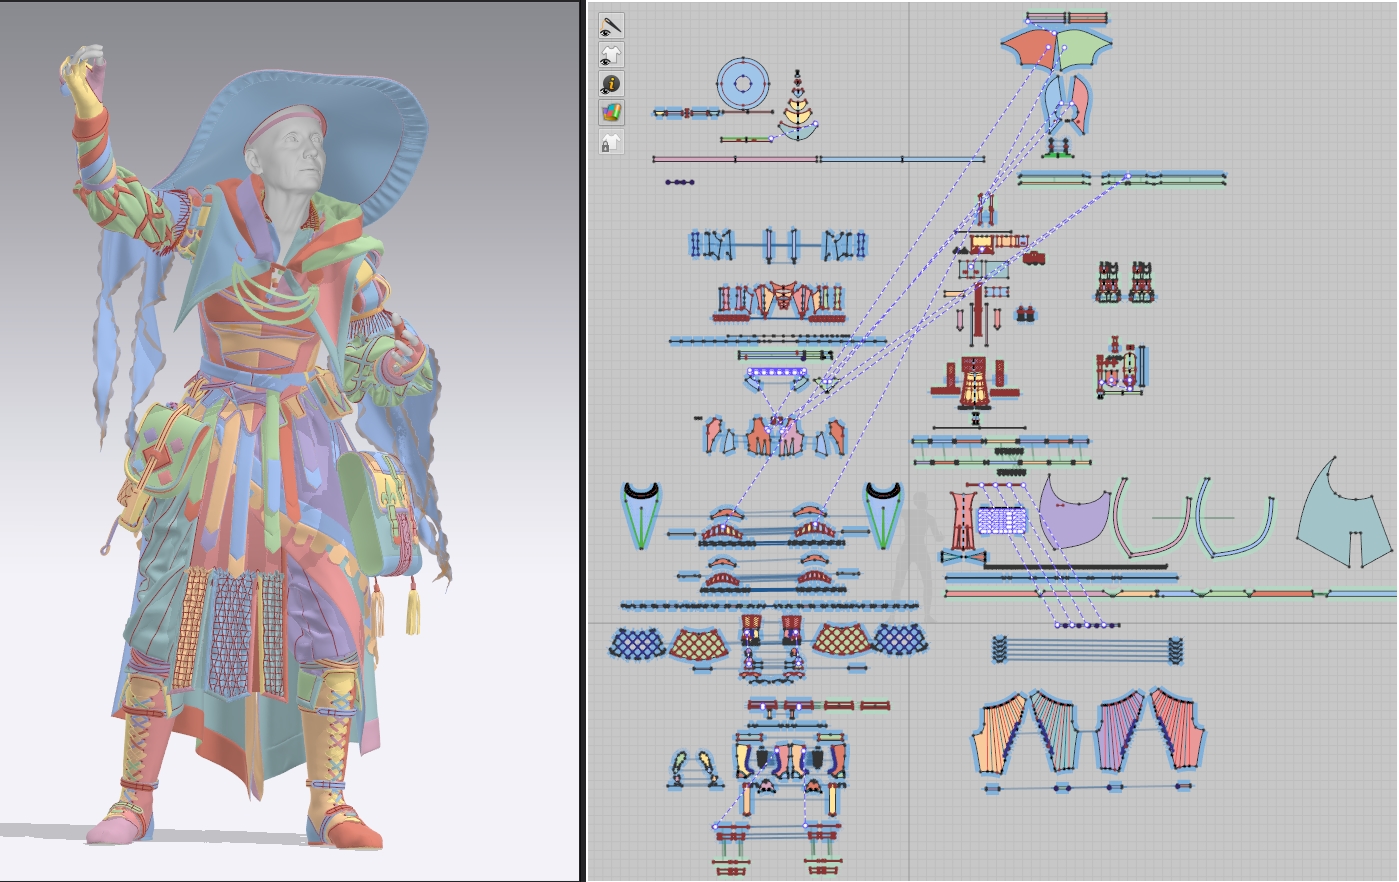
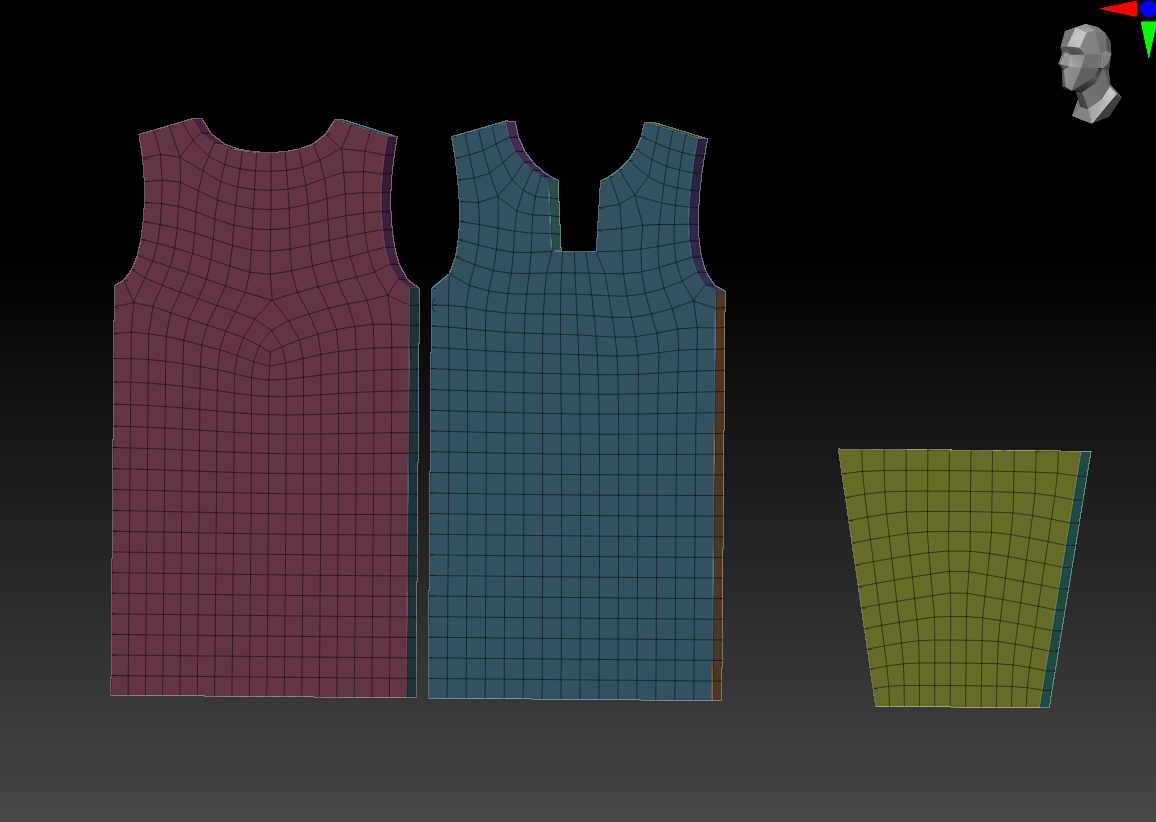
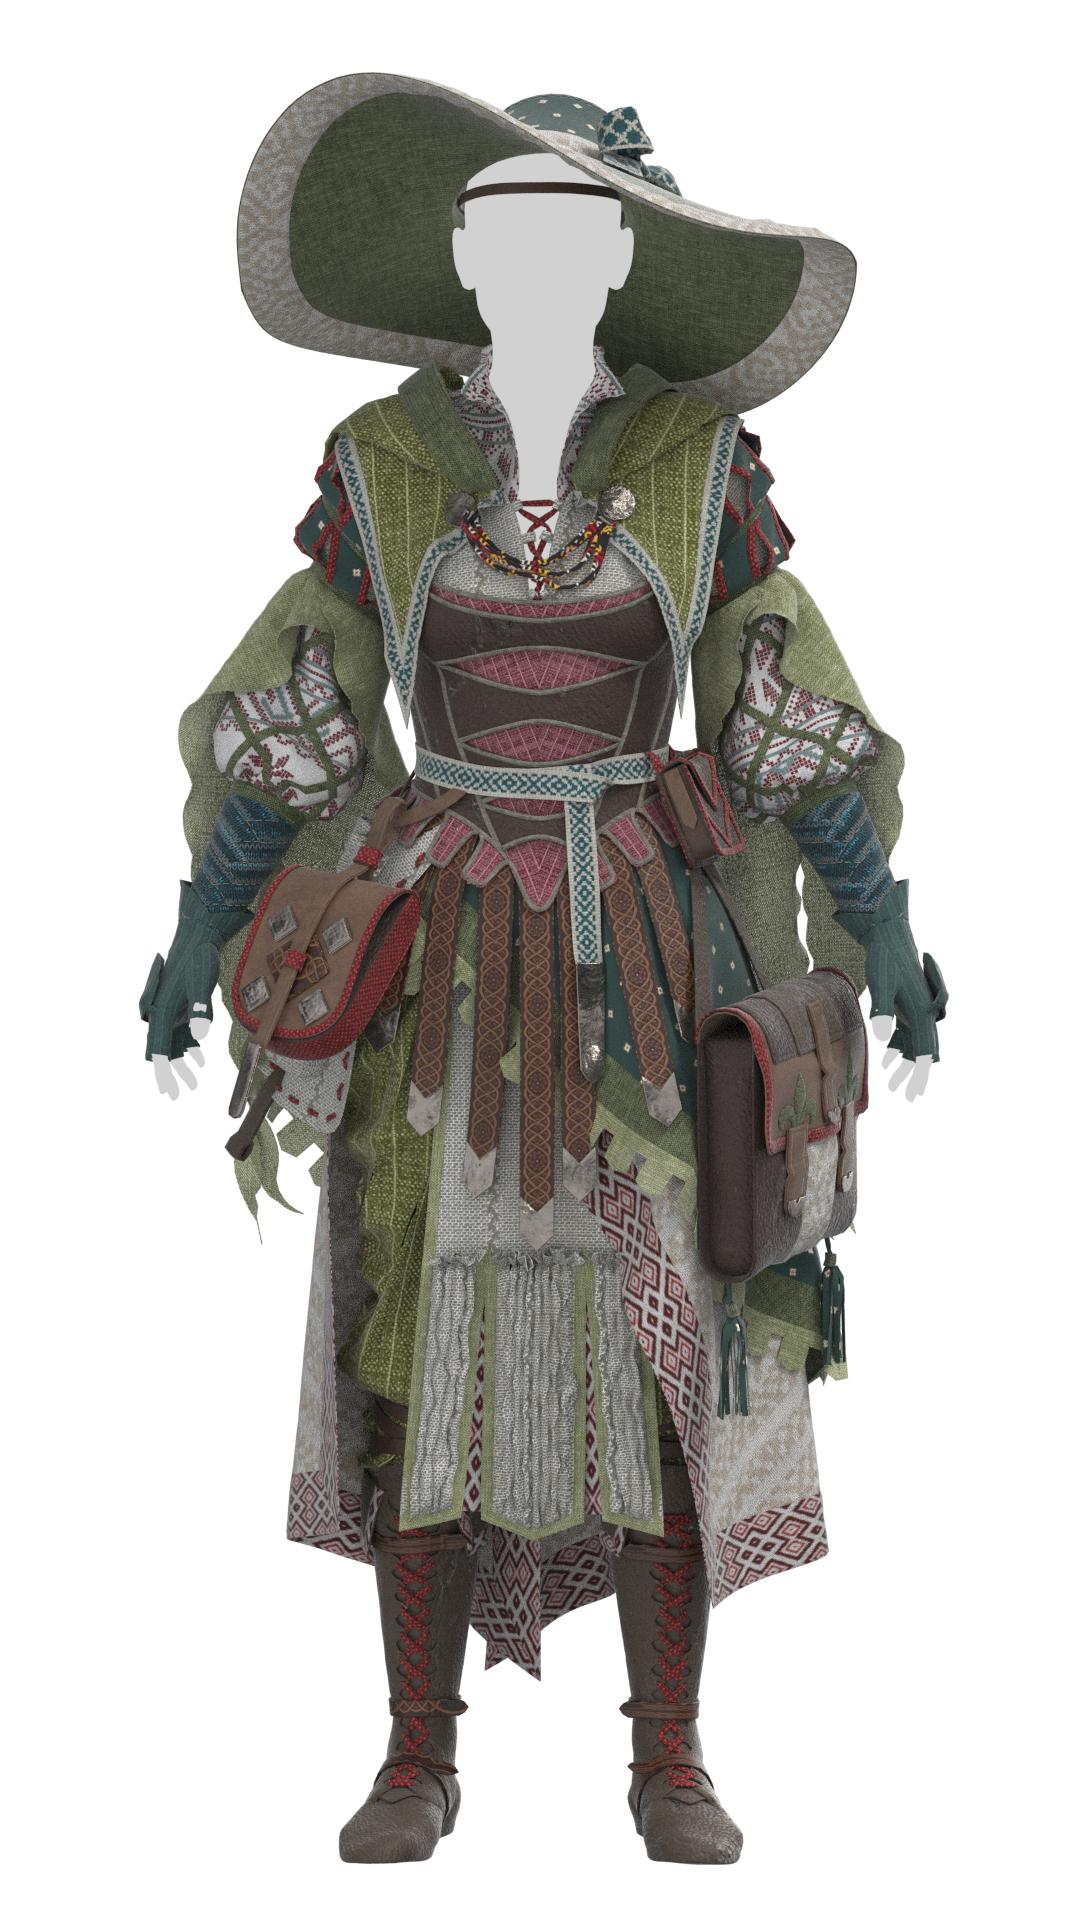
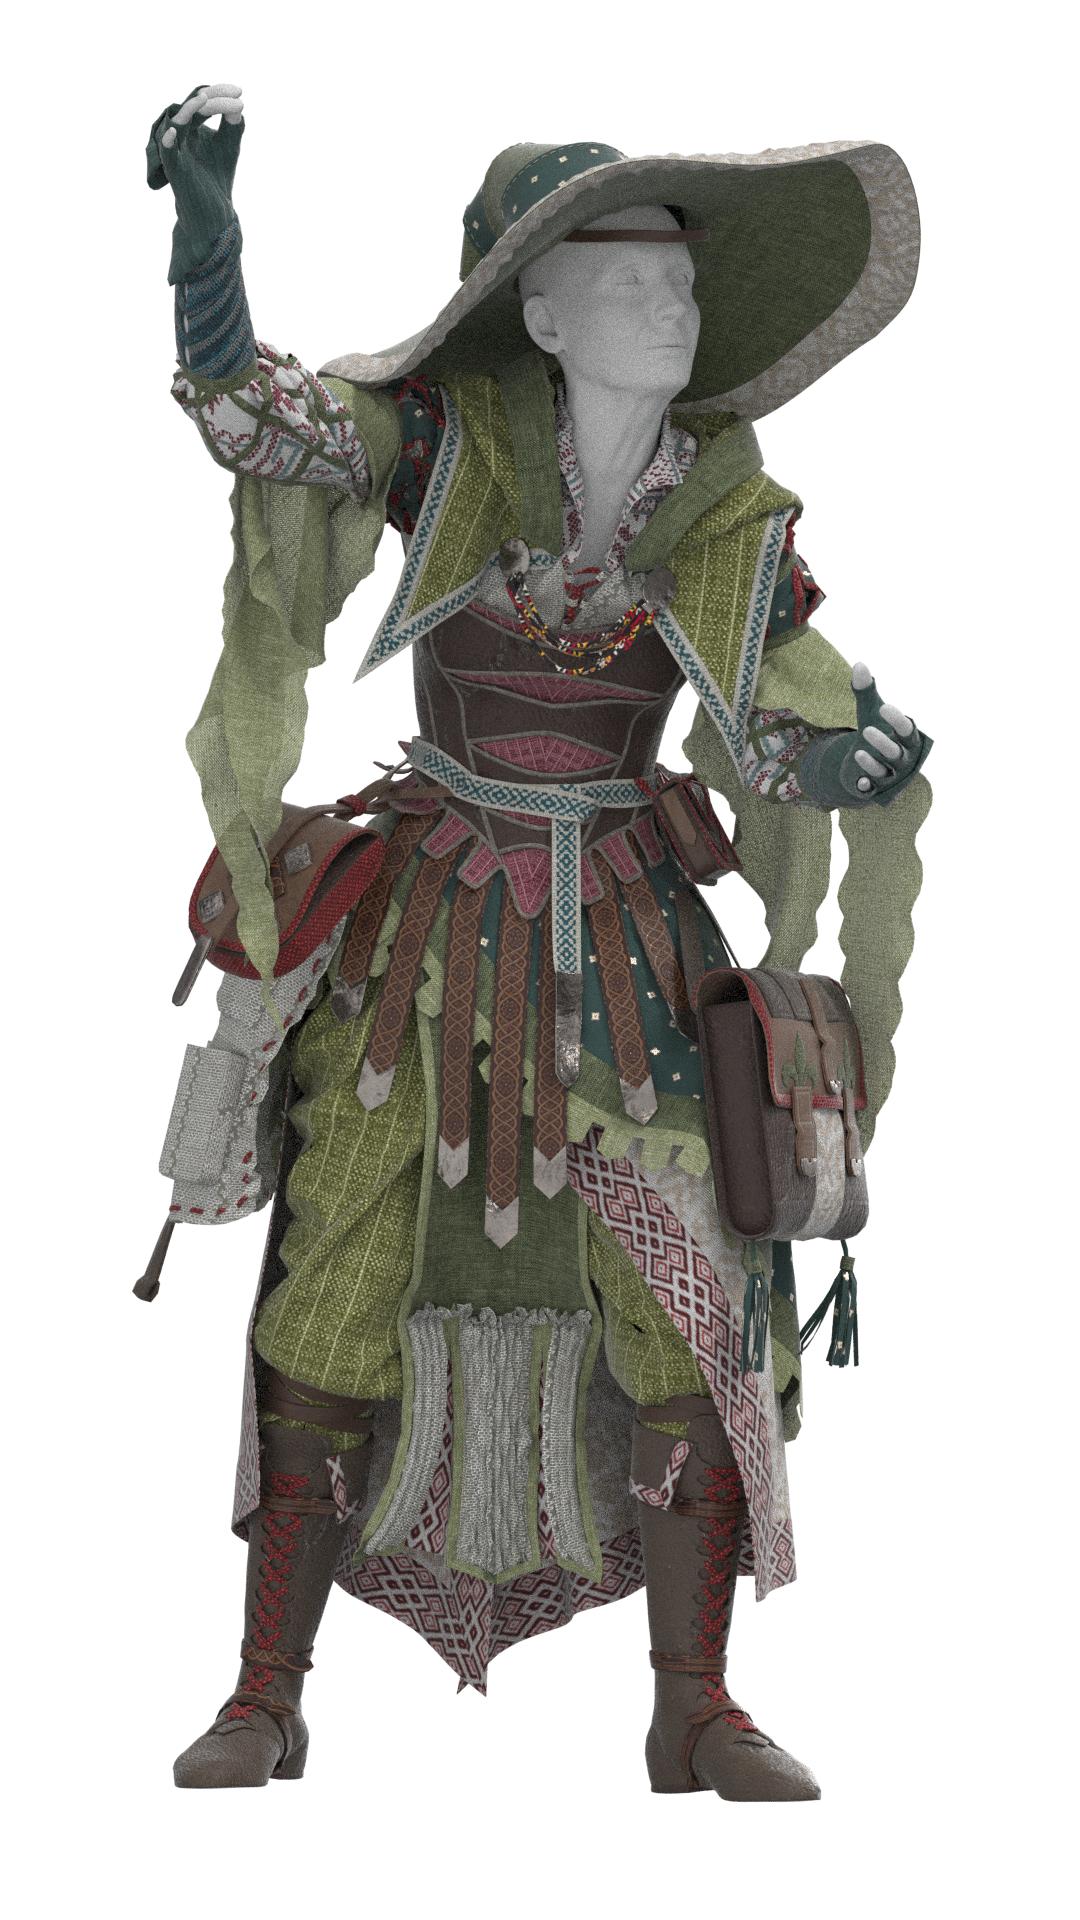
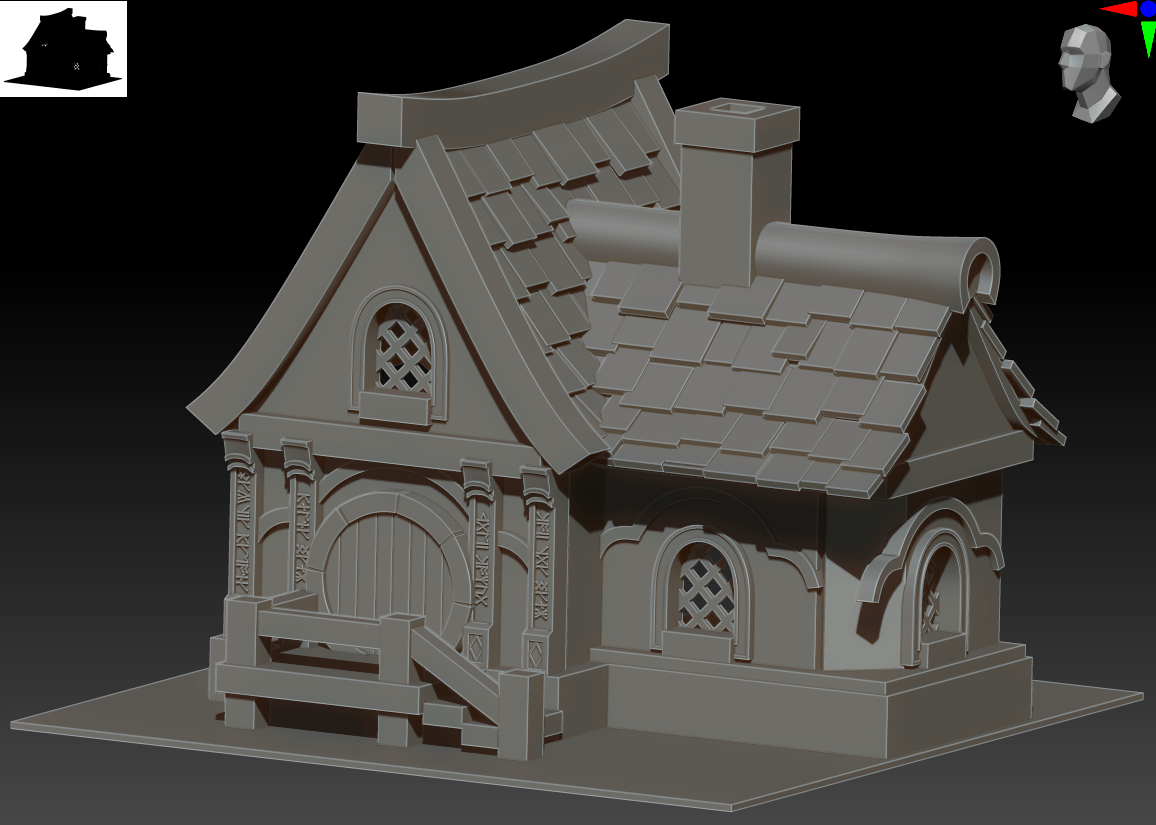
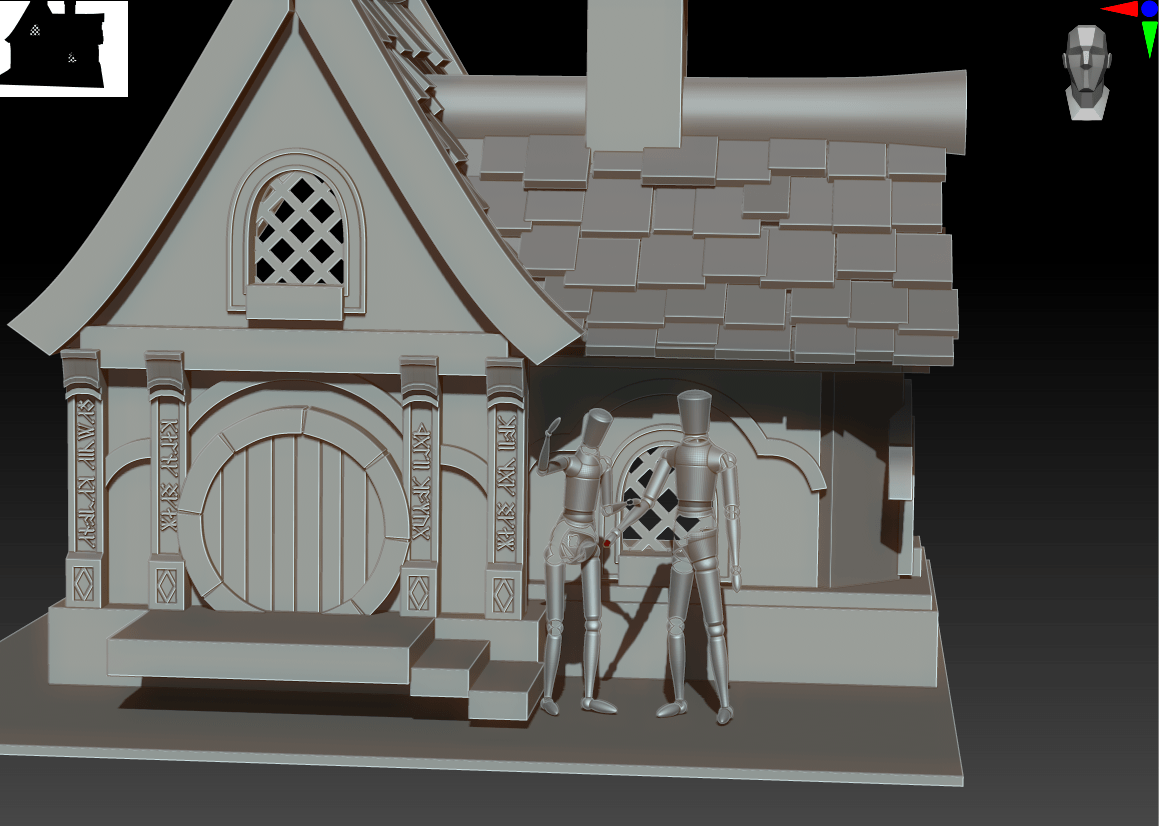
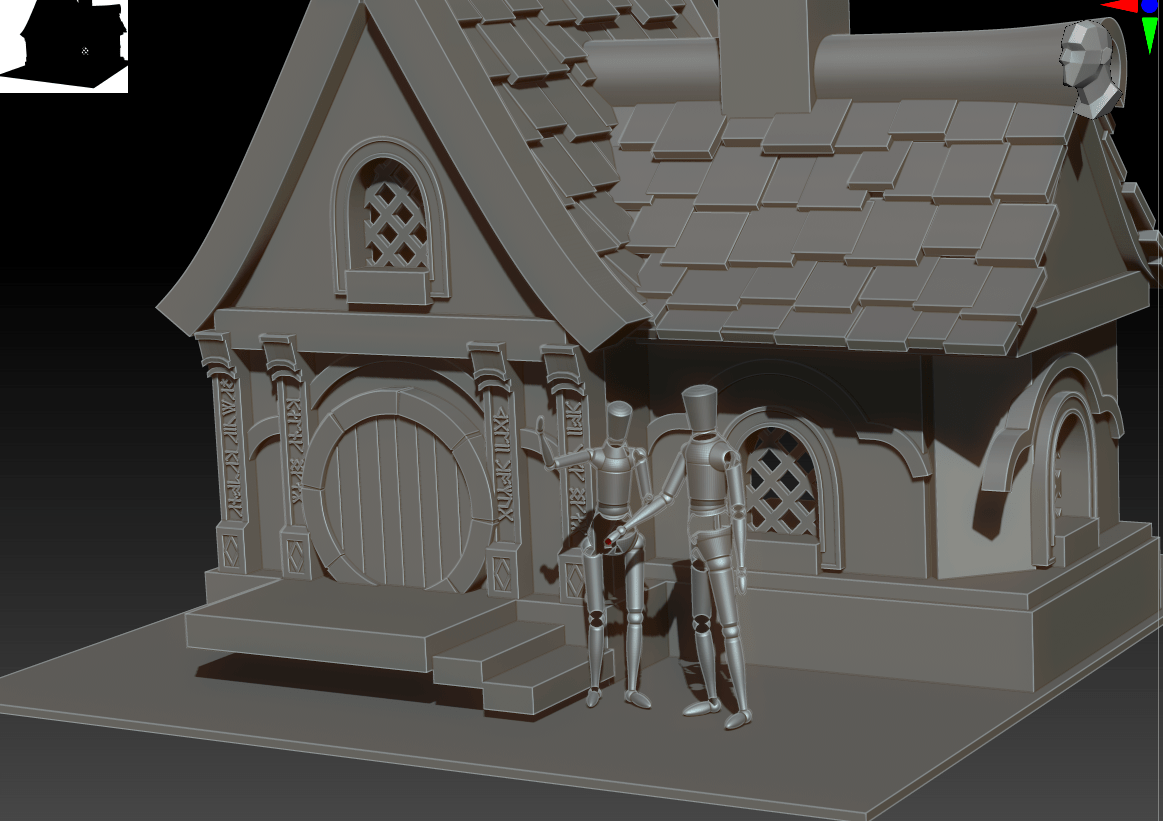
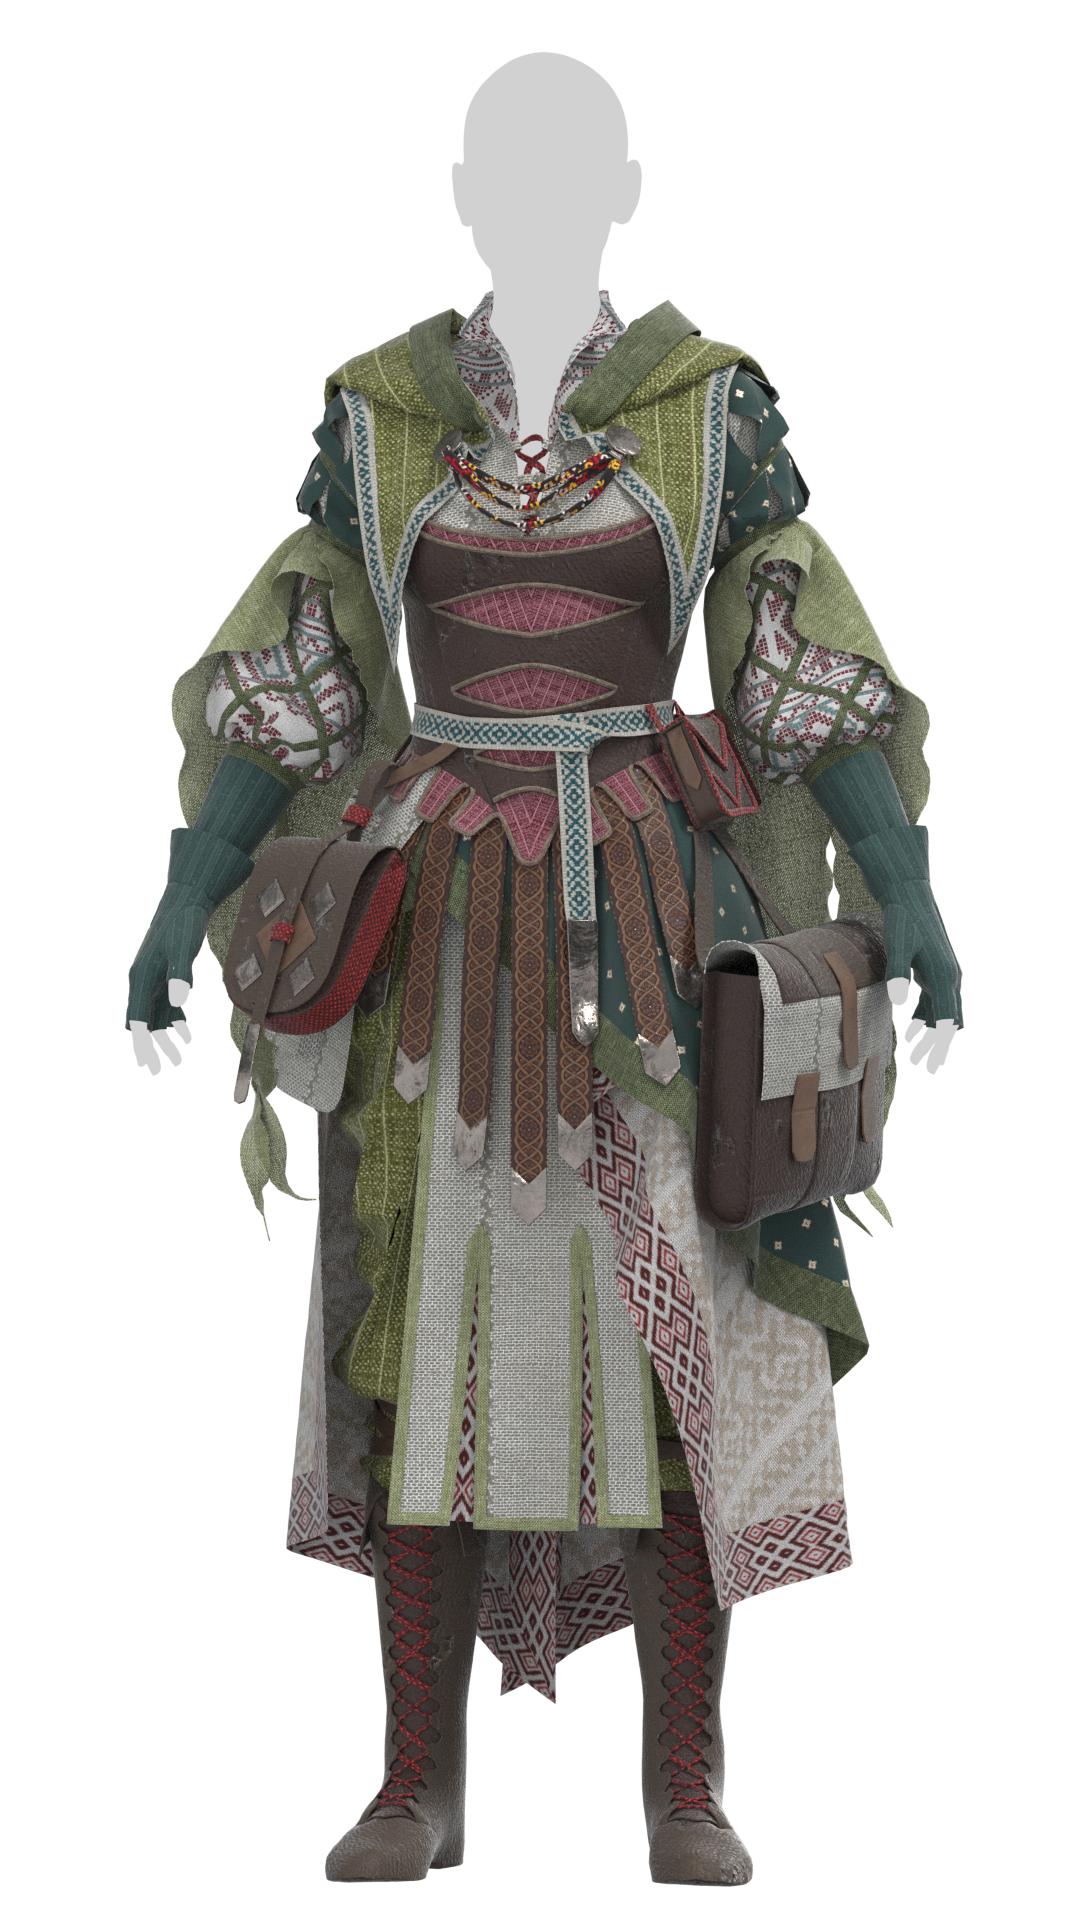
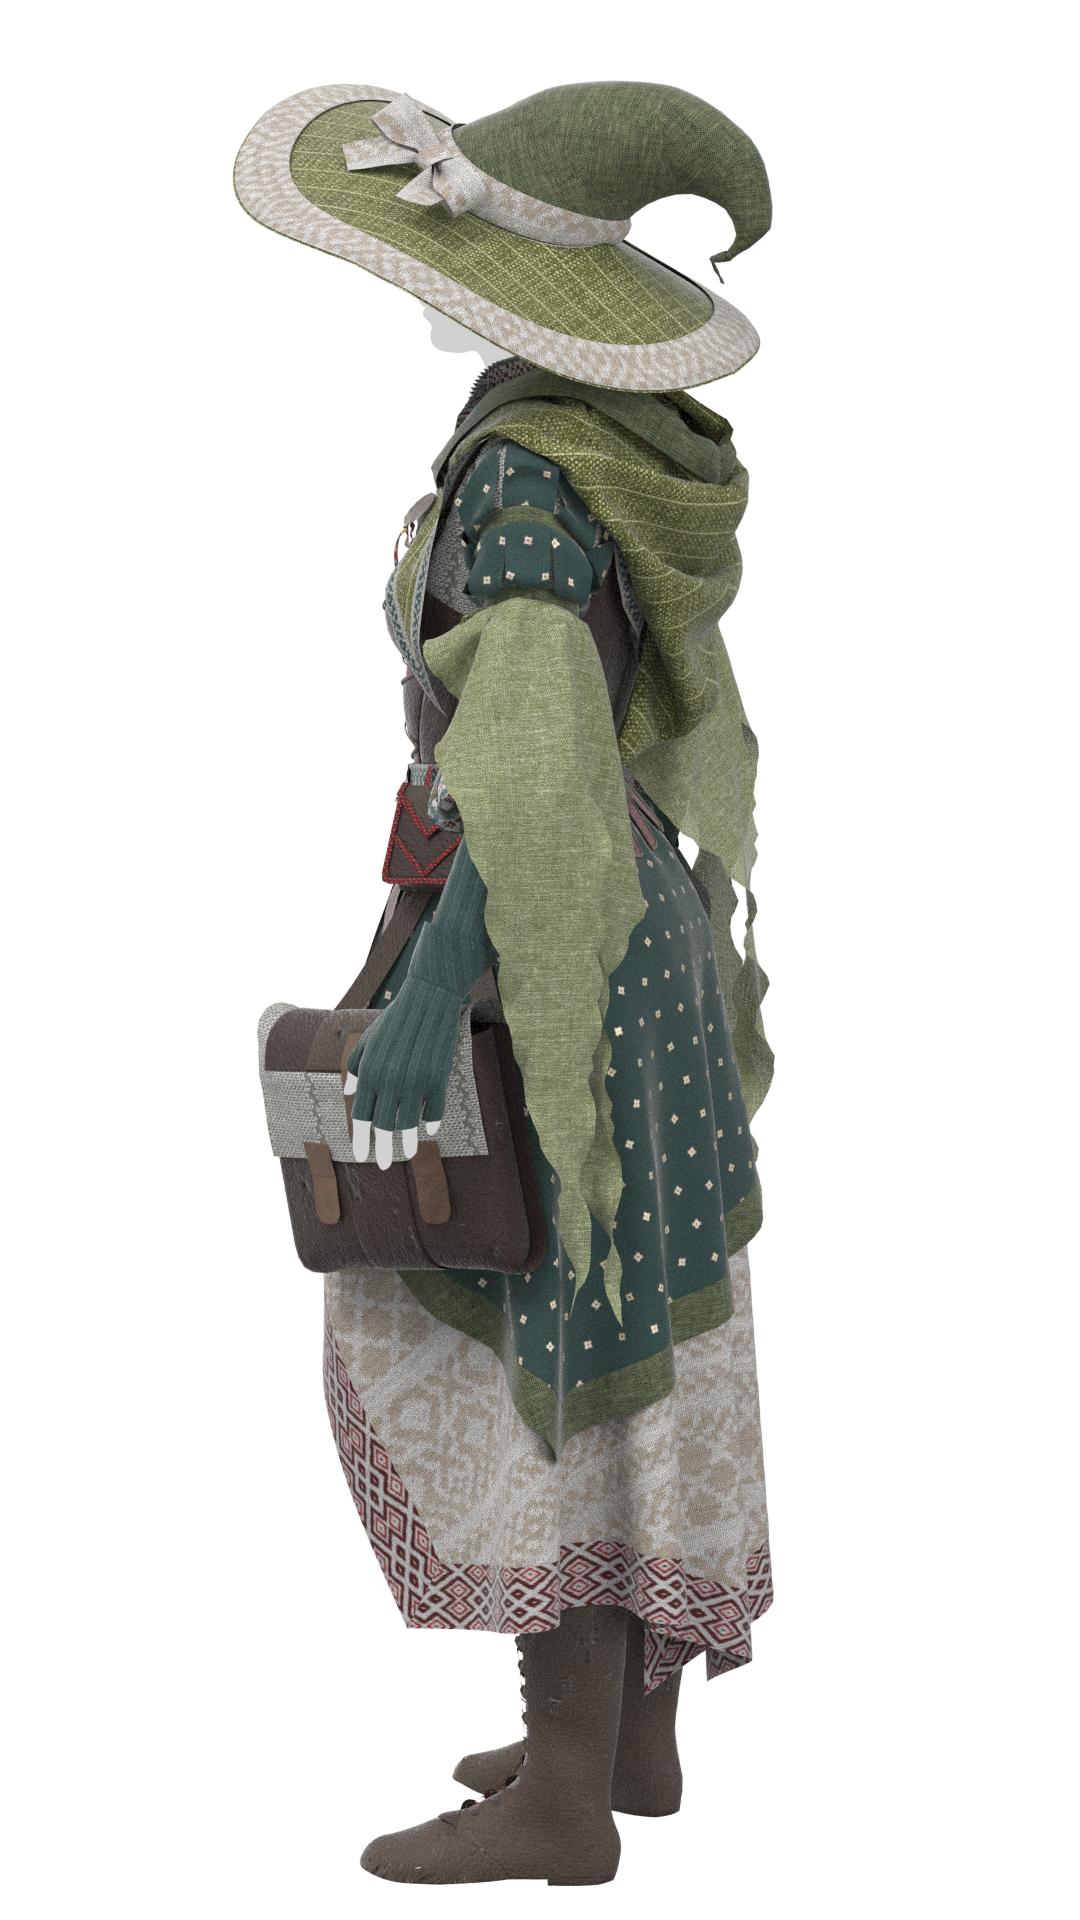
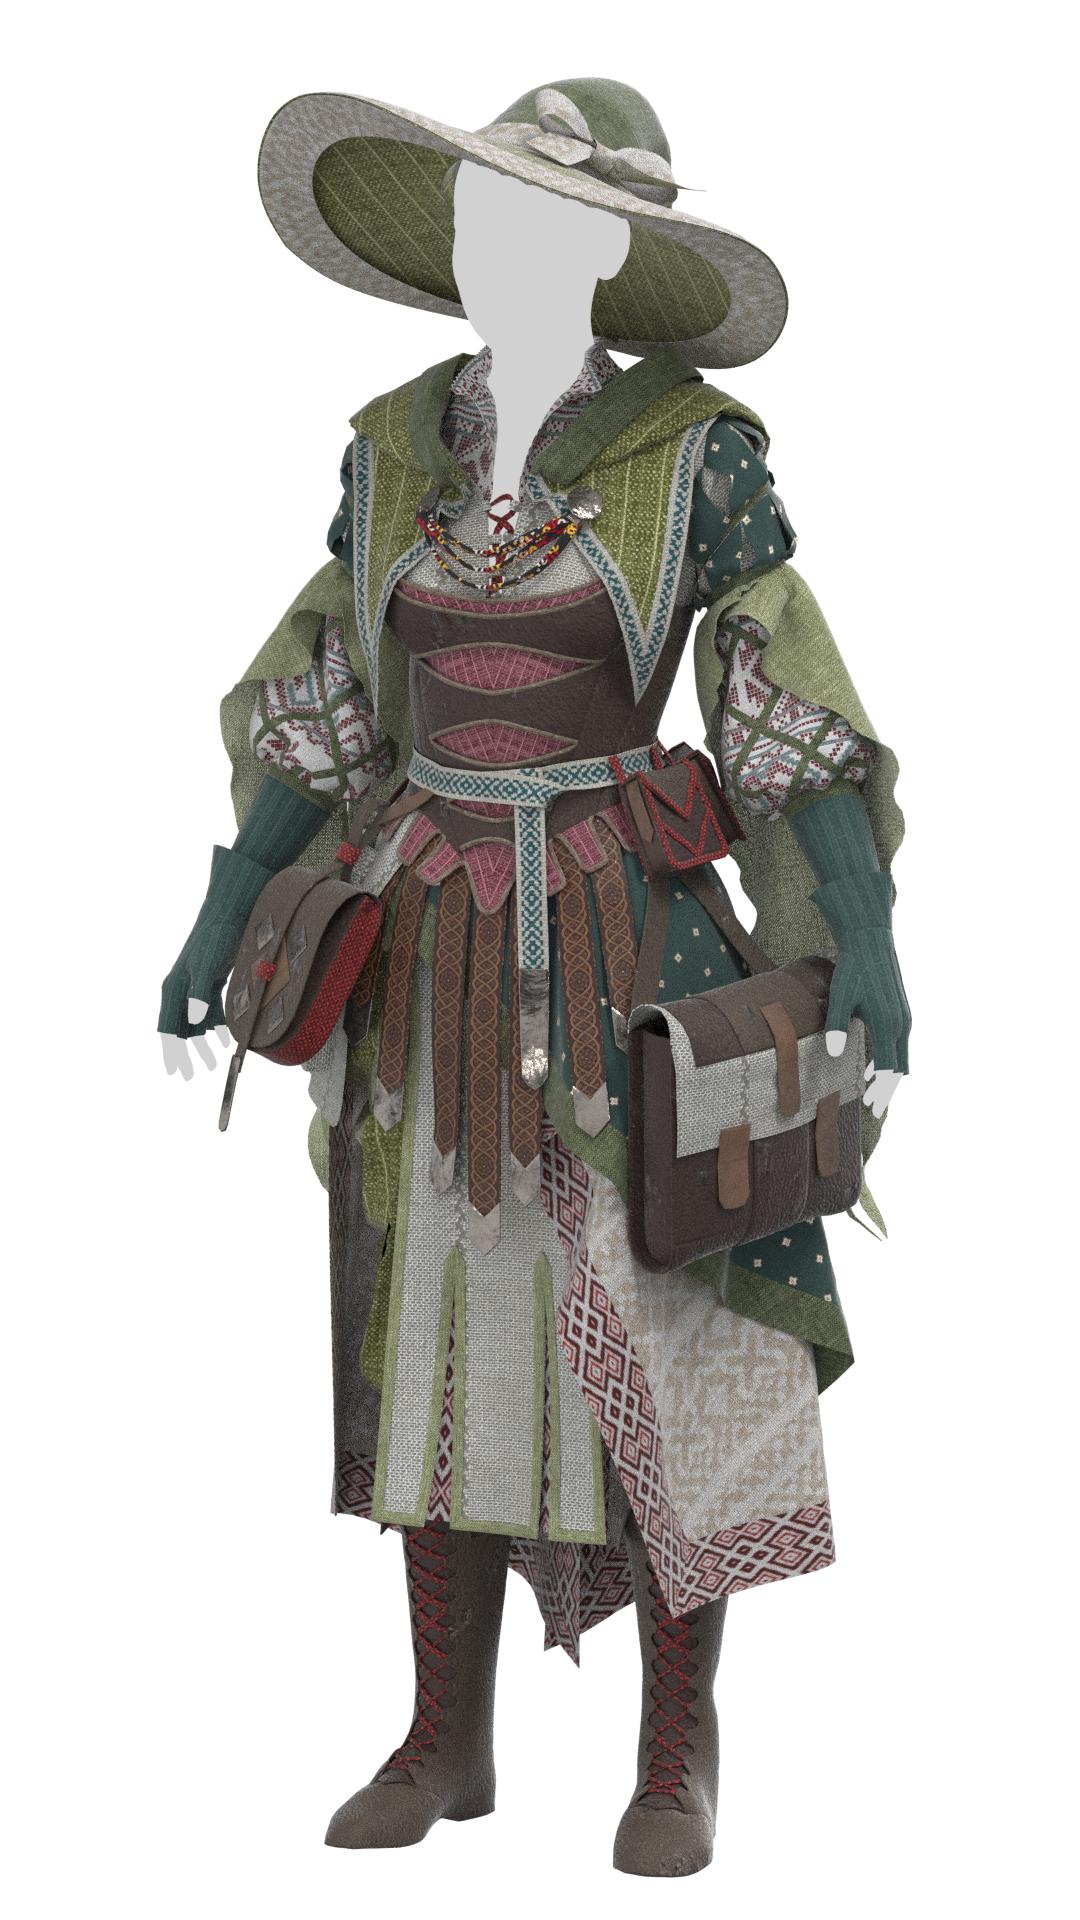
As expected, I wasn’t able to add many of my wishlist items. In particular, the environment is quite lacking from my original vision of a lush, tree-lined glade; this was a limitation of my knowledge of UE5 and something I’d like to revisit given more time. The cottage is also quite simple and needs a high-poly detail work pass to remove some of that perfectly-sharp-edged low-poly look. I also have tons of ideas for trinkets and baubles to add to the necromancer’s costume, and both characters need detail work (stitching, wrinkles, wear) on their fabric pieces.

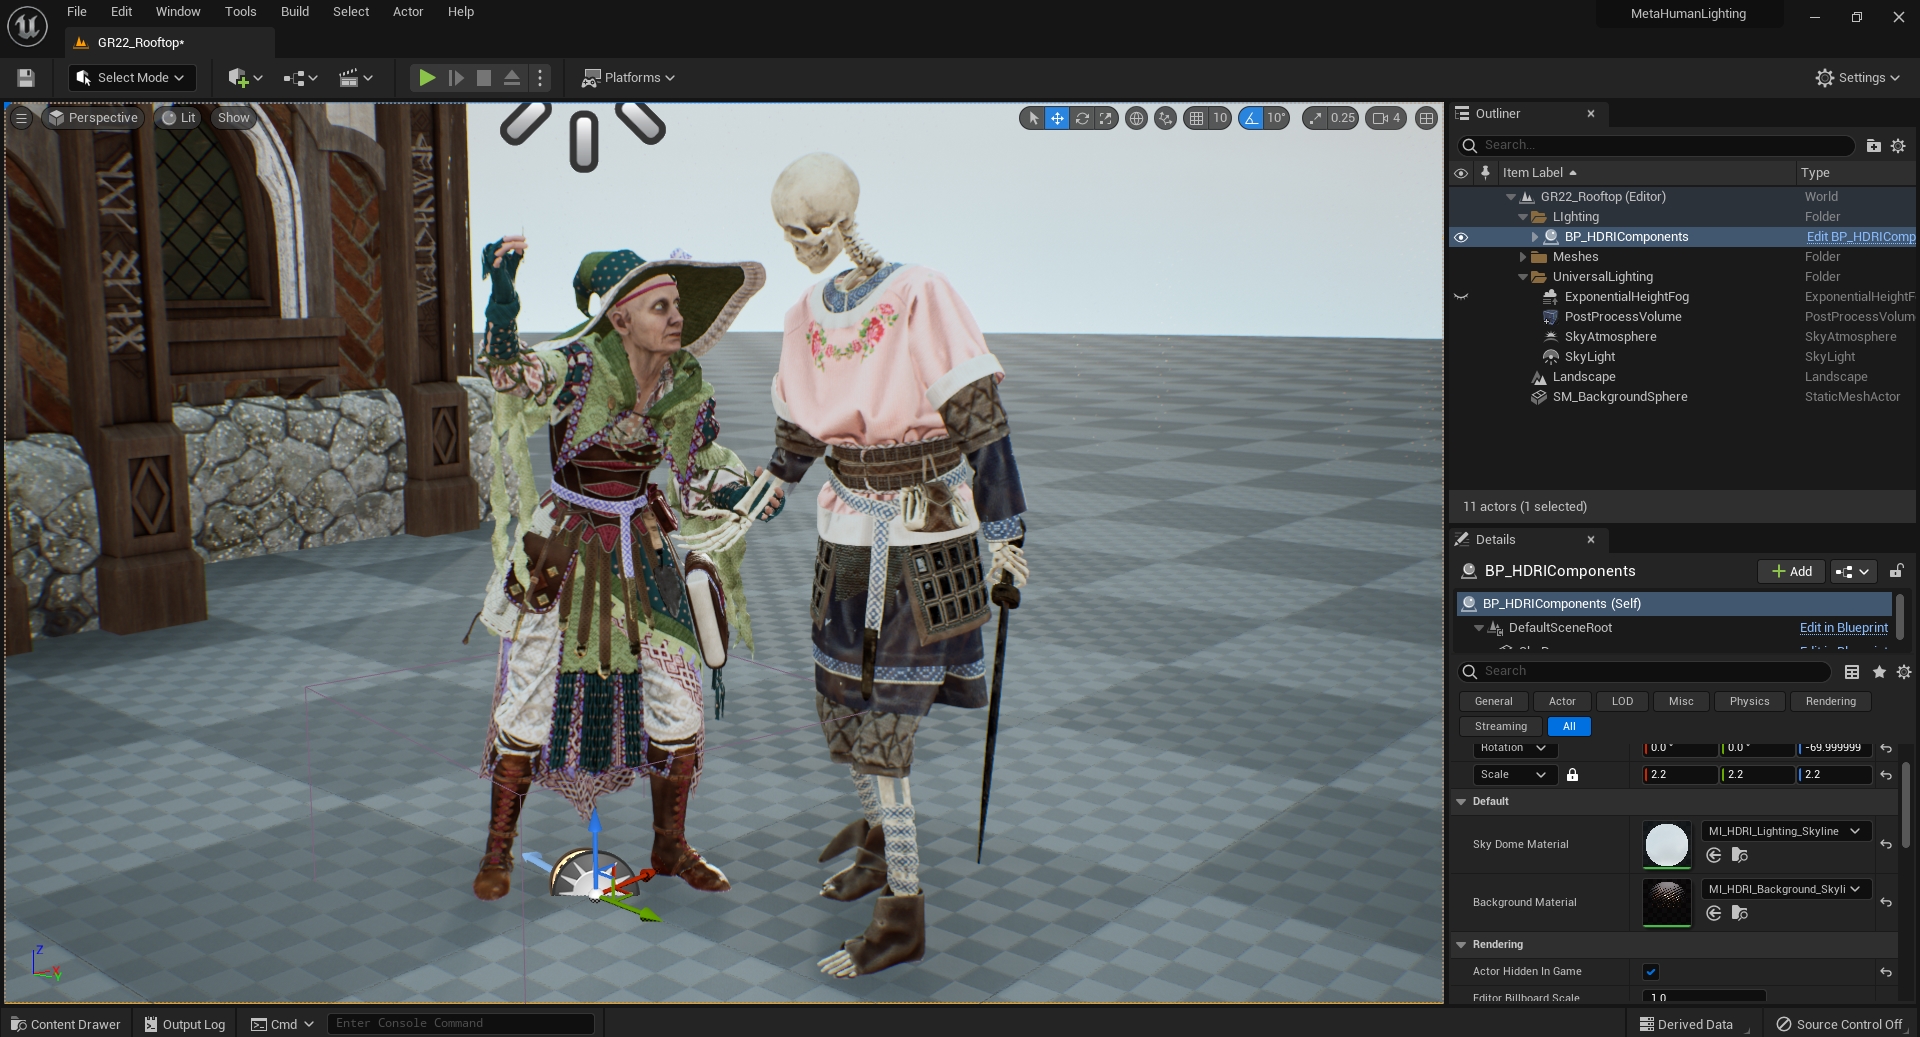
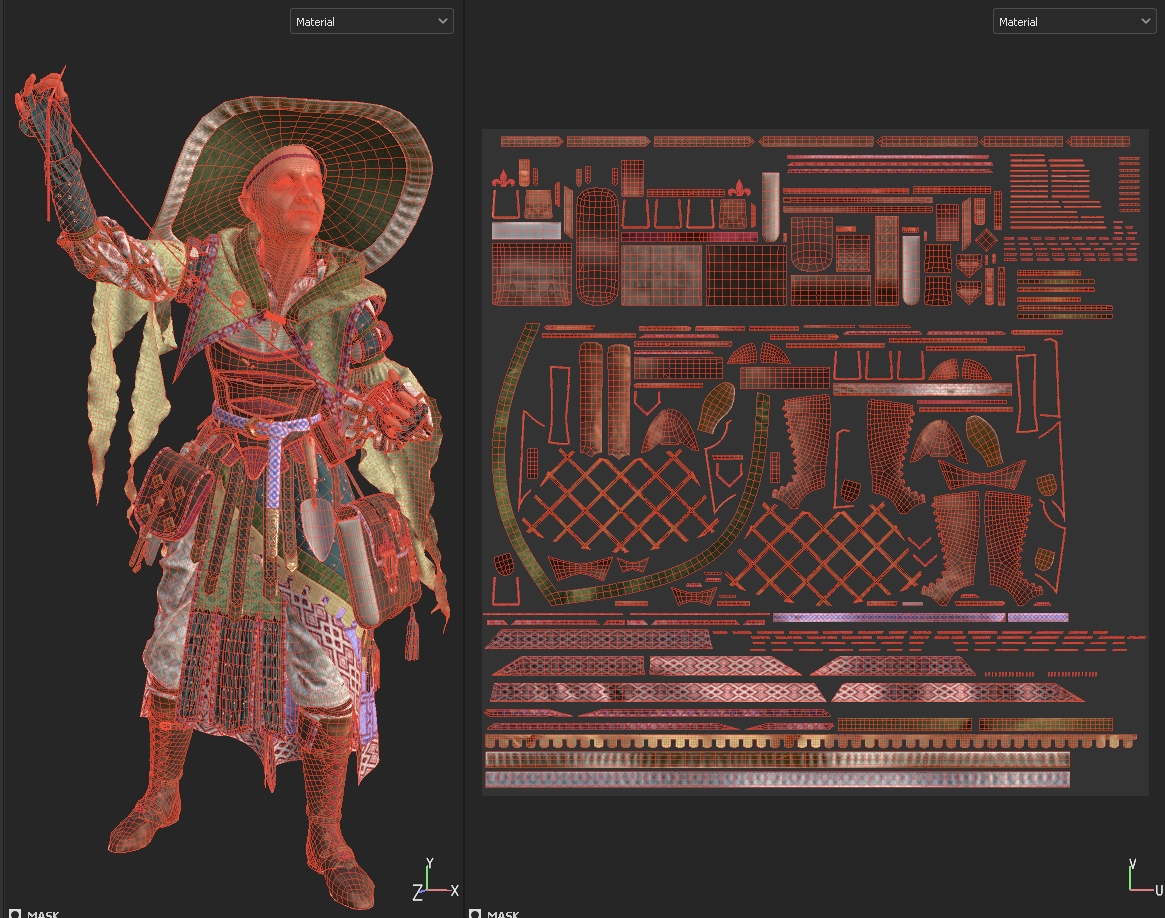
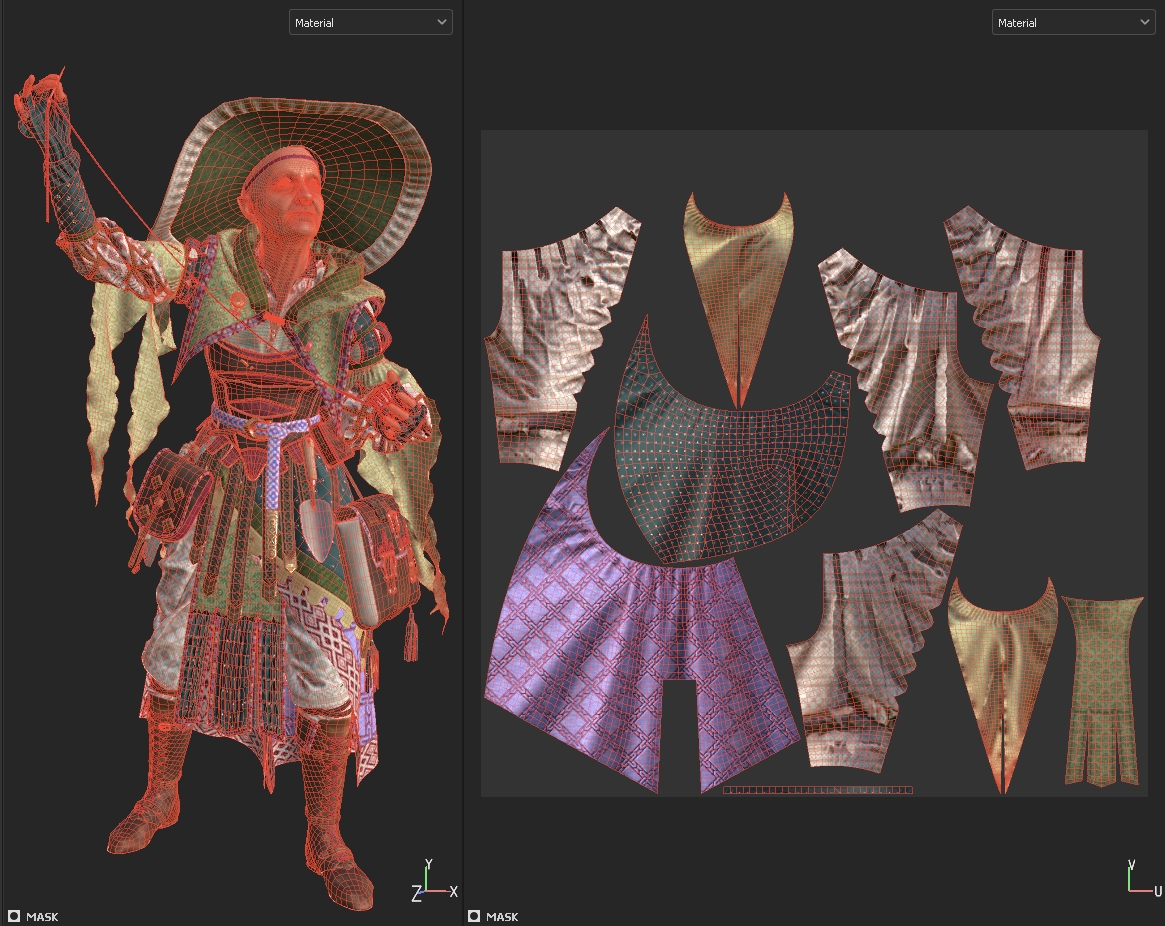
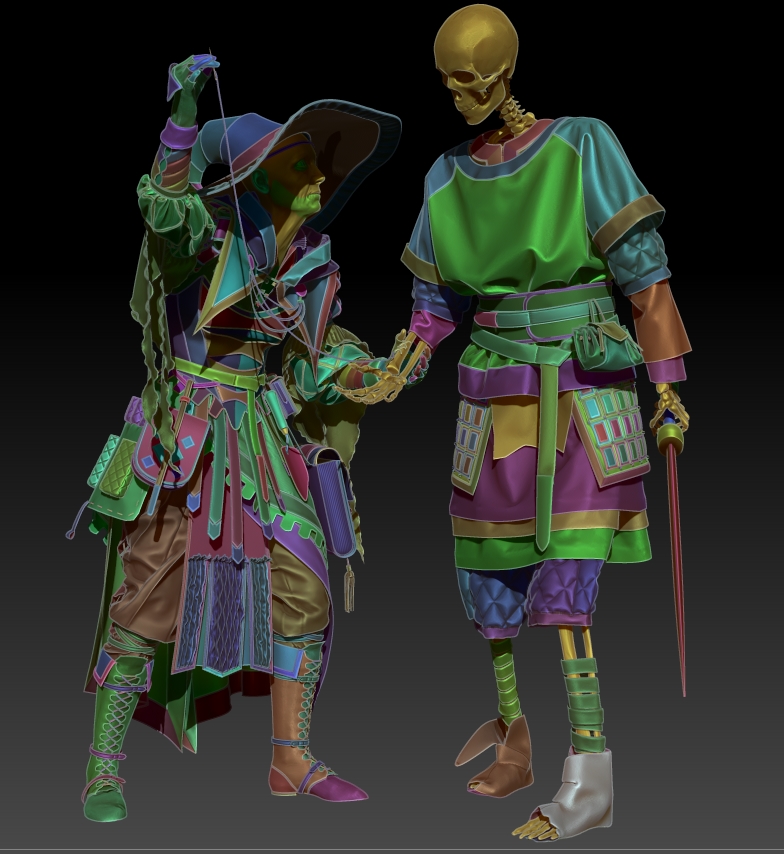
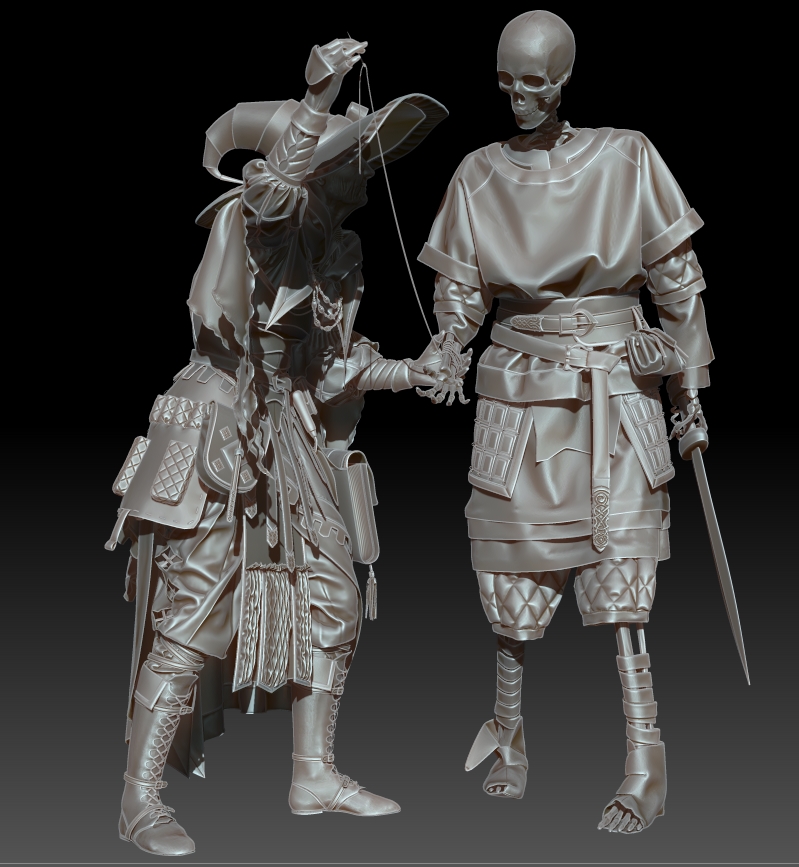
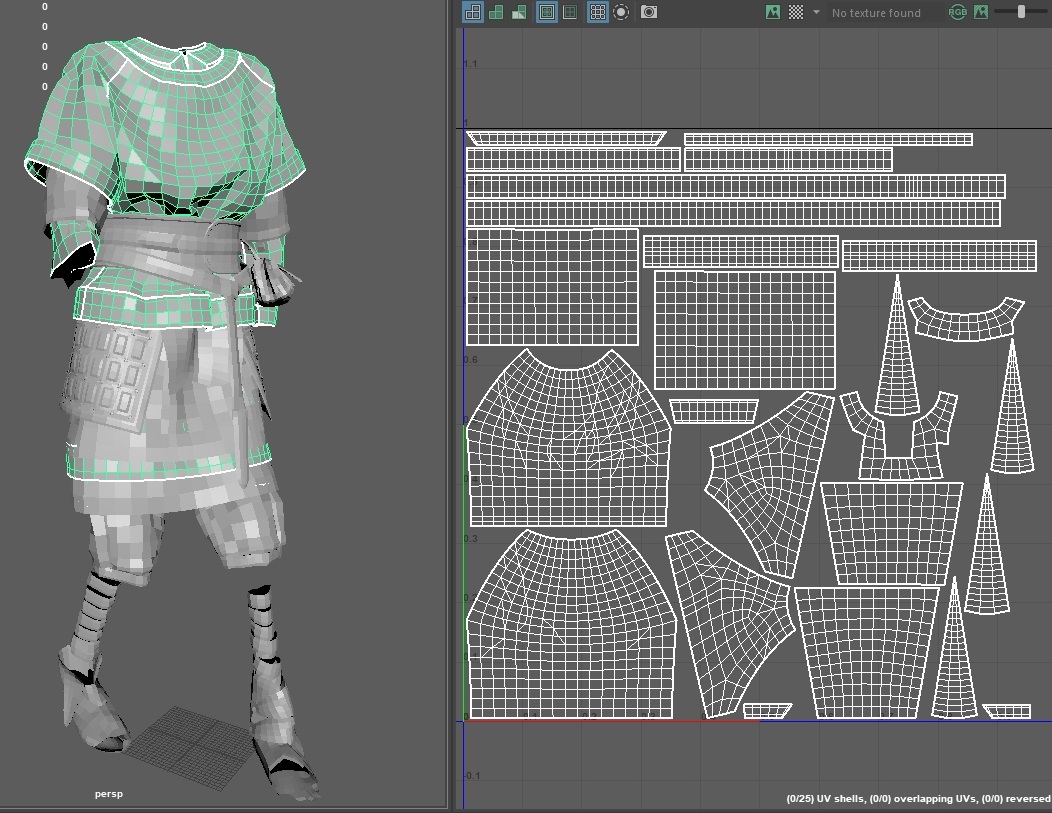
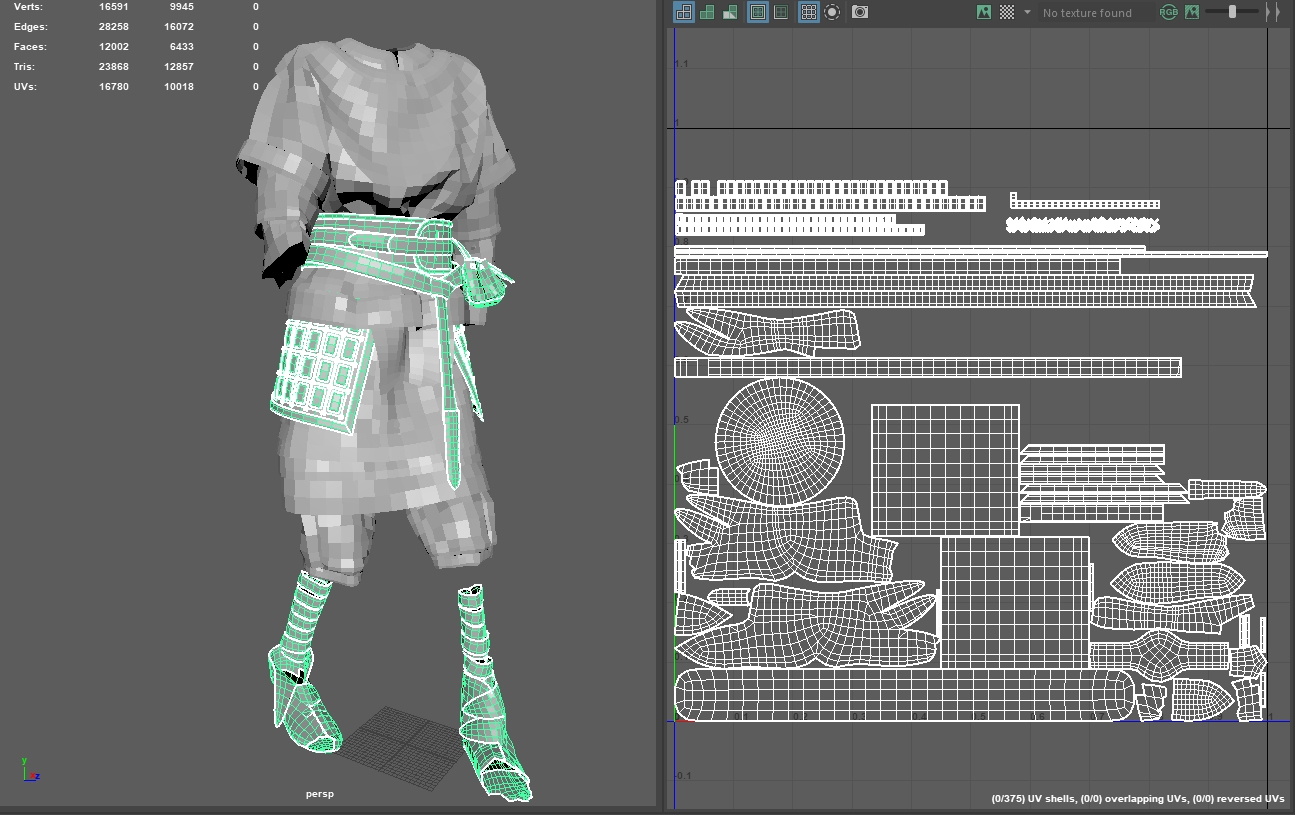
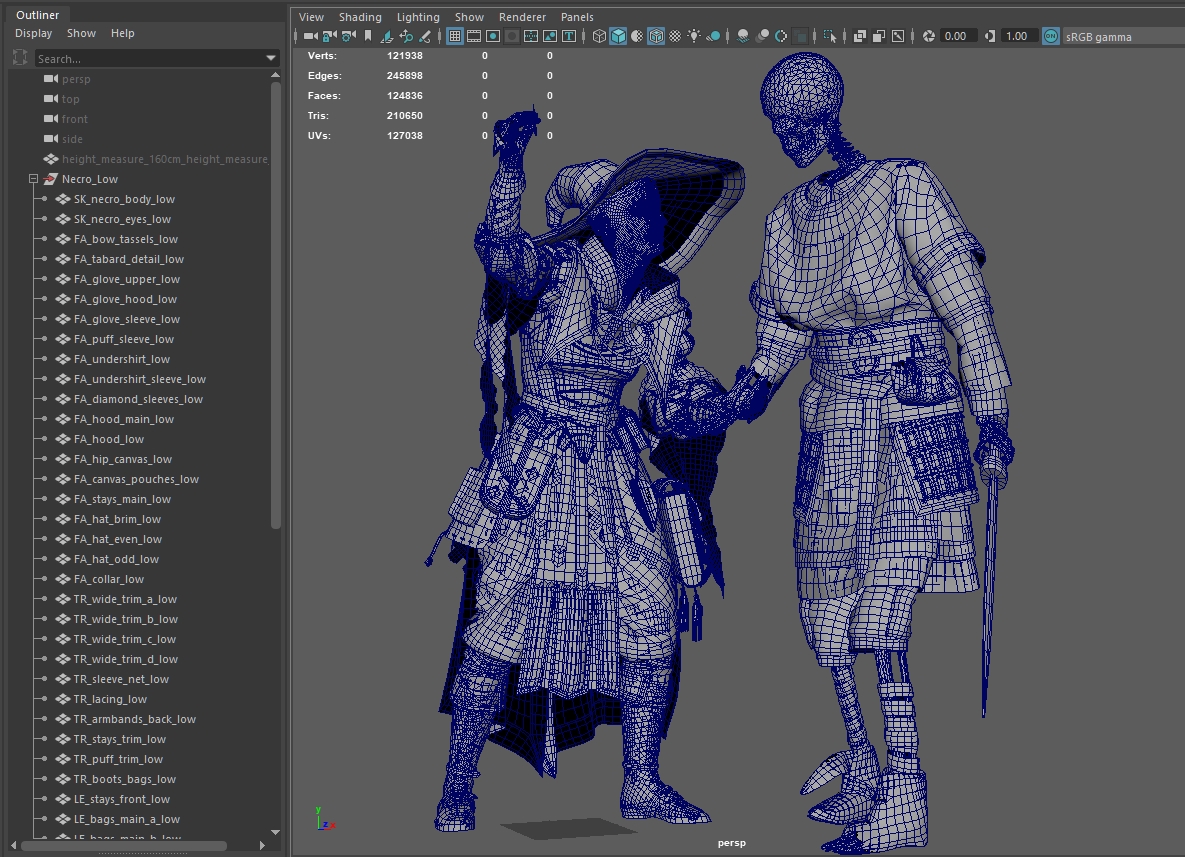
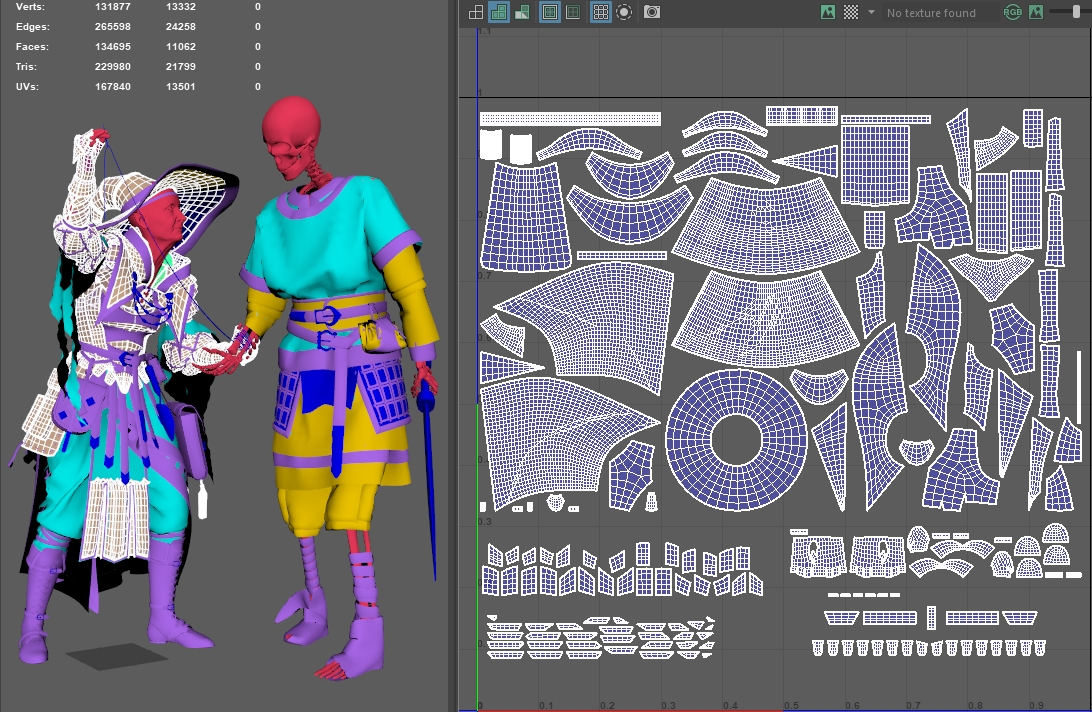
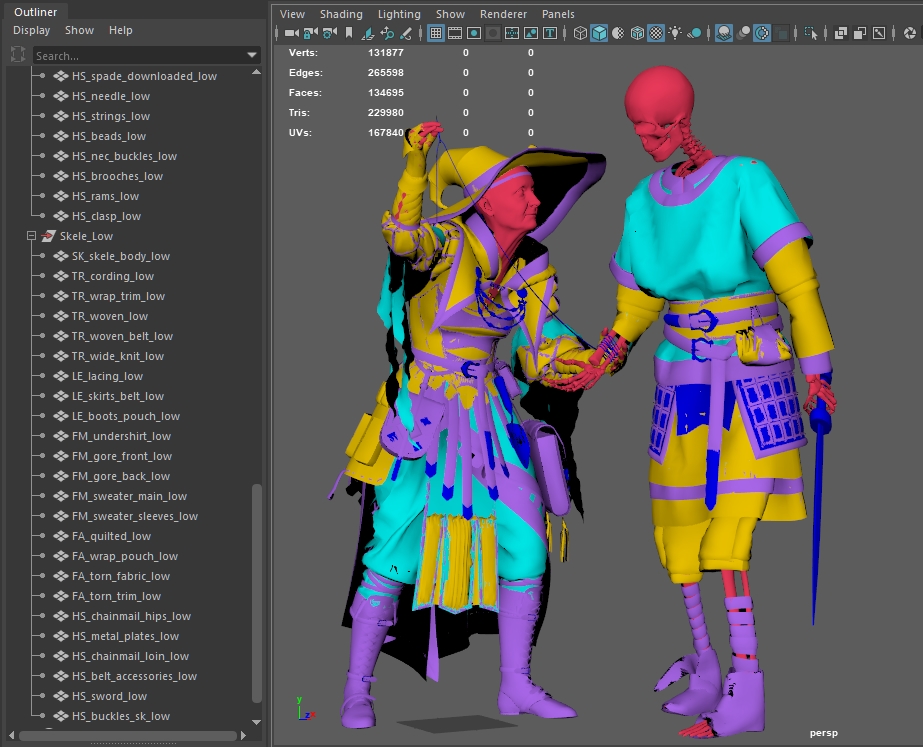
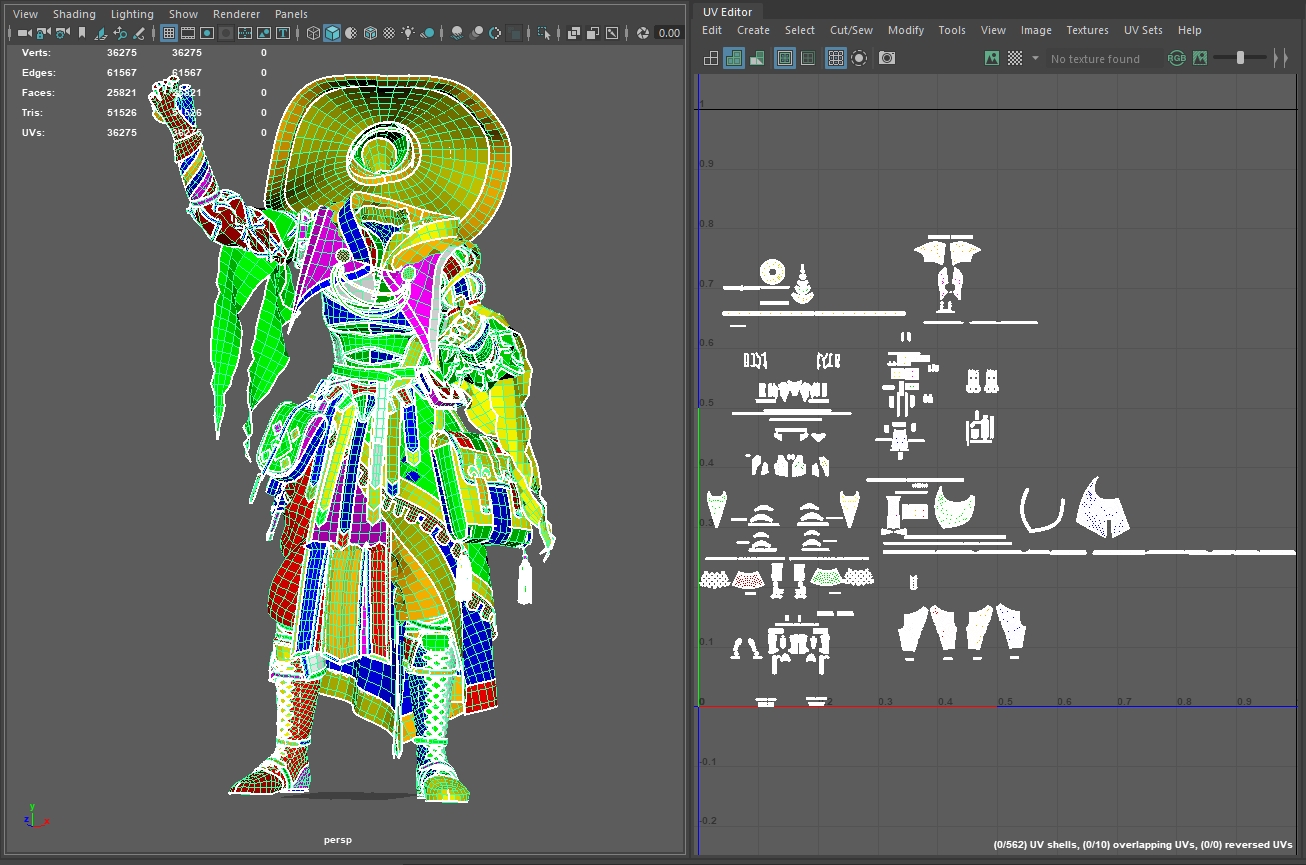
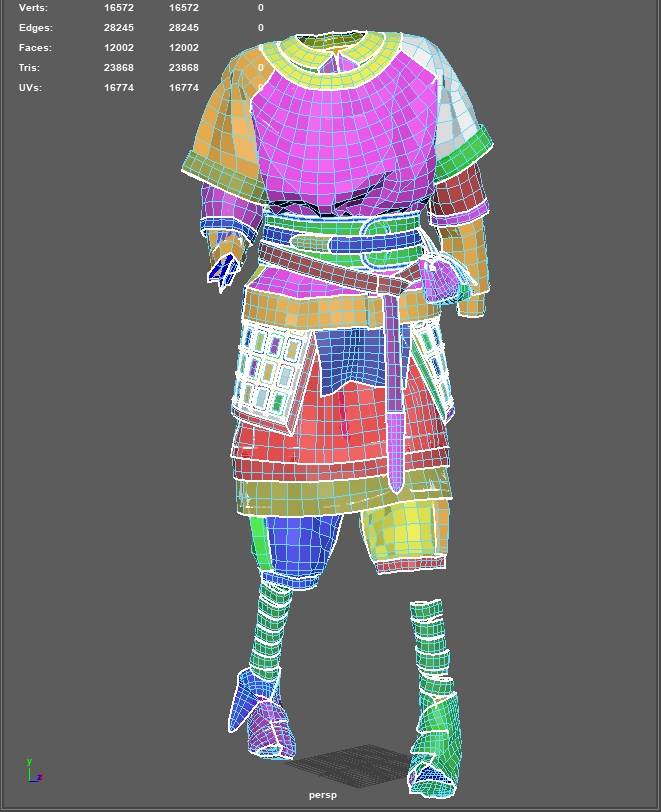
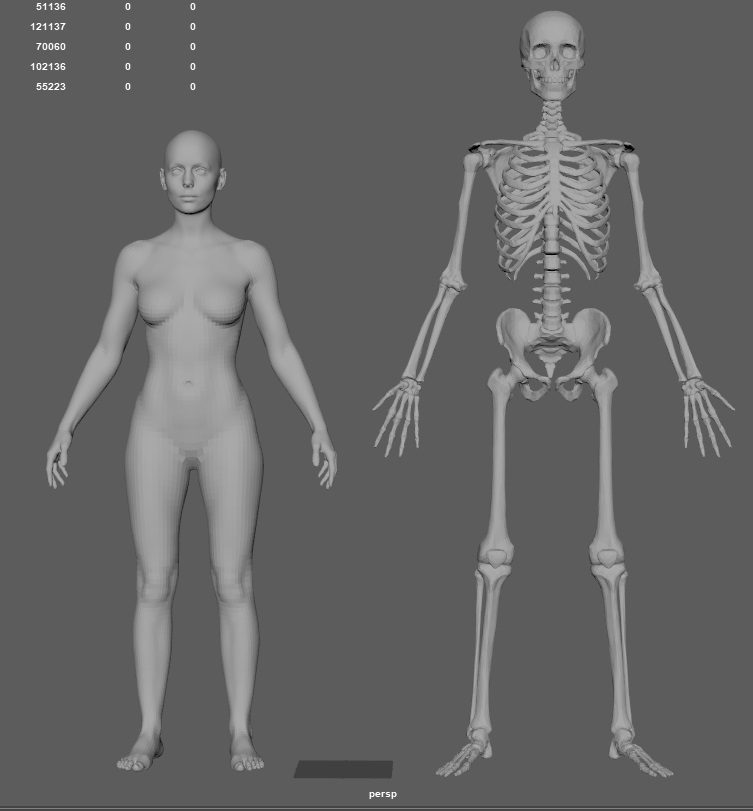
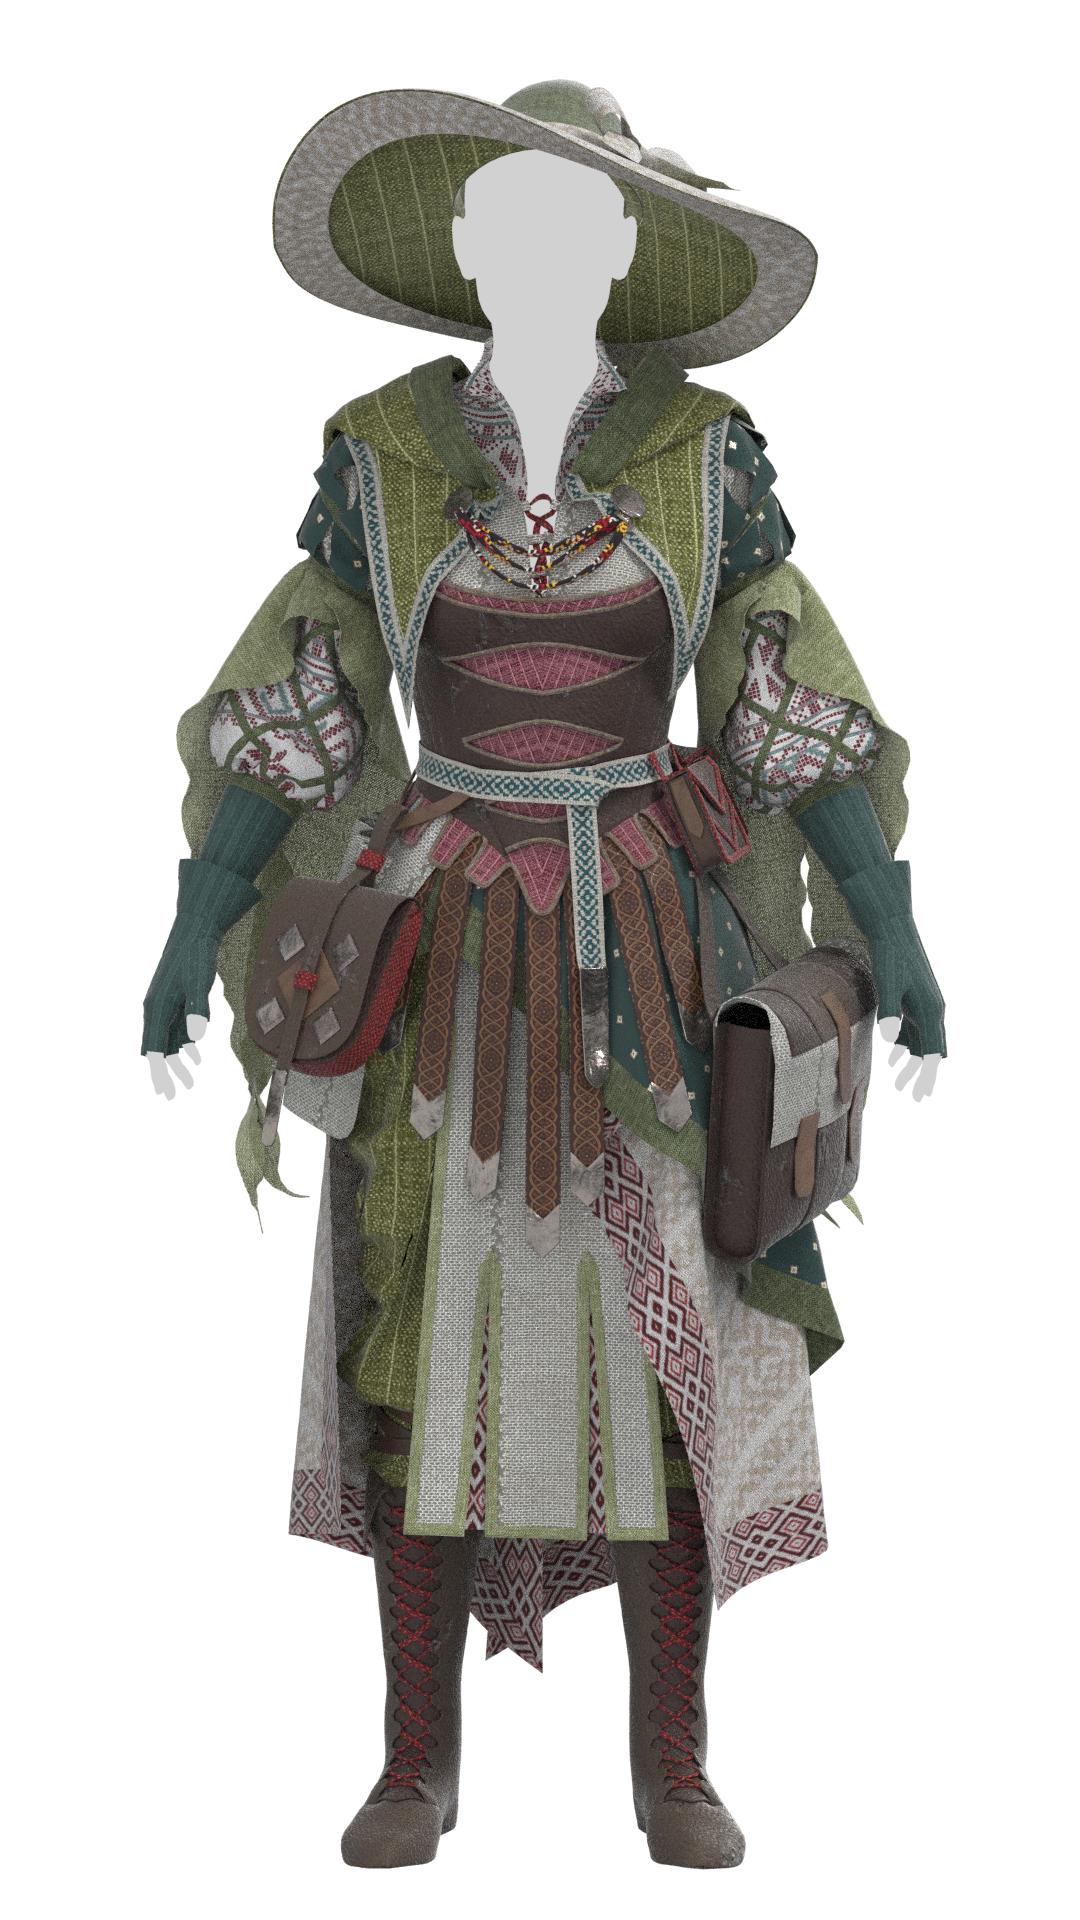
All that said, as it stands, the characters are remarkably low-poly (132k total between them) and game-ready with five 4k texture sets each. I could make my texture spaces more efficient with trim sheets, but otherwise they’re generally well organized and laid out. I’m very satisfied with the texturing work (although I wasn’t able to dive into Substance Designer to create my own textiles from scratch), and think the overall level of detail is about right for the style of games I’ve been aiming for.

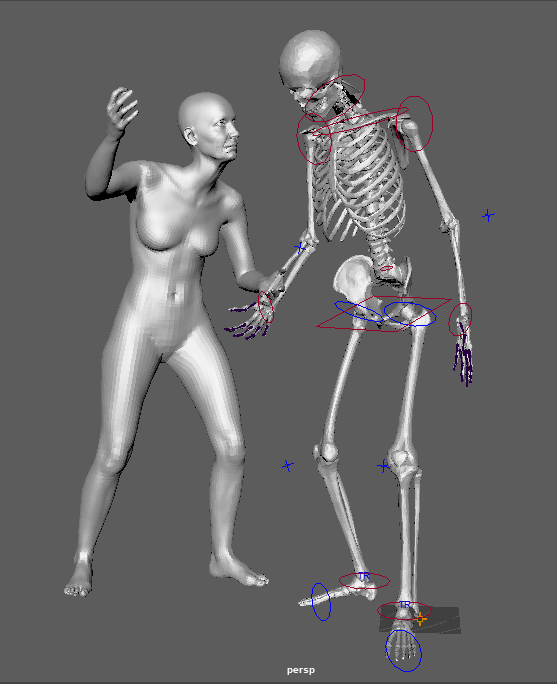
I did surprisingly well on time management throughout this project. Of course I ended up putting more hours in and producing more quickly in the last few weeks, but my timeline remained consistent throughout the semester. Even without the last few details I’d like to add, I’ve produced two full characters and a major environment asset in 3.5 months, which is something I couldn’t have imagined at the beginning of the year! I definitely have a new appreciation for the work that goes into designing characters (there are far too many choices to be made). I’ve also touched upon nearly every stage of the character art pipeline and feel comfortable tackling any part of it in future.

Finishing touches & UE5 Scene Setup (MP 14)

Final Major Project

I wasn’t quite satisfied with my base sculpt for the necromancer’s face and wanted to achieve really refined, realistic textures, so I tested out displacement and texture maps for the first time. I found a wonderful elderly woman’s face scan from 3D Scan Store and, with a little adjusting, arranged it onto my sculpt. I think it fits super well!

It’s getting a bit silly at this point how many times I’ve attempted to learn hair cards by a character deadline, but once again, that was the element I kept putting off until I was out of time. Luckily, UE5 has a wonderful integration with XGen where hair can be created and converted into a groom cache, taking up essentially zero polygons and very little file space. I’m not entirely sure whether this is viable for a real game, but it worked great for my demonstration and I was able to create a quick groom in only a couple hours.

Then it was time for UE5! I’d barely ever used this program before so the learning curve was huge. I started out with some premade lighting maps from Metahuman to figure out scene setup, HDRIs, etc. I ended up scrapping those scenes and making a new one from scratch. Playing around with various foliage elements from Metascans, I quickly determined that I didn’t have enough knowledge to create a realistic scene with trees and grass, instead settling on a seaside rocky tundra with fewer elements. I then played around with a bunch of lights for ambiance and emphasizing certain features, such as the broken skeleton arm and stitching.

Character baking and texturing (MP 13)

Final Major Project

The baking process went quite quickly after the tedium that was separating all of my elements out as separate objects and baking by mesh name. Throughout the character design process, I had essentially nailed down most of the main textures and materials that I had already applied in Marvelous Designer, so it was only a matter of refining them and adding more textures and designs to the textiles.

Final ZBrush Detailing (MP 12)

Final Major Project

I’m back into ZBrush for finishing touches and a few small sculpted accessories before I call these characters done. I created a needle and a set of repeated beads for the Necromancer’s necklace, along with a bunch of Celtic knot and Nordic filigree symbols all over hard-surface elements like belt tips and brooches. Mainly these were done with alphas, with a few sculpted over drawn designs.

I’ve also adjusted the necromancer’s face once again to put her in a more pleasant expression and make her even more realistically elderly.

Bibliography

Artem Shupa-Dubrova, 2021. ZBrush — 50 Belt Buckles. Available at: https://www.artstation.com/marketplace/p/ryGk/zbrush-50-belt-buckles [Accessed 12 August 2022].


sajjad, 2022. 20 Viking Symbols Zbrush Brush + Alpha – VOL 02. Available at: https://www.artstation.com/marketplace/p/9nJvb/20-viking-symbols-zbrush-brush-alpha-vol-02 [Accessed 4 August 2022].

Final character retopo, UV layouts (MP 11)

Final Major Project

I was determined to keep these characters extremely clean under the hood, with good topology and well organized and laid out UVs. As per usual, this was an enormously long process – for ease of texturing, I wanted to keep like materials near each other, which led to some minor inefficiency in texture space usage, but generally I managed to fill most of the 5 4k texture maps that I used for each character. They’re separated out by skin, trim and leather, main fabric, accessory fabric, and hard surface such as metal or jewelry parts. I then set separate named materials in Maya and sent them off to Substance Painter for texturing.

Cottage Sculpt, UVs, Texturing (MP 10)

Final Major Project

The cottage was a bit of a mess for most of this project, as I never wanted it to be the focus, and I constantly fought with making detailed and interesting shapes while not having elements too oversized or cartoon-y. I think some of the proportions are still off, and there’s maybe a few too many embellishments (I can’t stop myself!) but I’m proud of my first real foray into architecture work. I did all of the sculpting in ZBrush where I’m most comfortable, retopo and UVing in Maya, separated out like materials, and then adjusted the UVs to keep all of my texels consistent. Finally, I textured the piece in Substance Painter, making liberal use of some very advanced pre-made materials such as the windows, roof, and door.

Bibliography

Foreman, M., 2021. Substance 3D Assets – Medieval Village. Available at: https://substance3d.adobe.com/assets/allassets?q=markforeman [Accessed 8 July 2022].

Marvelous Refining & Retopology (MP 9)

Final Major Project

I finalized all of the elements in Marvelous Designer this week and did my final simulation and export. I added a quick extra at the end: the thread and ties that the necromancer sews onto the skeleton’s arm. This remains by far my most complex MD work to date, which I wish I had considered before it came time to retopo everything…

I did my usual retopo method for clothing by ZRemeshing the flat pieces, refining them heavily in Maya’s quad draw, and then manually adding tons of lines and divisions to better follow the contours of the high-poly garments. I also tried to stitch together pieces wherever possible to avoid small gaps in the final low-poly piece. The characters together are about 100k polys, with the necromancer taking up 2/3 of that count. I expect they’ll end up a bit higher once I add the other accessories, but that’s not bad at all for current-gen game characters.

Face Refining (MP 8)

Final Major Project

I’ve been having too much fun adding wrinkles and changing the weights of different parts of the face, so my necromancer keeps getting more elderly, but I think it adds interest to her face! I’m starting to really diverge from my original face reference, which I had intended. I’ve also started a really basic blockout of the hair, although it needs quite a lot of refining.

Final Poses (MP 7)

Final Major Project

It was important to me that the characters had strong, dramatic poses that quickly indicated to the viewer what their relationship dynamic was. I tend to make my poses too subtle and under-dramatic, forgetting that these characters will mostly be viewed from a distance and their full backstory likely won’t be known by the viewer – their pose has to show all of that at a glance. I started with basemeshes from 3D Scan Store (woman) and Fabricio Works (skeleton), and created rigs using Maya’s rigging system. It took quite a lot of refining of the skin weights and bones, but I now have them in dramatic poses that fit well together. I wanted the necromancer to be a little hunched and tired but obviously caring for the skeleton, who’s a little meek and confused as he towers over her.

Bibliography

Fabricio Works, 2019. Free Base mesh – Human Skeleton. Available at:
https://www.artstation.com/marketplace/p/wnNz/free-base-mesh-human-skeleton [Accessed 29 May
2022].


3D Scan Store, 2020. Ultimate Female Base Mesh. Available at:
https://www.3dscanstore.com/base-mesh-3d-models-and-textures/ultimate-female-base-mesh-1
[Accessed 28 May 2022].

Artist Inspiration: Emmanuel Lecouturier

Final Major Project

Although this piece focuses on lighting within Marmoset, whereas I’ll (hopefully) be showing off my characters in UE5, the basic fundamentals remain the same. I was struck by the simplicity of the setup and yet how dramatically it shows off a character with a very similar vibe to my necromancer and skeleton. The rimlight is more subtle than I usually see, which emphasizes the edges of the monochromatic clothing and hair without looking too synthetic; it could almost be moonlight or reflection rather than obvious studio lighting.

The texturing work is also excellent – the dirt pass and small visible threads and tears add so much realism to a relatively simple character design. These are elements that I definitely plan to add to both my characters for that living-in-the-woods digging-up-corpses aesthetic.

Bibliography

Lecouturier, E., 2022. Presentation, Lighting, and Hair Creation for a Sorceress Character. [image] Available at: https://marmoset.co/posts/presentation-lighting-and-hair-creation-for-a-sorceress-character/ [Accessed 9 July 2022].

Posing Tests (MP 6)

Final Major Project

I’ve run into the same issue I’ve had on previous projects in trying to decide at which point to pose the characters: before or after draping in Marvelous Designer. I’ve learned that, in industry, most characters are created in T- or A-pose and then the fabric is rigged by a specialist afterwards. Since I obviously don’t have access to that service and it would be a huge undertaking to learn that skillset, I’ve decided to pose before my final Marvelous export.

I quickly posed the characters using ZBrush mannequins to get an idea of how they should interact. I don’t love the idea of learning how to rig, so I started out testing automated rigging and posing in Mixamo. However, I ran into all sorts of issues with the skin weights being incorrectly applied and couldn’t figure out a way to adjust them within Maya’s rigging system. This worked great as a test – I even pulled the poses into MD and re-draped the characters to see what they’d look like – but I believe I’ll have to head back to the drawing board and rig them from scratch for the final.

I’ve also started thinking about accessories and additions I can add to both characters, specifically weaponry for the skeleton and jewelry/tools for the necromancer. These are mainly from my trip to the British Museum where I kept an eye out for fitting pieces!

Necro Face Blockout (MP 5)

Final Major Project

I’ve started thinking about the face I want for my necromancer character, and settled upon this lovely model TATYANA from an agency oldushka.tilda.ws. She’ll just be a starting point for my character, as I want to give her a more custom look, but I think she has very timeless, ethereal features that work wonderfully for an older necromancer woman.

Bibliography

Oldushka, 2022. Tatyana. [image] Available at: http://oldushka.tilda.ws [Accessed 5 June 2022].

Starter House (MP 4)

Final Major Project

I’ve started doing basic blockout for the characters’ cottage in ZBrush. I’m working from a mishmash of concept arts, but have already run into the pitfall of the house looking too stylized and proportionally incorrect to match my very realistic character style. I’m also trying to decide where best to place the characters so I don’t have to create much more of a background environment for them but so the house isn’t distracting from their looks.

Necro Accessories, Skele Refining (MP 3)

Final Major Project

The necromancer’s Marvelous Designer look is pretty much nailed down at this point, for at least the larger pieces, and I’ve started adding some accessories. I’ve been struggling with the necromancer’s proportions, especially with how bottom-heavy her costume is, so I tested out adding a hat and I think it perfectly balances things out. I’m also happier with some of the textile choices and colors, although now her skirts feel a bit empty compared to the rest. This would be a great time to add some of that smocking detail I tested out during my planning stage.

I also added a few elements to the skeleton to make him look a little more detailed and disheveled: boots, a second wider belt, and some legwraps. He’s half Viking, half Greek hoplite but I think it works!