Vest Details
I’ve had quite a fight with the twisted fabric strips adorning Daenery’s vest. When I first saw these designs, they were immediately reminiscent of the same detailing on Aloy’s Carja Blazon outfit from the Horizon Zero Dawn game, so I sought to analyze the original model and see if I could puzzle out how it was constructed.

This helped somewhat in seeing how the pieces are laid out on the garment and their overall shape, but very little about the actual method of creating them. My best guess is fabric strips in Marvelous with thickness added later and a manual retopo that deleted all unused underlying sections and ‘stitched’ them all together. Since I intend to go with my usual retopo method straight from Marvelous, I was hoping to be able to recreate this effect purely with fabric pieces rather than a lot of custom sculpting after the fact that would obscure my nice UVs.


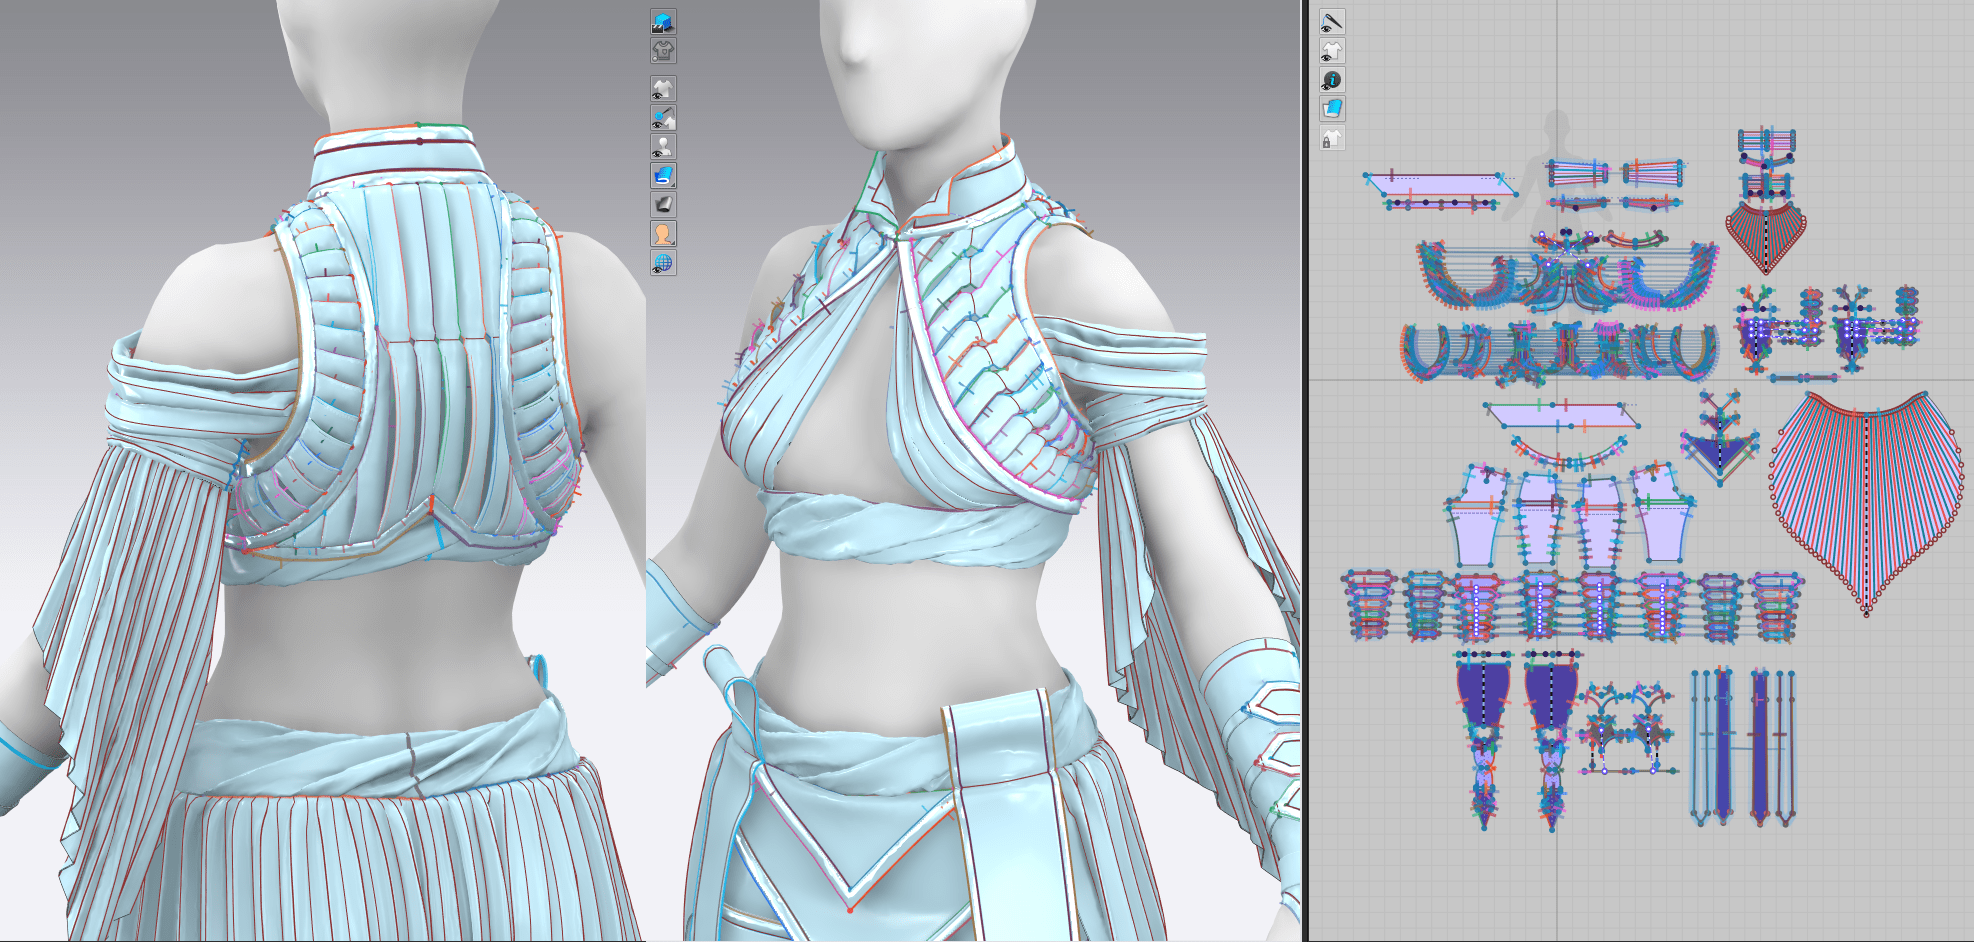
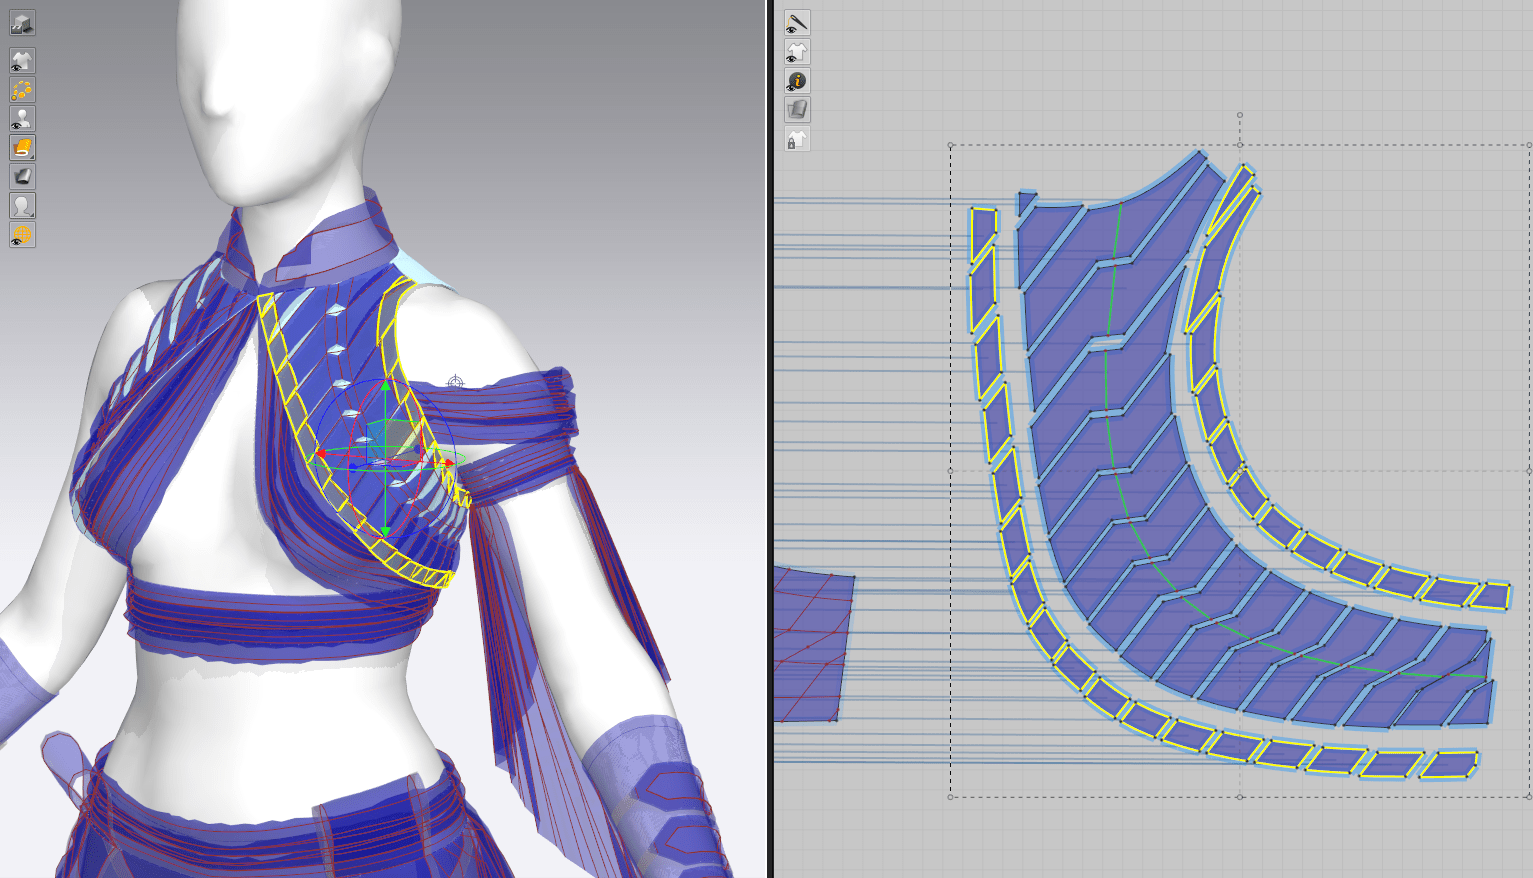
Unfortunately, the several methods for building strips of twisted fabric just weren’t creating the effect I was going for. The fabric was stretching and shifting rather than creating that sharp dividing line, and the alternating flaps were simply falling on top of each other with no real gaps. It quickly became clear that I would need a more complex shape for these pieces to force them exactly where they need to lay; hopefully this workaround will be hidden by the little buckles at the center of each twist in the final piece.

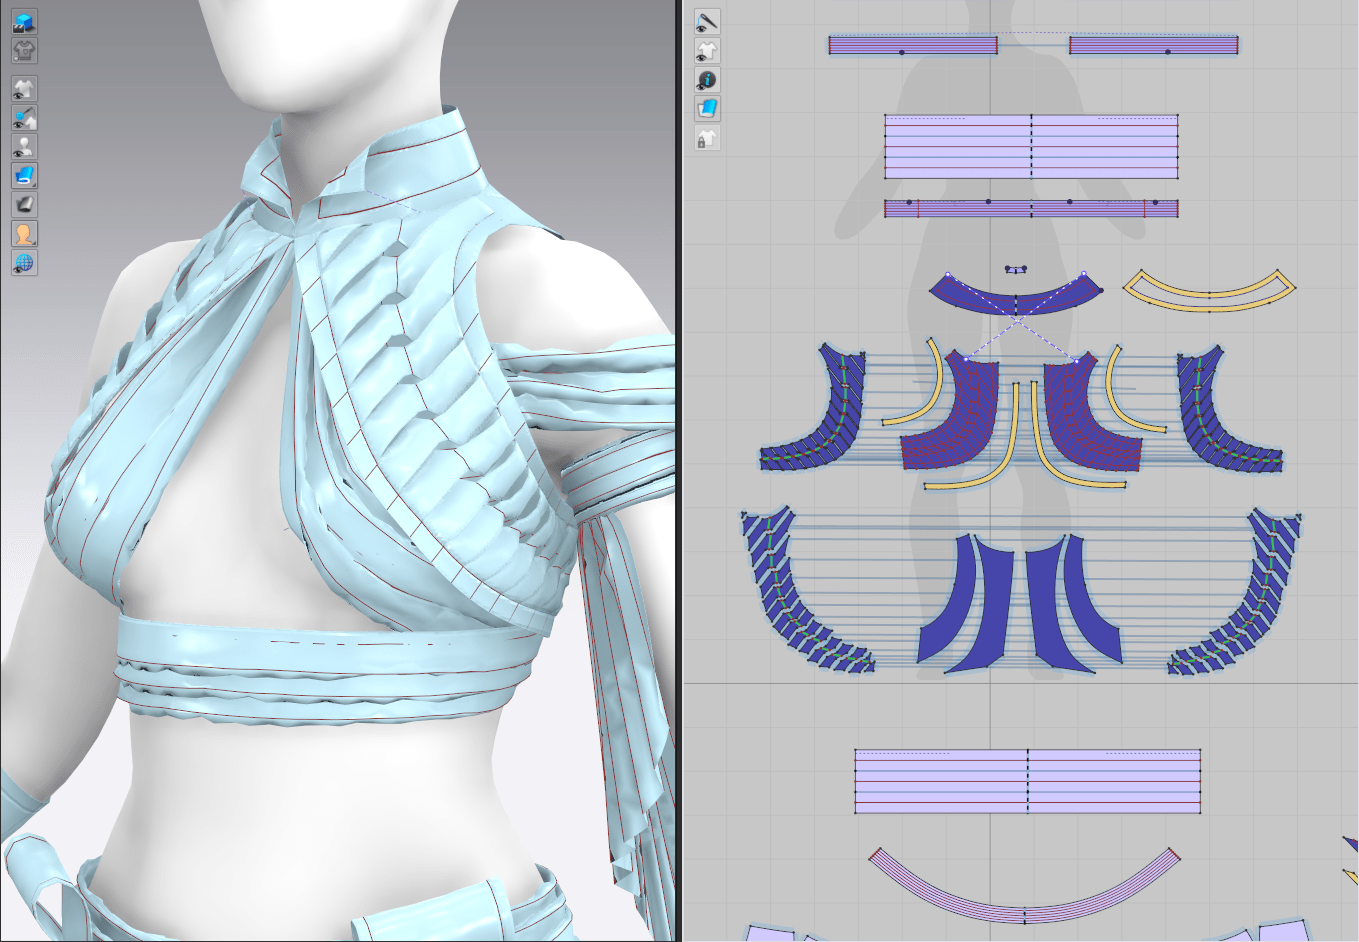

I ended up creating little Z-shaped ‘pillows’ of fabric, adding pressure and positive shrinkage to simulate the gathered effect of each strip. This was quite tedious, as I had to stitch each piece together by hand and keep track of a few dozen tiny patterns, but the end result was behaving exactly how I wanted.
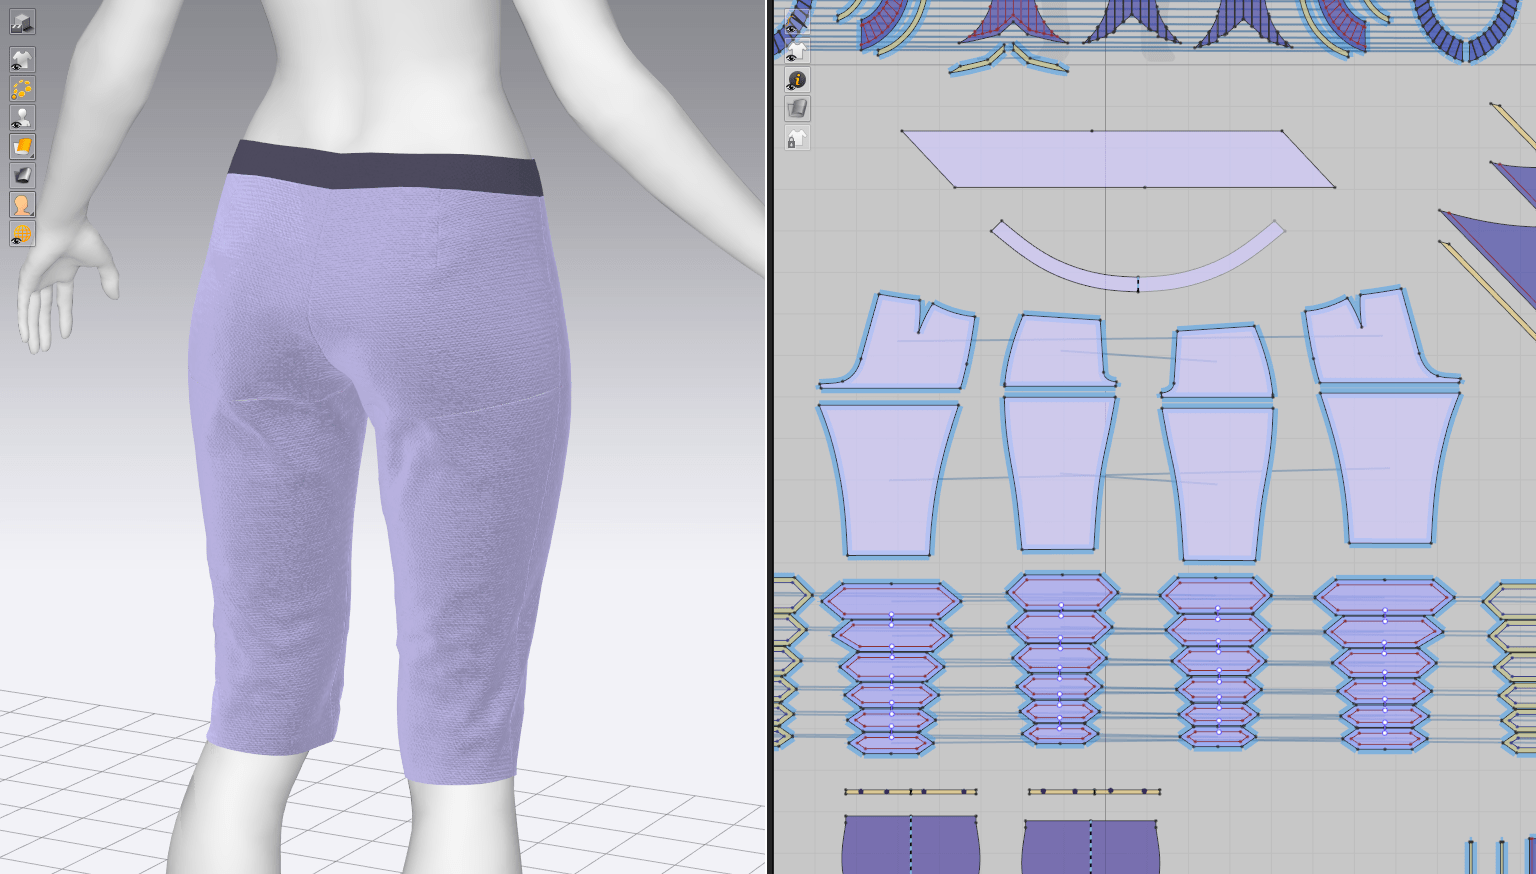
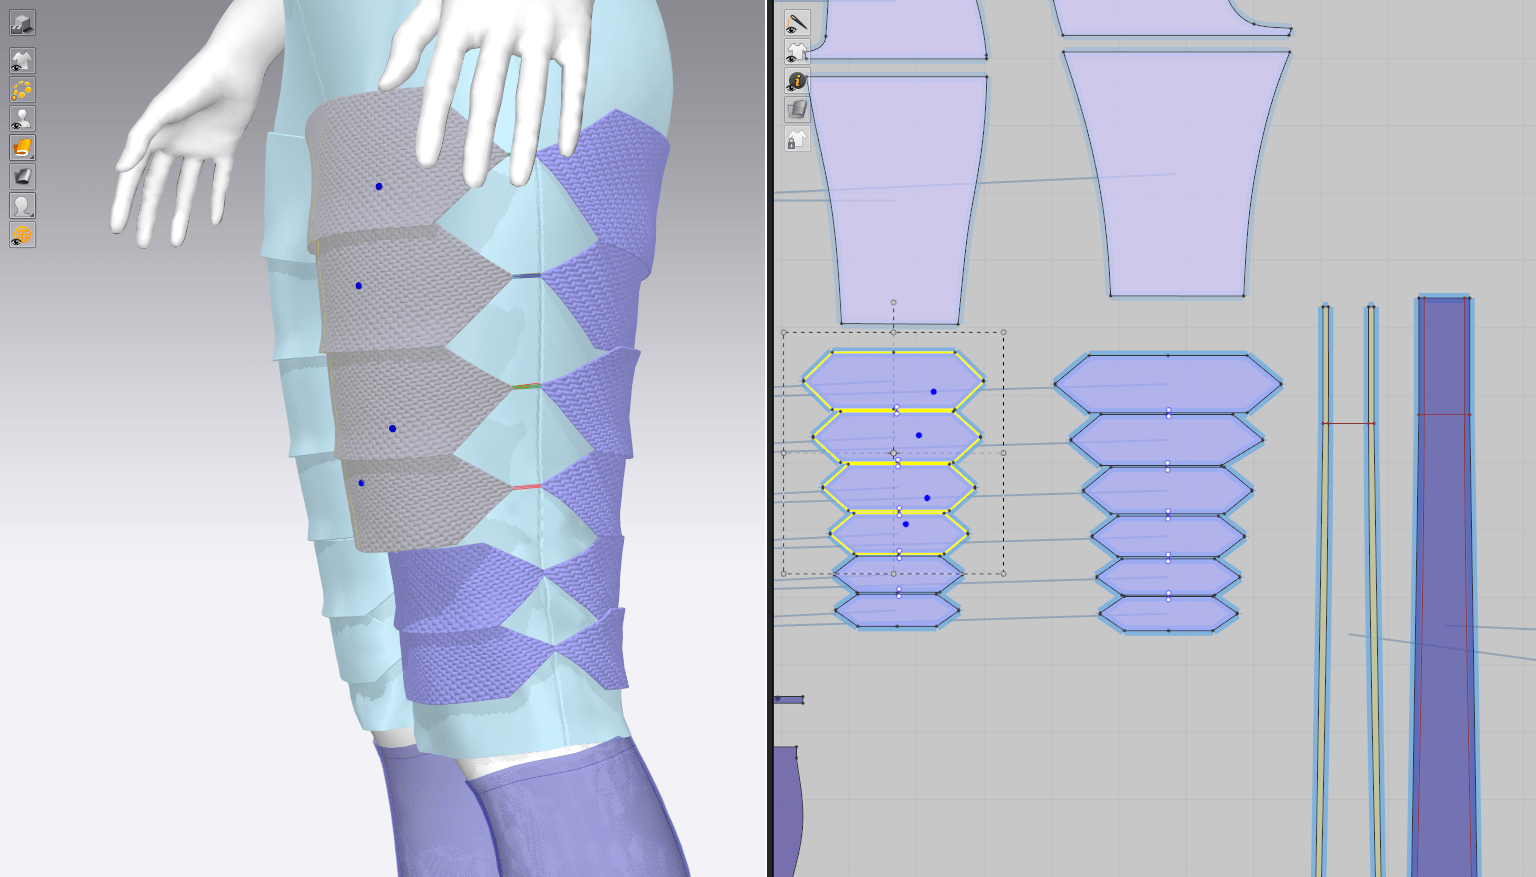
Leg Armor & Trim
I first adjusted the fit of the pants slightly so they were closer-fitting, since I had mounted the leg armor directly onto the fabric. This kept the ‘floating’ leg armor very close to her actual leg rather than showing a gap where the invisible pants fabric was.
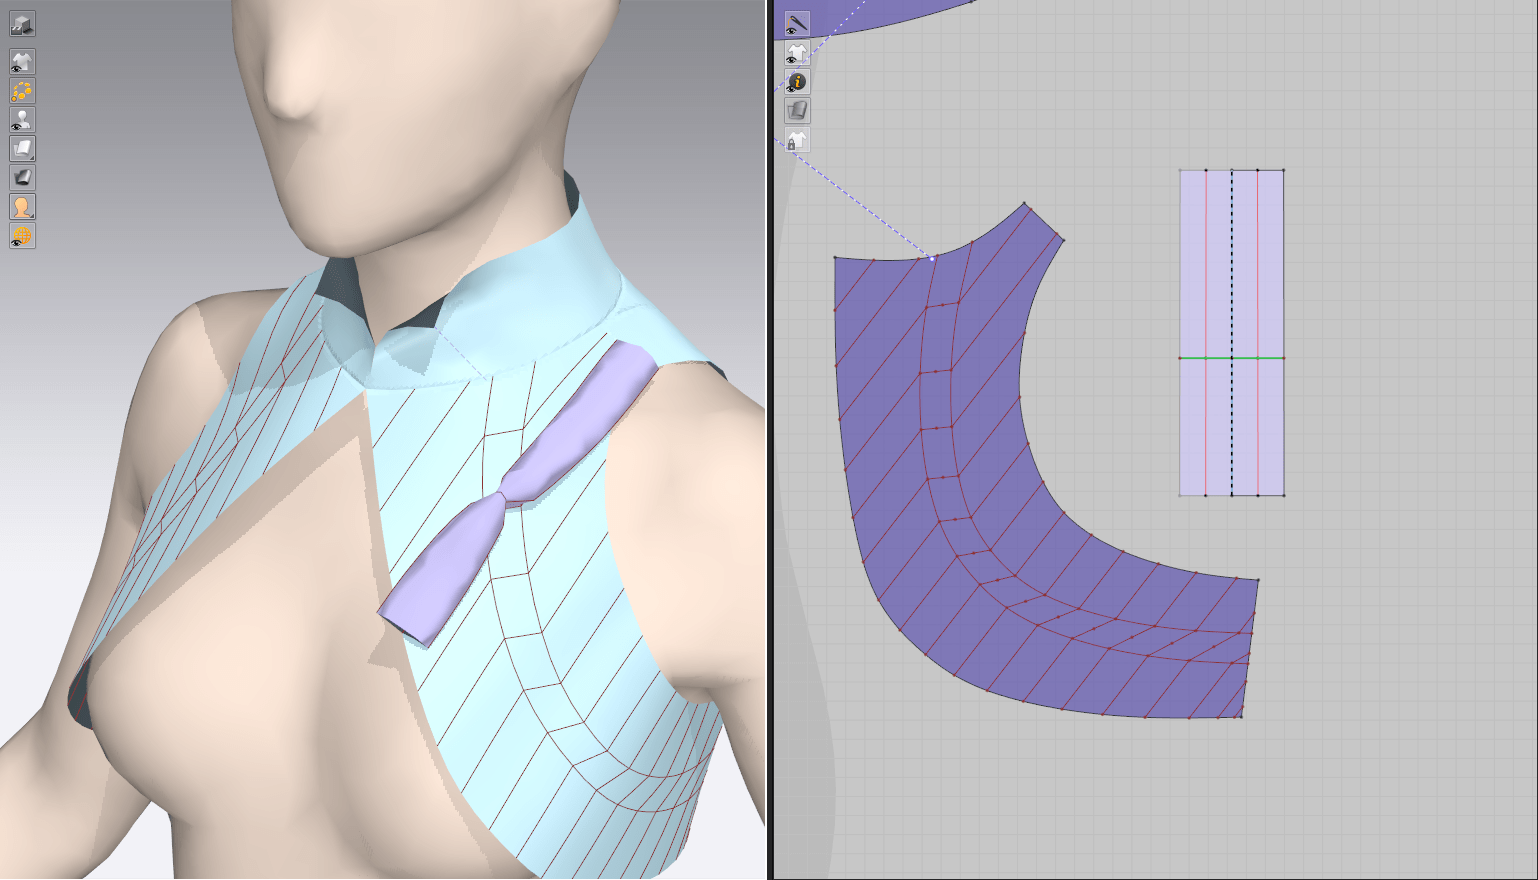
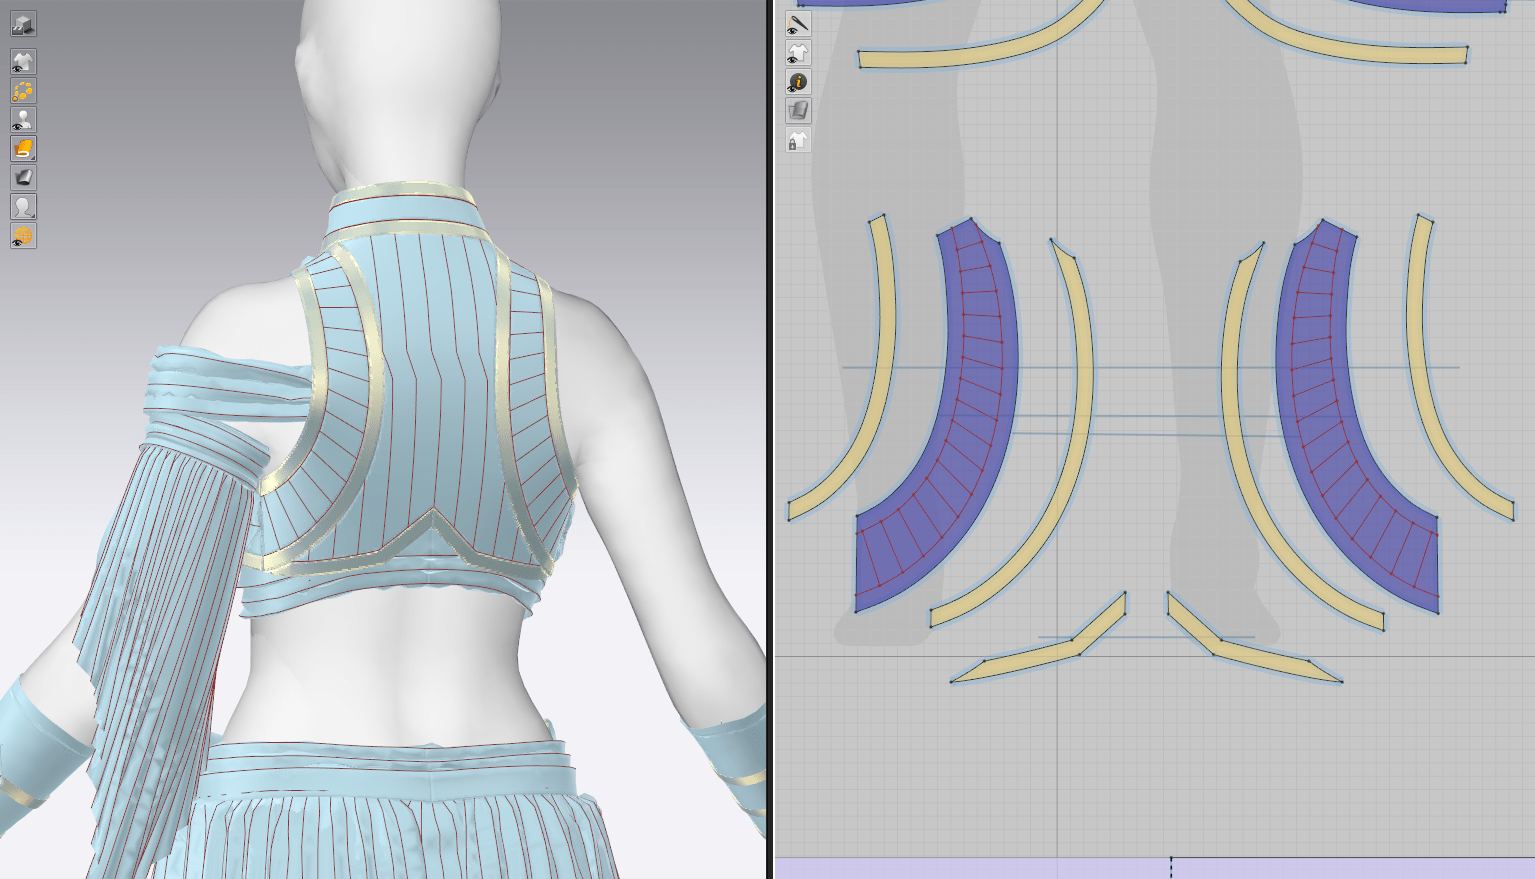
I then cut out shaped trim for all of the armor pieces and along the vest, stitching it down manually as well. There was yet another level of complication here, since half of the seams needed to be ‘turned’ and the other half 180 degrees, and I dealt with quite a few wiggling pieces of trim until i was able to track down any inconsistent seams. But finally, once they were all correctly assigned, I was able to repeatedly simulate the outfit while I adjusted other areas and the trim stayed in place.

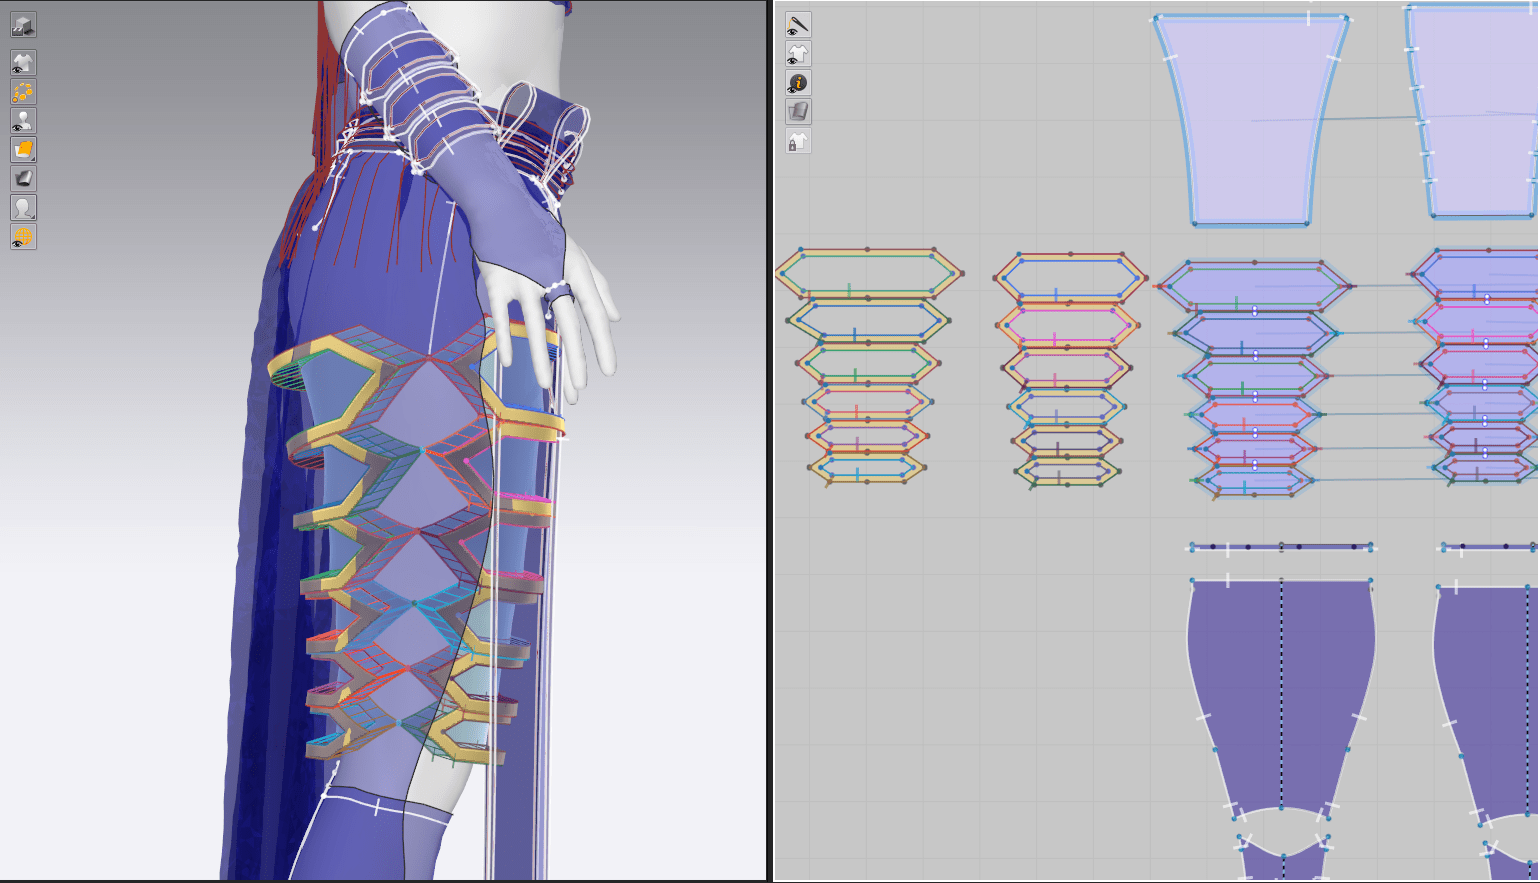
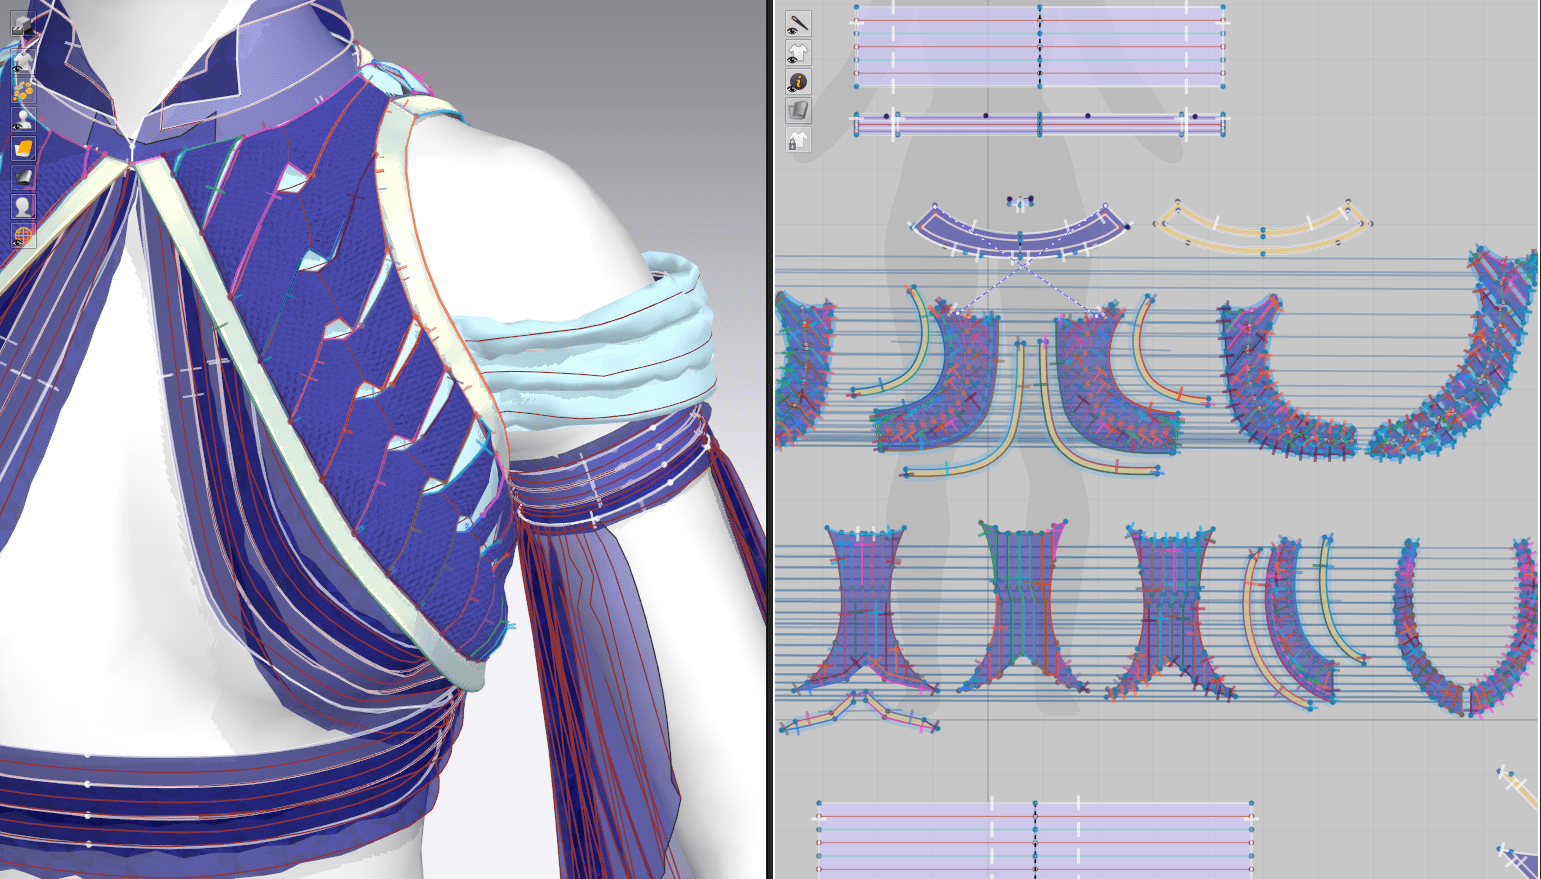
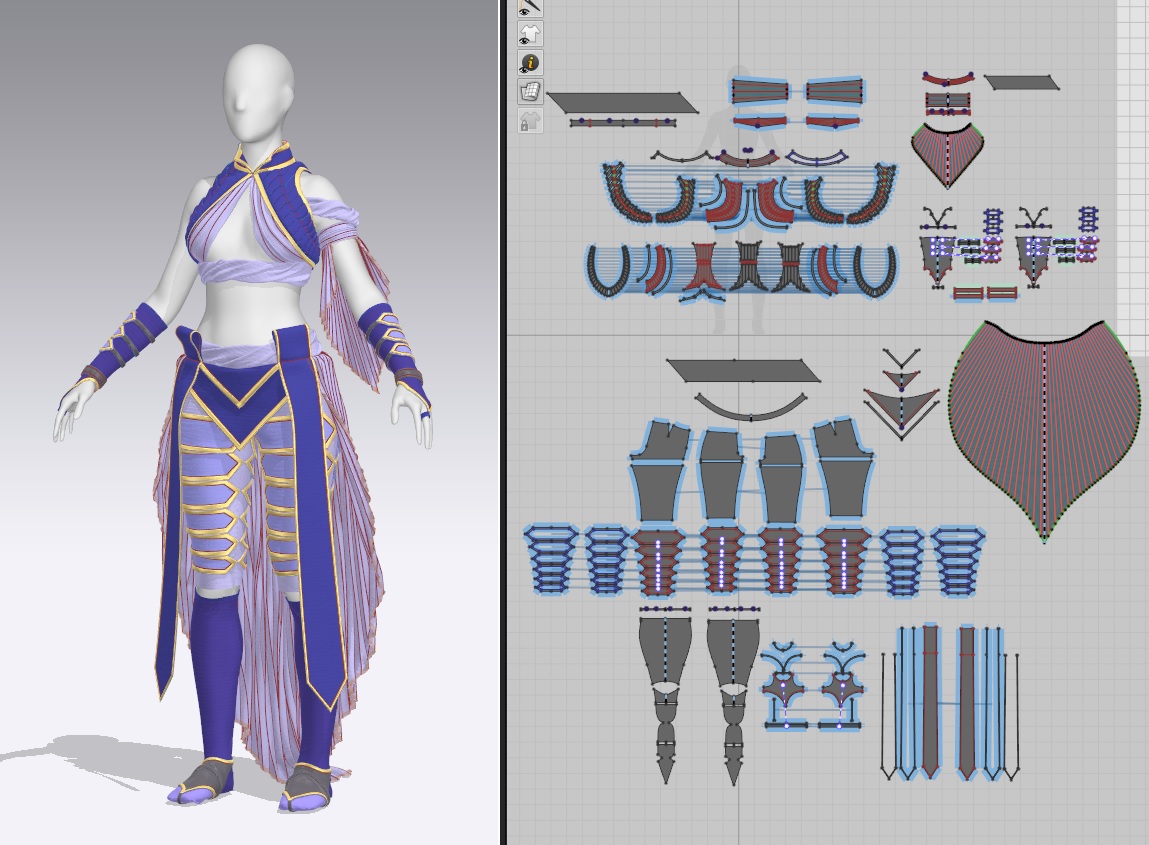
Final Pattern
So here we have it, by far my most complex patterning work I’ve done in MD so far. I’m extremely proud of this piece looking at it all laid out, and I’m now tempted to try out other fiddly fabric manipulation techniques to see how far I can push the software.