Analysis: Cloud Strife Revamp
One of my favorite character artists (turned educator on the subject), Laura Gallagher, recently released a series of analysis videos where she breaks down recently-released game character models and looks for optimization tricks. I found her breakdown of Cloud from the 2021 Final Fantasy 7 remake particularly enlightening, especially as someone new to the concerns of game-ready, low-polygon, limited texture space modeling. I’ve watched a huge number of tutorials on various 3D principles just trying to understand the character art pipline, but I think a lot of these secrets aren’t usually disclosed in education (and perhaps some of them are close to proprietary knowledge within companies).
So here are a few takeaways that seem nothing short of revolutionary to me!
- The model is surprisingly high-poly at 135k tris – obviously this is a fairly high budget for anything but major hero characters, but I’ve been stressing over models with 20 or 30k and it’s good to know that the restrictions aren’t so narrow
- The hair makes up nearly half of the polycount! The face is ~10k tris but the hair itself is a series of duplicated (front and back stuck together) hair cards and almost 50k
- Different polycount versions of the same models are used to ‘downgrade’ characters when they are further from the camera or when detail doesn’t matter as much; e.g. the highest level of detail will be used in cutscenes but a model might be replaced in live gameplay if they’re further away from the focus as a way to reduce scene complexity
- The polygon density decreases dramatically going from top-to-bottom on the character; there is a far higher poly budget in the face, hair, and upper body than in the legs
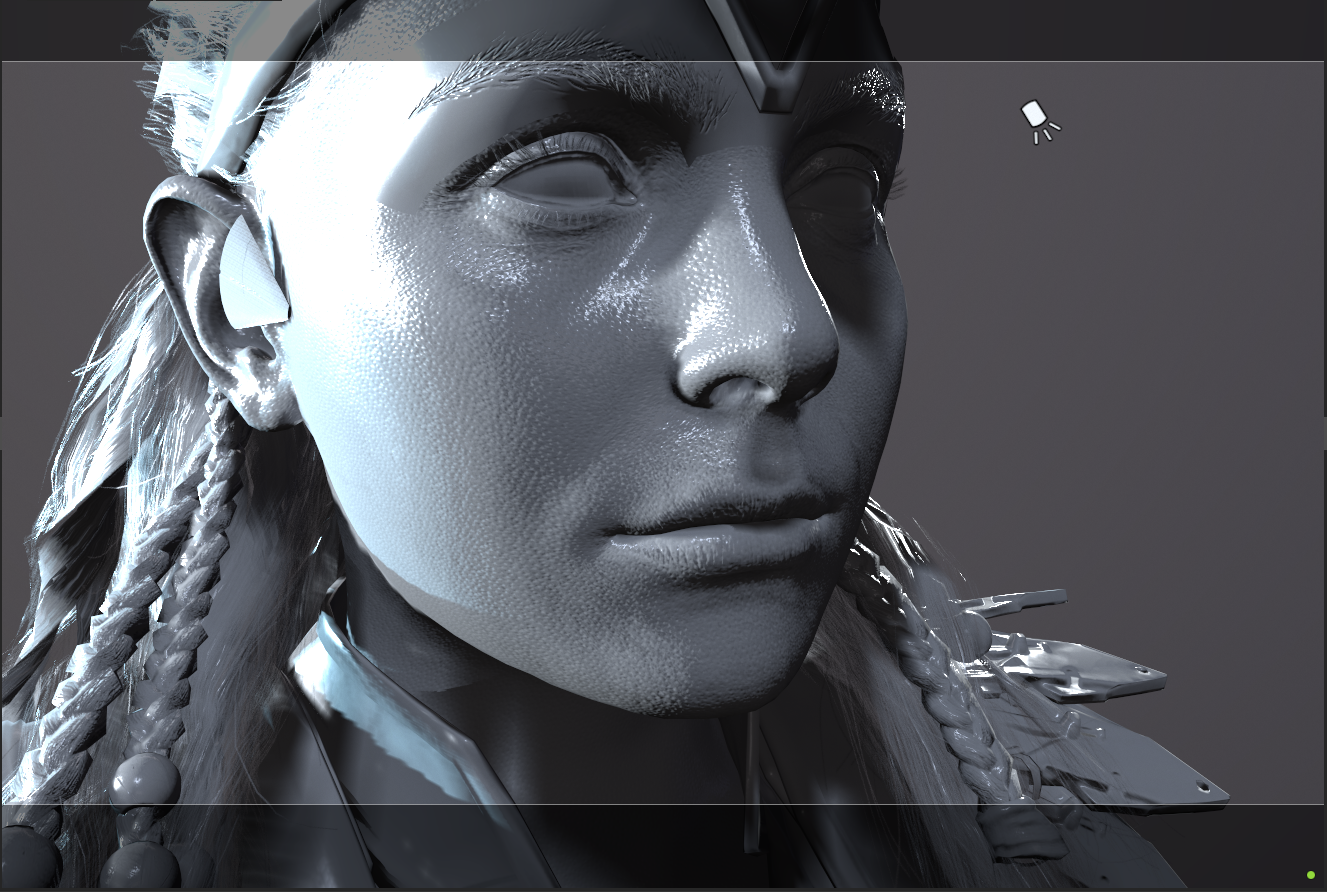
- Much of the fine detail, such as pores and creases in the face, is added in separate texture sets with repeated, tiled textures that are alpha-map painted on for additional variety
Analysis: Horizon Zero Dawn – Carja Blazon Outfit
As someone fairly familiar with the armor sets in the Horizon Zero Dawn game, I was drawn to the mashup artwork that I’m sculpting for the live brief specifically for its close resemblance to one of my favorite canon designs, the Carja Blazon outfit. Thanks to Crazy31139 on Deviantart who shared several Horizon Zero Dawn character models pulled directly from the game, I was able to download and examine a model of Aloy in this costume. This turned out to be incredibly useful as a learning exercise – I feel like I’ve sussed out some very creative, modern solutions that are usually hidden under the hood.
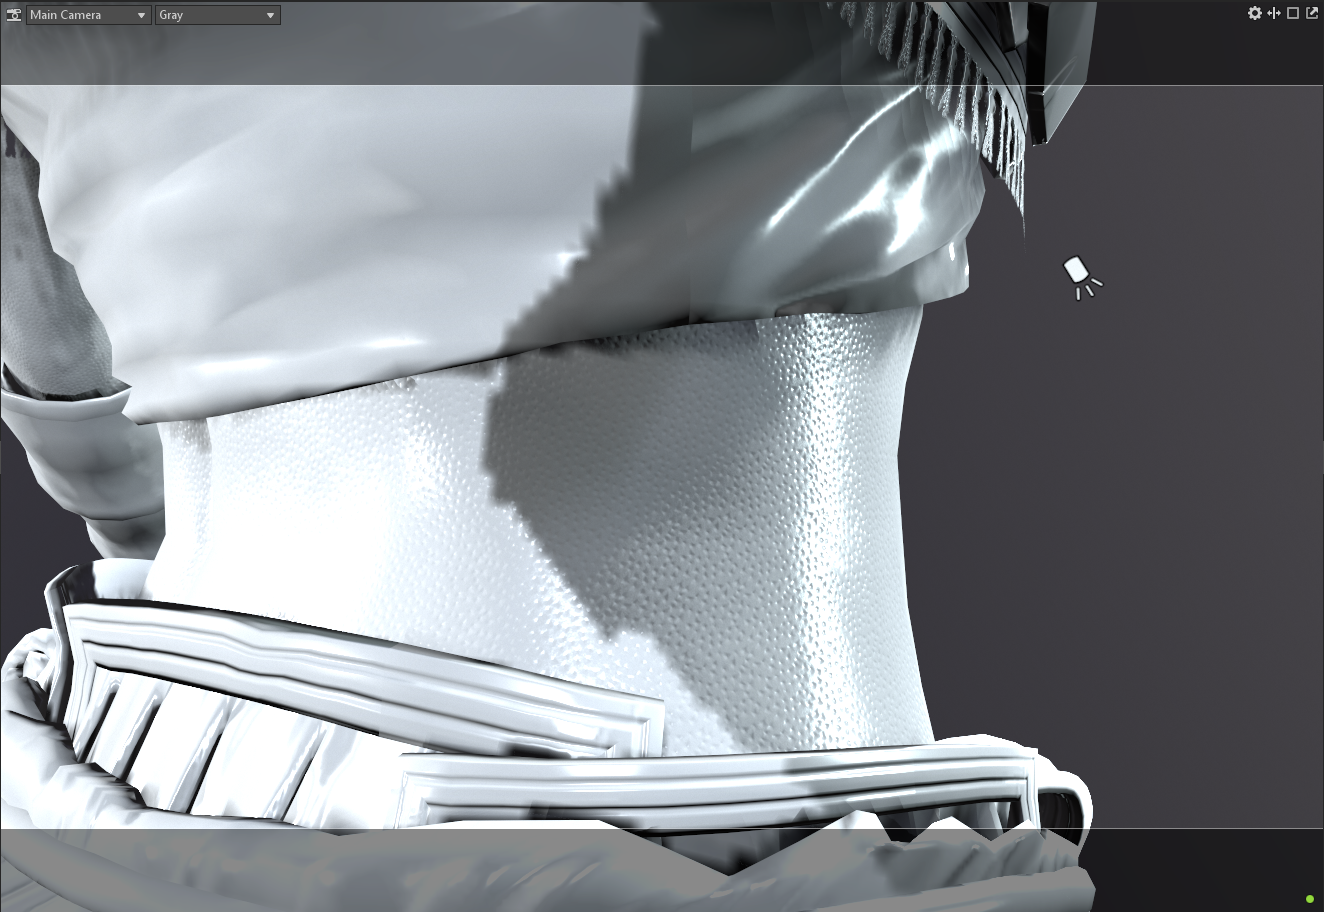

My biggest takeaway is in the many clever ways the artists found to maintain an extremely high level of detail with a limited texture space. Apart from a few elements that are shared across costumes (head, hair, embroidered pouch symbol, arrow quiver, etc.), her entire model is contained in a single 4K texture set. This includes her painted body skin as well as all armor pieces. When examining the base color and normal maps, only the broadest details are included: overall colors, large shadows, major creases. The base color looks about as detailed as you’d expect from a simple stylized character, which makes sense given how much area was squeezed onto a single map. So how did they manage to give Aloy complex fabric designs, visible pores, and leather wrinkles? The same way the Cloud model did: with tiny tiled, repeating textures.
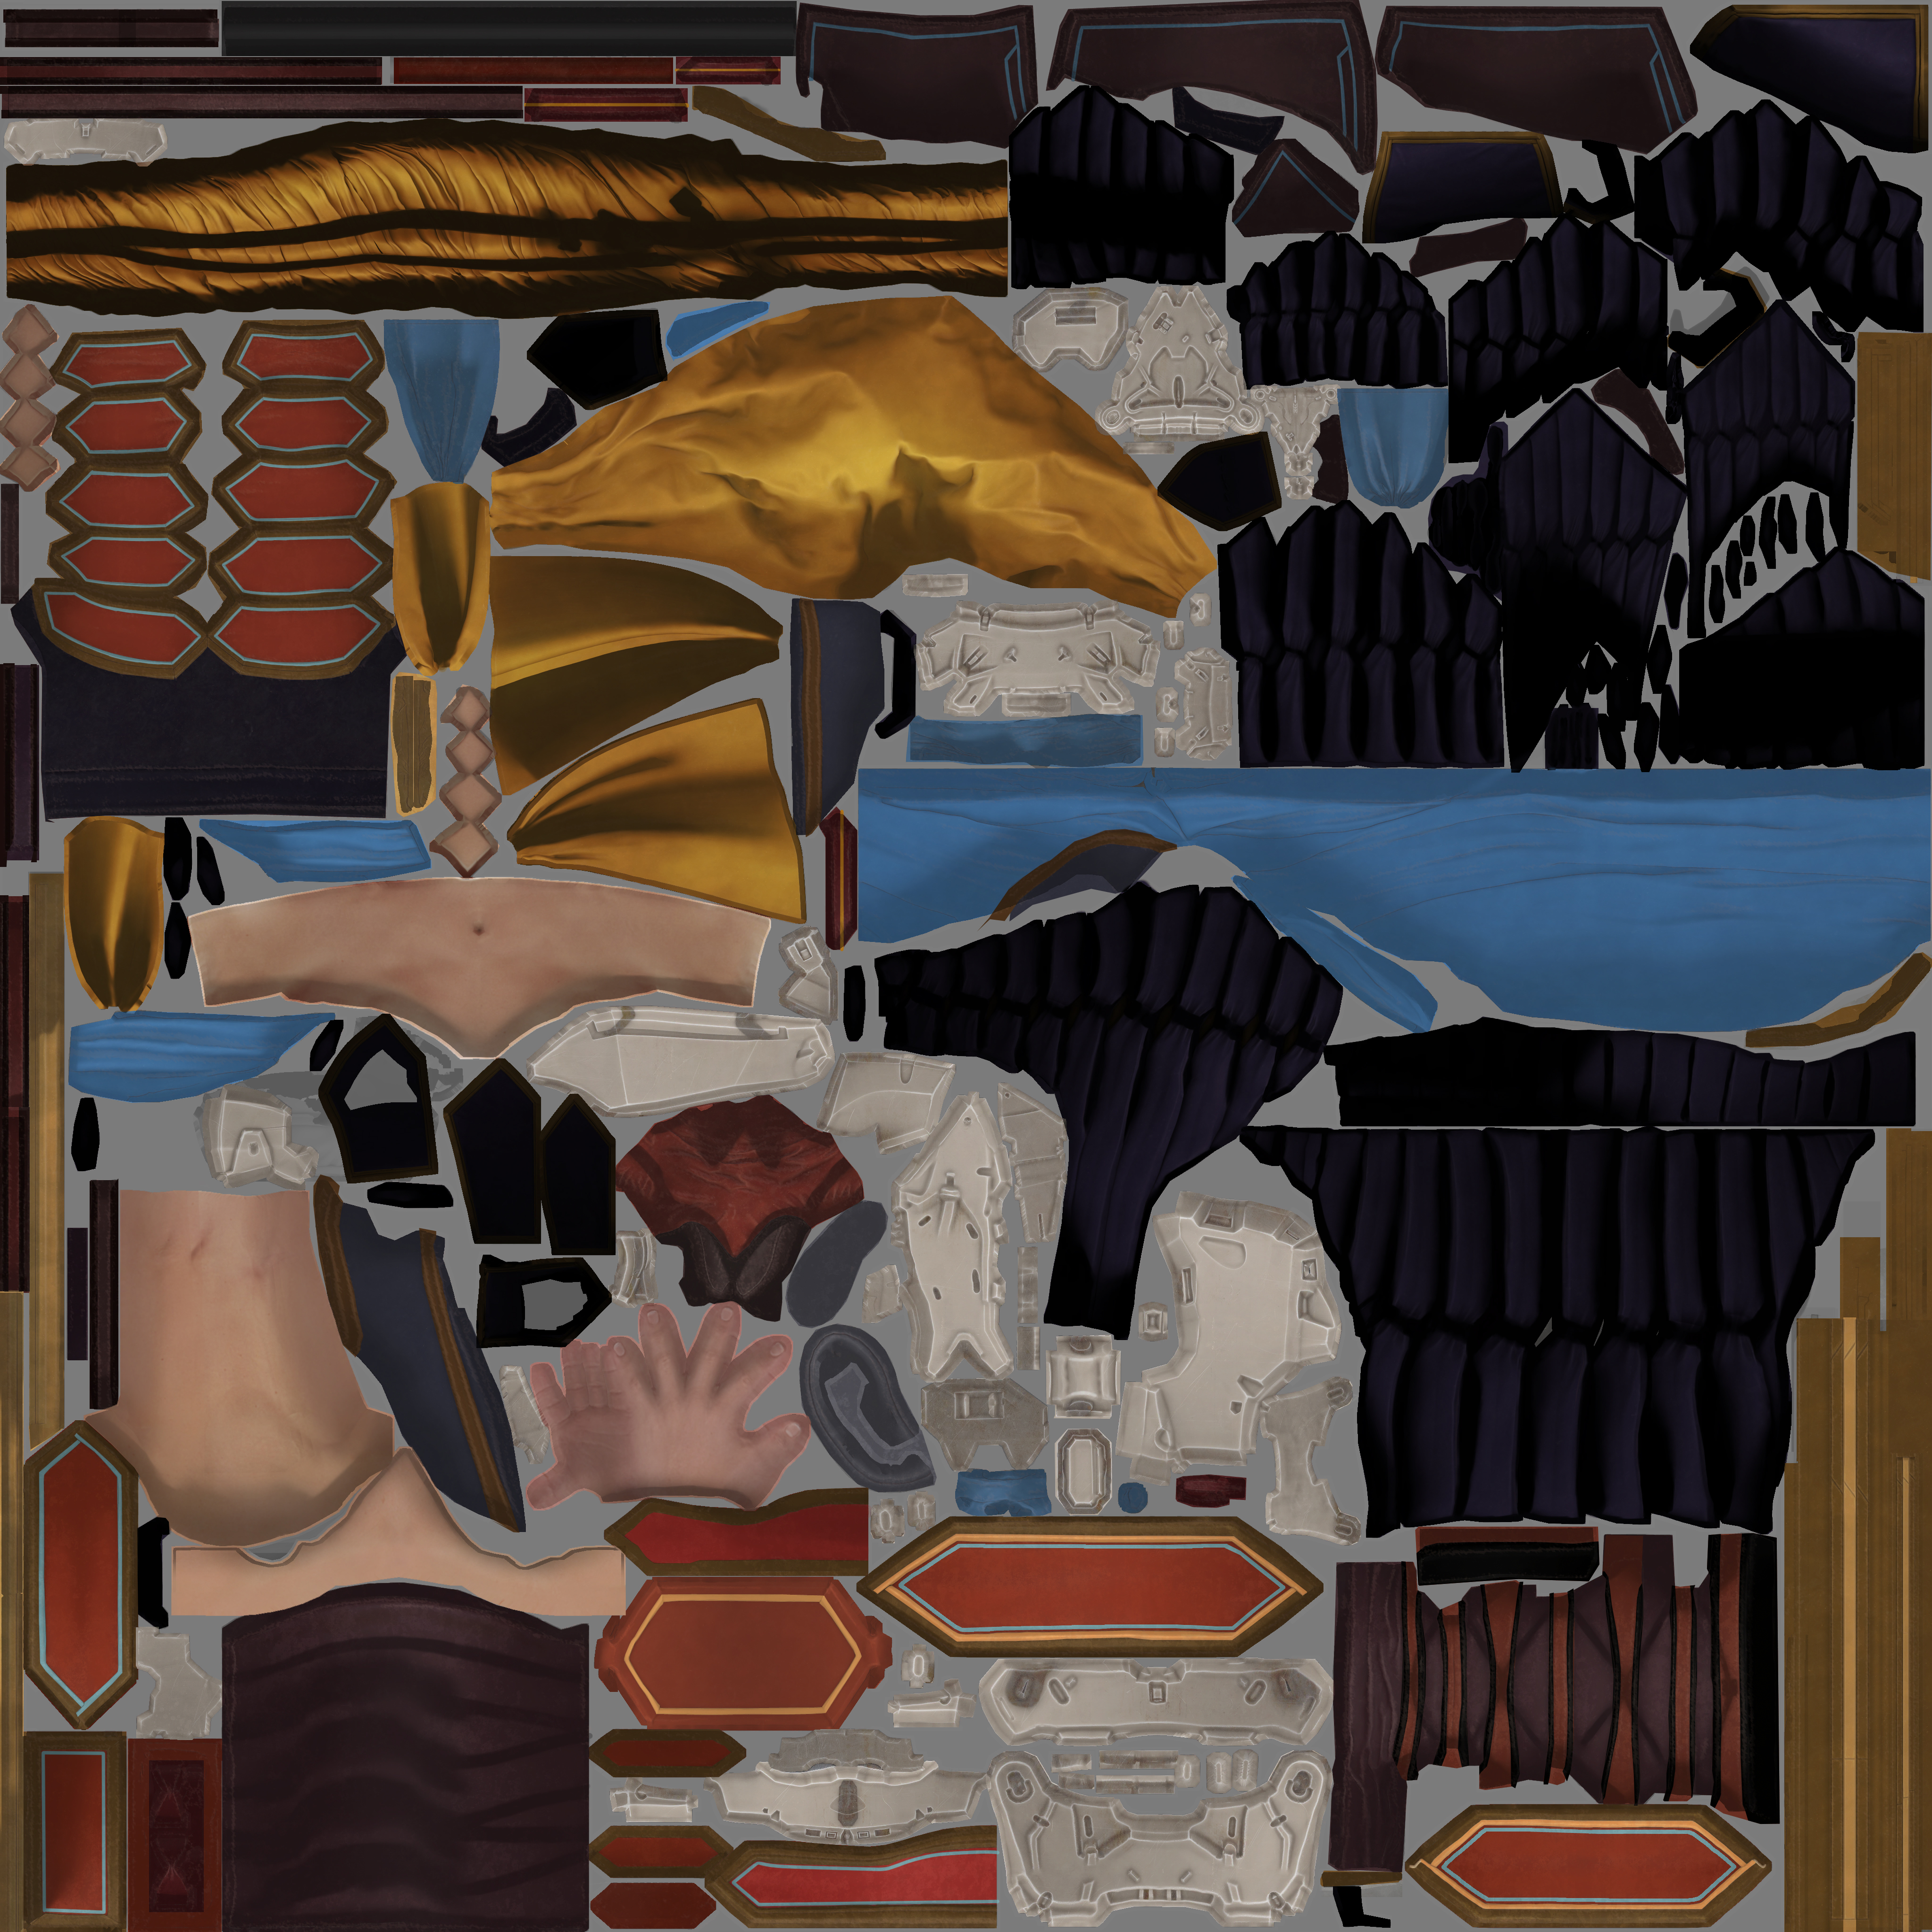
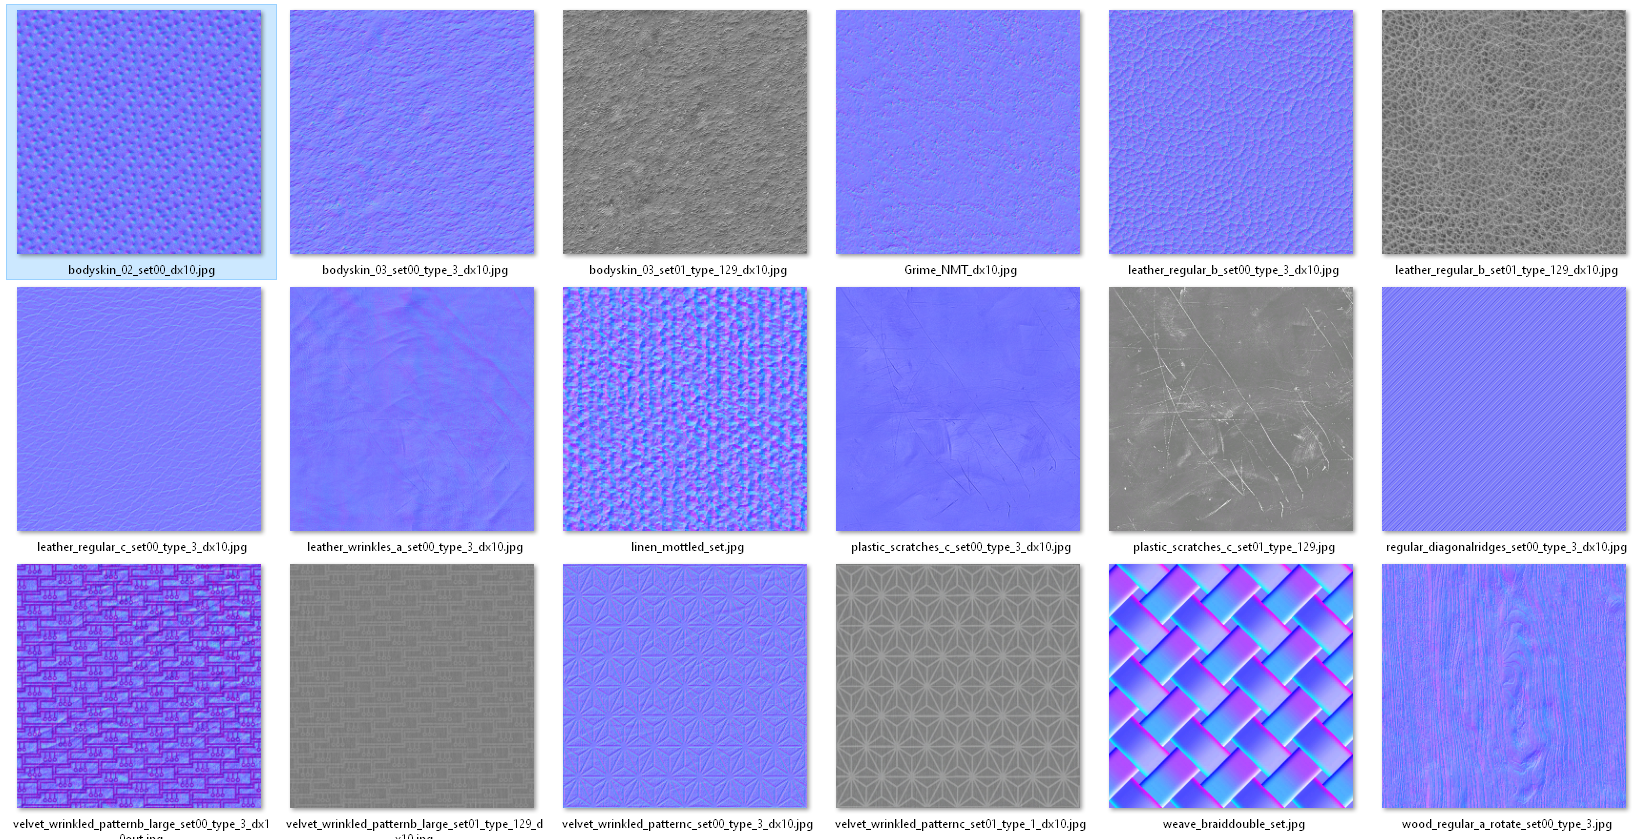
Digging through the source files, Aloy has a slew of small normal and height texture maps (mainly 512px, a few 1k) that are used repeatedly over the surface. Many of these, I assume, can be shared across outfit models: Aloy has multiple costumes that use similar-looking leather, rough-spun fabric, and geometric textile designs; the outfits in the game are each part of a set based on which region they’re from, and share many visual similarities (which means texture sets!). For any of Aloy’s detailed trim (along her vest, outlining all her leather armor pieces), the artists made use of trim sheets (including alphas for things like dangling beads). I imagine this means that they took the UVs for all those areas and unified them to use a single repeating section of a trim sheet.
Aloy also has quite a few elements that use the same textures overall, such as a dozen duplicated pieces of armor and a great deal of horizontal symmetry. The main texture map only has a single version of each unique armor piece, despite Aloy having many iterations of several pieces across her costume. It looks like some of the pieces were scaled or mirrored, with additional details tiled on, all to disguise the fact that there is so much repetition.
As I do so much with textile design in particular, I’ve been especially frustrated by how fabric details (individual threads, embroidery, beading) are lost, even if I devote several 4k maps to a single costume. Visible threads tend to disappear into mush or create a moire effect, and I’ve been puzzled as to how other artists have been able to maintain them; obviously, this is the answer!
Daenerys Application
Since my Daenerys model will have many of these same elements (leather armor, similar fabric pattern), and because I’m limited to one 4k texture set and 2x 2k sets, I plan to apply some of this knowledge to my live brief piece. I plan to have the 4k map devoted to her clothing, one 2k map to her head/body/hair, and one 2k map to her armor (and armored dragon, if I have time to make it). I may cheat a little and include a few tiny repeating textures as well for the extensive gold trim on her outfit and textile design. The biggest way I can save myself texture space is in re-using armor pieces: this particular design has about two dozen copies of the same spiky brown piece (making up pauldrons on both shoulders, spread out below her knee armor, on her headdress, and decorating her shoes). There are very few other unique armor pieces, but it’s not immediately noticeable because the repeated ones are scaled, squished, cut off, or mirrored. If I can make a single texture for this piece and simply duplicate it, that’s nearly all of the armor sorted! I’d also like to try and create modular armor pieces that can be replicated in the dragon, which shares a lot of visible elements.
Bibliography
Crazy31139 (2019). Horizon Zero Dawn – Aloy Carja Blazon Heavy. [image] Available at: https://www.deviantart.com/crazy31139/art/Horizon-Zero-Dawn-Aloy-Carja-Blazon-Heavy-801847148 [Accessed 16 February 2022]
Outgang. (2021). Cloud Strife Character Model Breakdown (Final Fantasy 7 Remake). [Online video]. Availablle at: https://youtu.be/w8SjXHQ8ASY [Accessed 14 February 2022]
