Additional Inspo
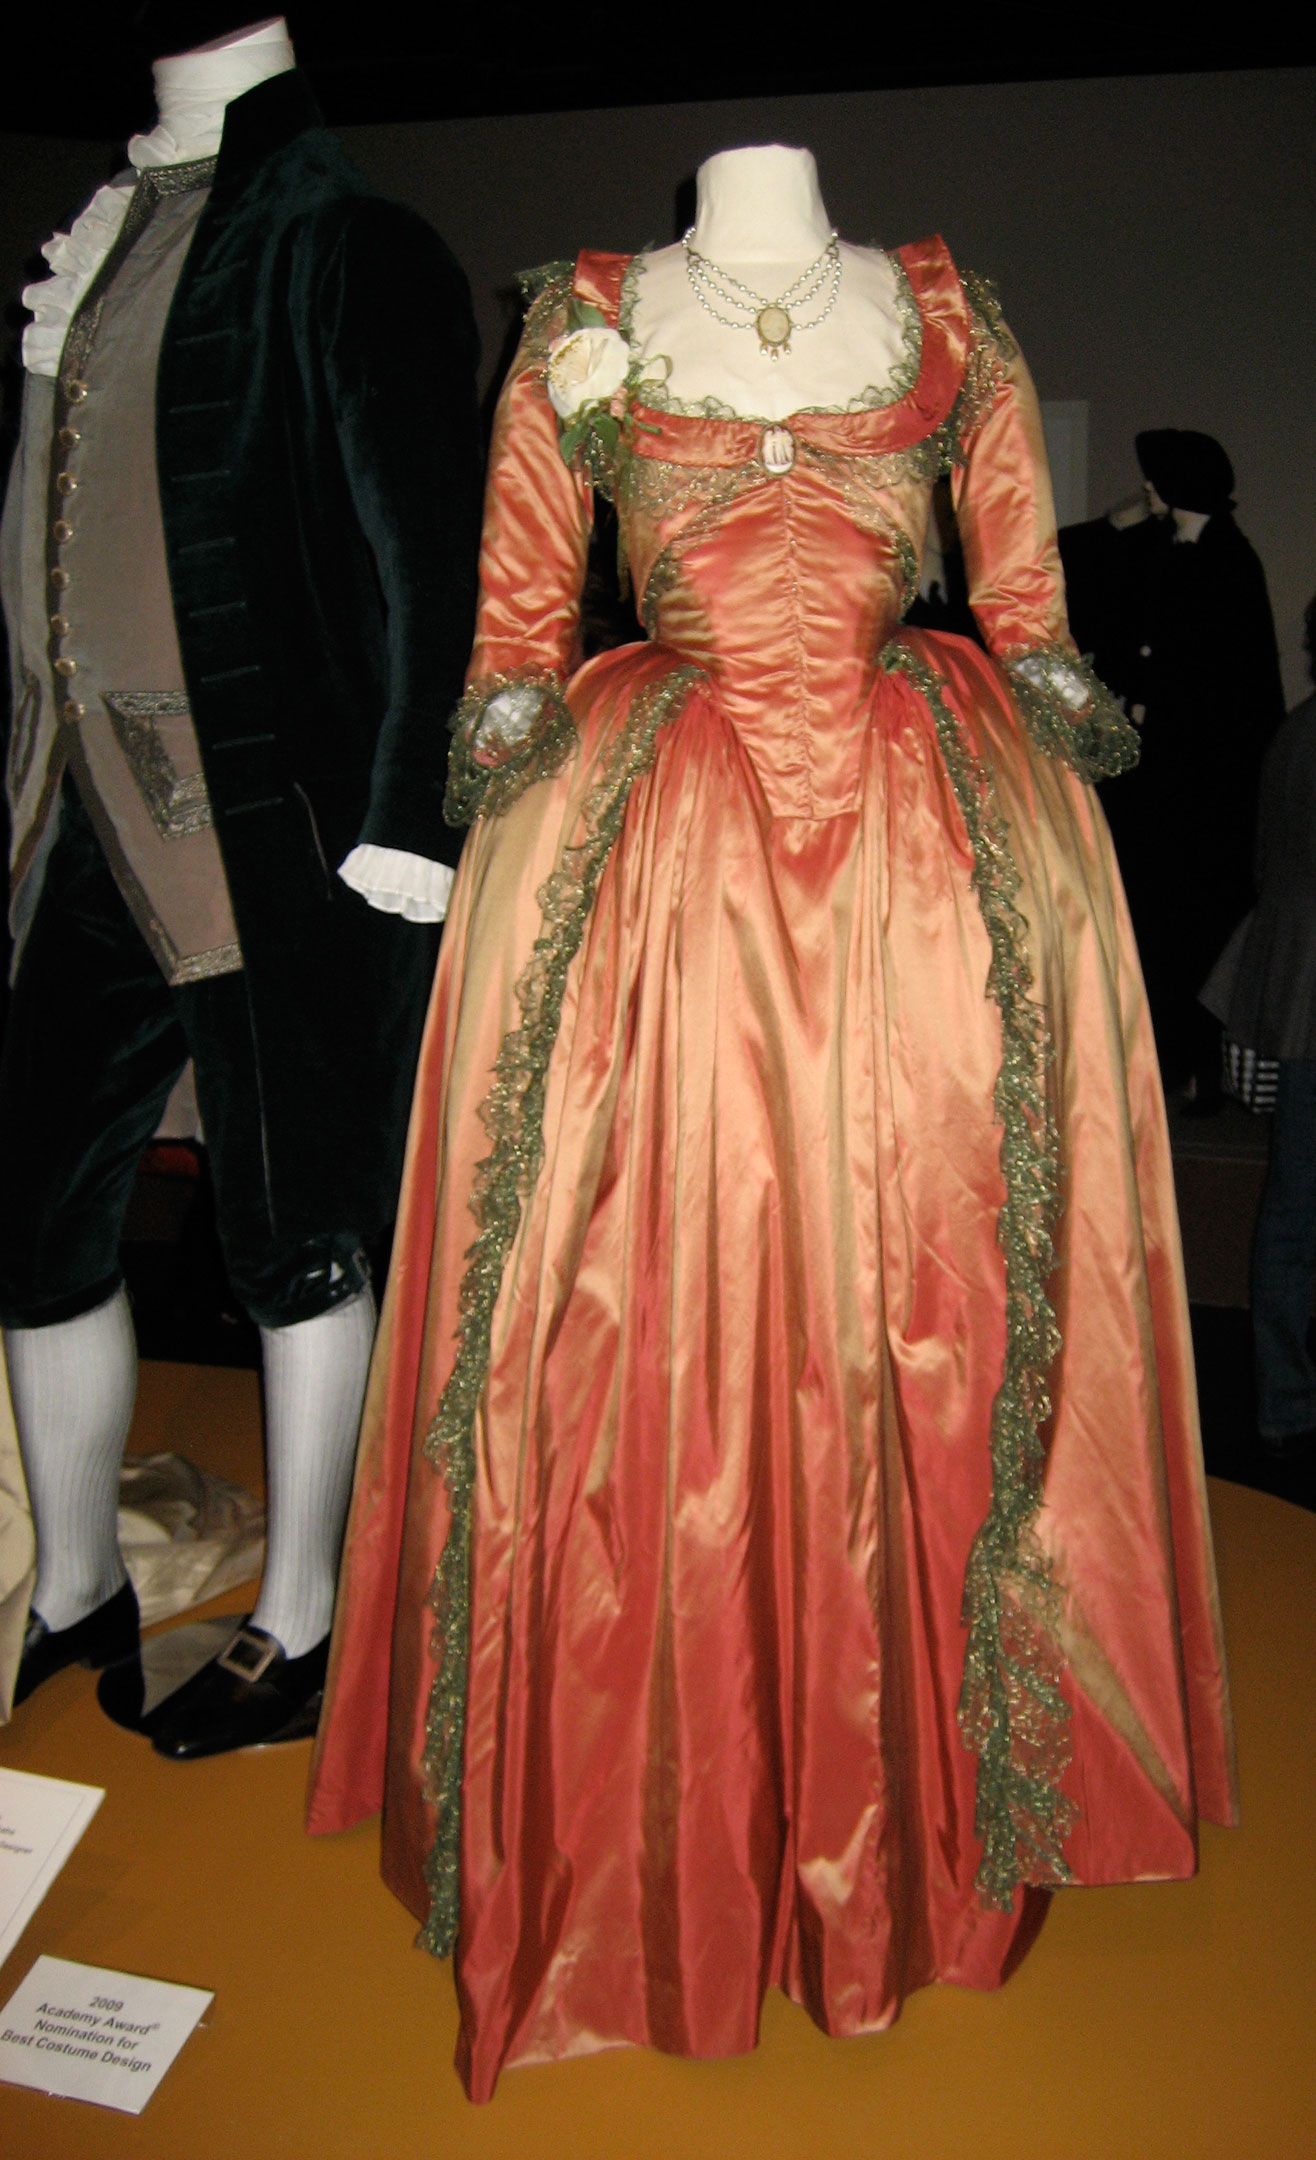
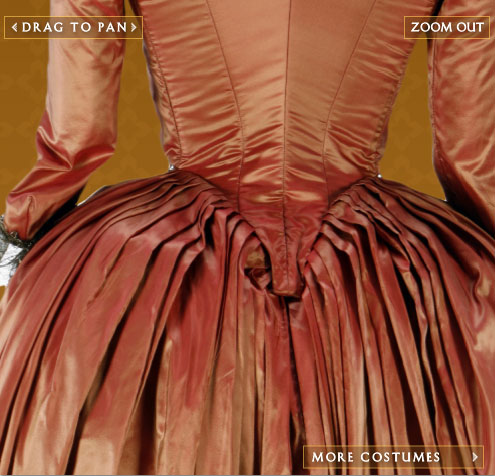
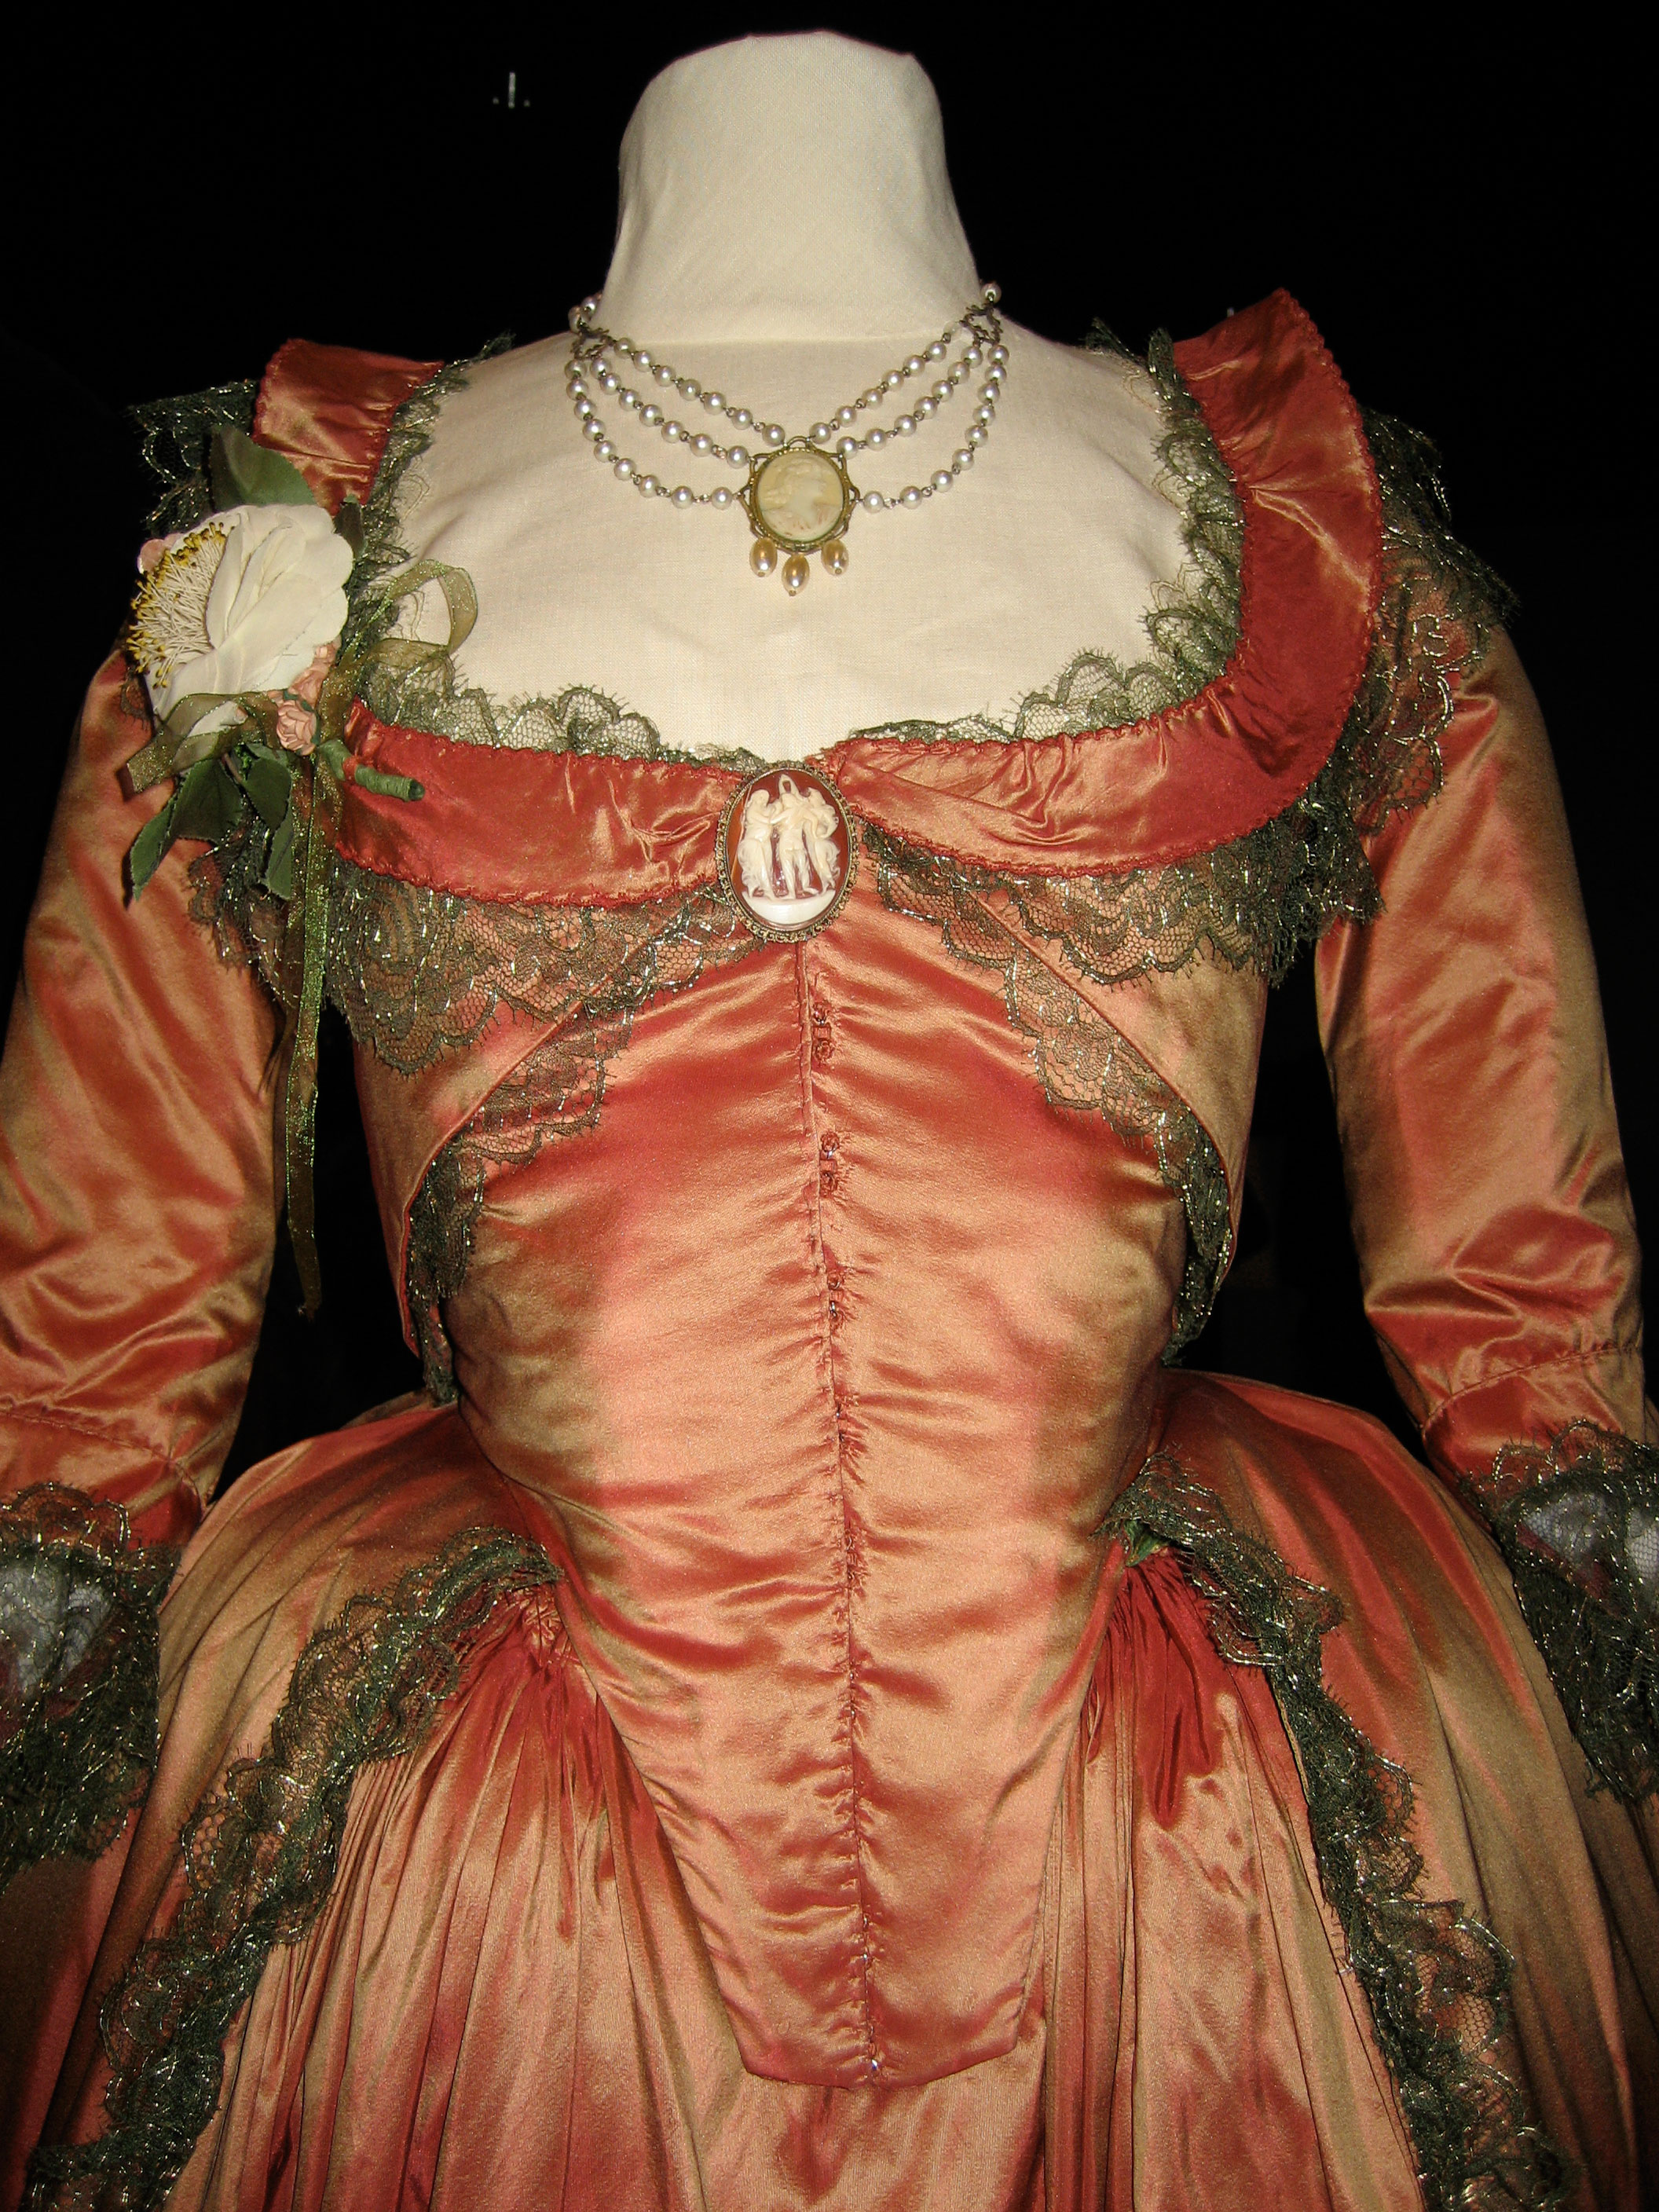
I finally sat down and watched a film that historical costumers have been drooling over for a decade: The Duchess. The entire move is full of incredible, quite historically accurate (at least in silhouette) costumes, and I was immediately drawn to the design of this rust and gold gown worn by the protagonist. Since the shape is already fairly similar to my previous work, it shouldn’t be too much of a change to add some of the bodice and lace details. I don’t think I’ll be too accurate to the colors, as I want to experiment with dramatic color schemes, but it’s an excellent reference for wrinkles and texturing overall.
Structure Adjustments
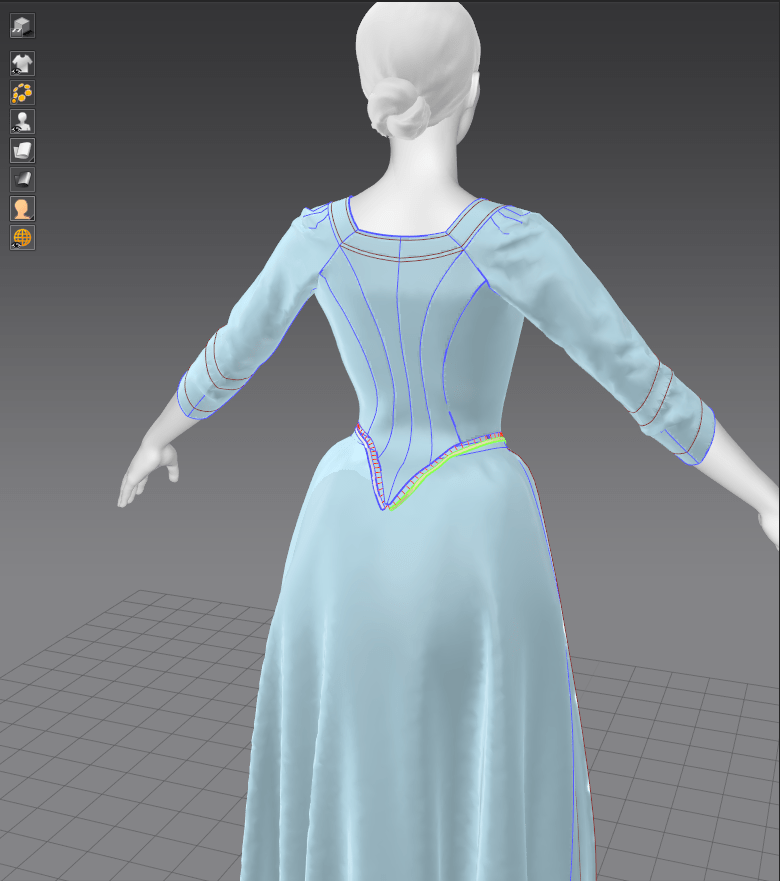
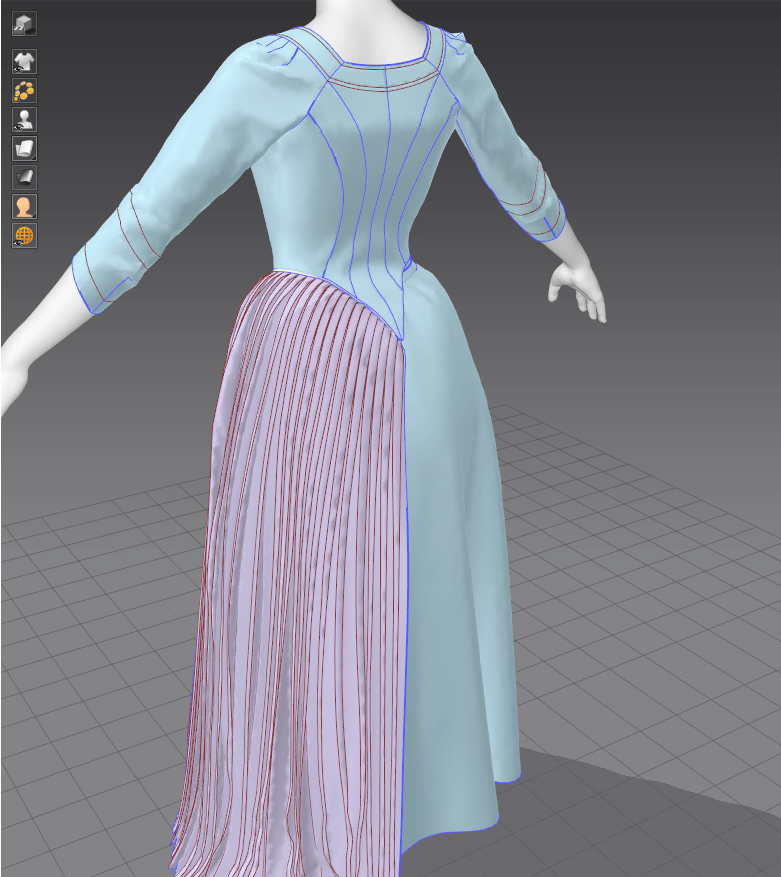
Looking at the overall silhouette of my previous gown, it was clear that I needed to make some adjustments to the skirt foundation layers. I tested out a basic split rump design, but missed the padding provided by my previous bum roll. In the end, I created a combination of the two, splitting my previous skirt padding down the middle to allow for the dip of the back bodice to continue more gracefully into the overskirt. I then created a smoother petticoat over the top in form of an (inaccurate) circle skirt in order to create a smooth base for the skirts.

Pleats: Round Two
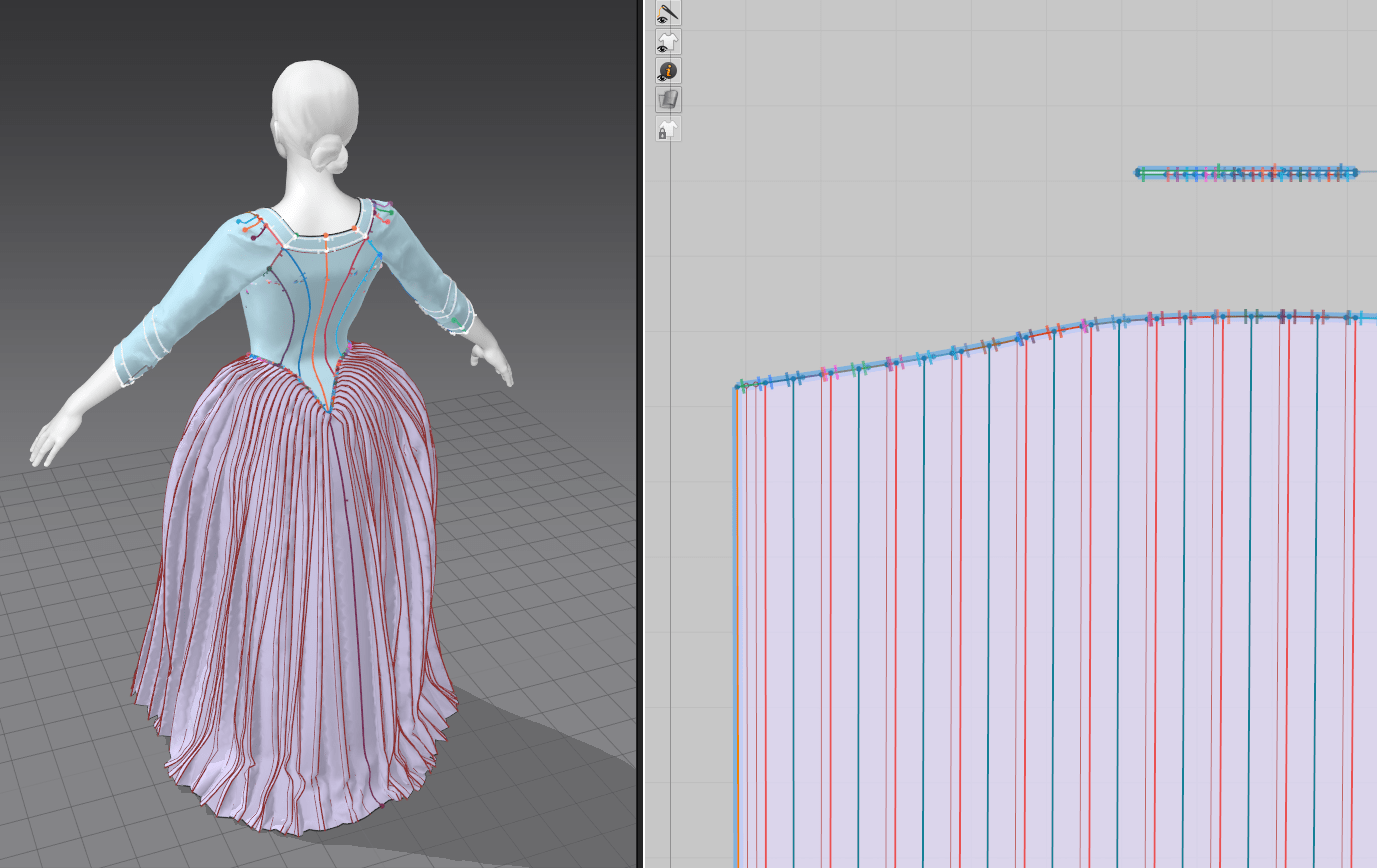
Knowing what I do now about the ins and outs of Marvelous Designer, I decided to revisit my old nemesis from the one-week project: the pleating system in MD. I simply couldn’t achieve the correct skirt silhouette with cobbled-together circle skirts. After experimenting with small sections of automatic pleating, I realized that there wasn’t anything magical happening – the pleating tool simply stitches rows of pleats with the correct settings, and can be reverse-engineered. By examining the stitch settings, I had a major ‘aha!’ moment in why my attempts at manual pleating had resulted in so many overlaps and conflicts: all of the stitches where the pleats are stitched to each other (as opposed to the waistband) are ‘turned’ in the stitching direction, rather than 180 degrees as is the default. Once I discovered that, I was able to manually stitch each pleat down on a rectangular piece of fabric to great (if tedious) effect. I then adjusted the upper edge of the skirt to follow the line of the bodice rather than sit underneath, as it should for historical construction, and sewed the skirts down.
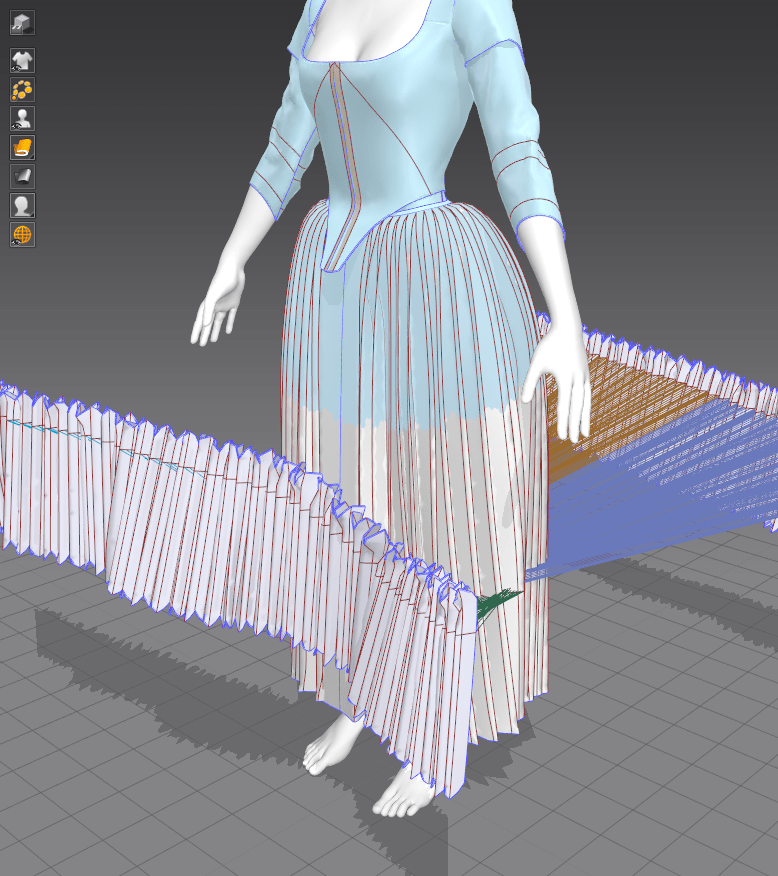
I knew I wanted to add loads of ruffles and pleat details elsewhere on her garment, so I applied my newfound knowledge of manual pleating to box pleats and accordion pleats. This was quite straightforward, but required a fair amount of freezing the underlying garment and simulating the pleats in zero gravity to get them to play nicely. Once I had a set of box pleats, I duplicated the pattern pieces in several areas around the garment, stretching and shrinking slightly so that the pleat math worked out.

Additional Details
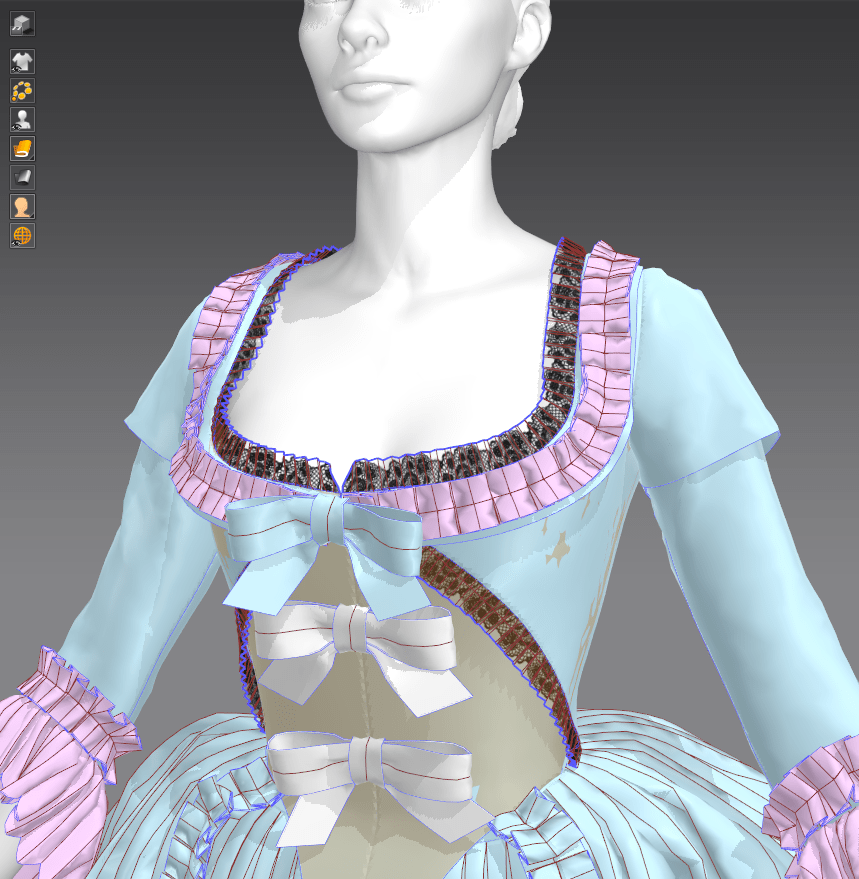
I added a few extra details beyond ruffles and pleats: three bows down her center front, a decorative collar, and gathering tapes for the overskirt. The tapes were the easiest part – I simply created two rectangles, set them to a non-stretch material, and used the tack function to tack them to places on the overskirt. A little back-and-forth simulating and I had a nicely voluminous robe a la polonaise on my hands.
The bows were fairly simple shapes, but were quite frustrating to get to lie flat in the correct vertical order. I ended up splitting them into a bunch of pieces and stitching those pieces down separately, with a strip of fabric covering the center. Finally, I played around a little with the built-in texture map system in Marvelous to put a transparent lace texture on some neck and zone front bodice details. I’ll do the final texturing in Substance Painter, but I wanted to see how these delicate, partially transparent pieces would look.

Bibliography
Costumer’s Guide. (2018). The Duchess – Drunken Gown. [image] Available at: <http://www.costumersguide.com/duchess12.shtml [Accessed: 20 December 2021].
