Dress Patterning
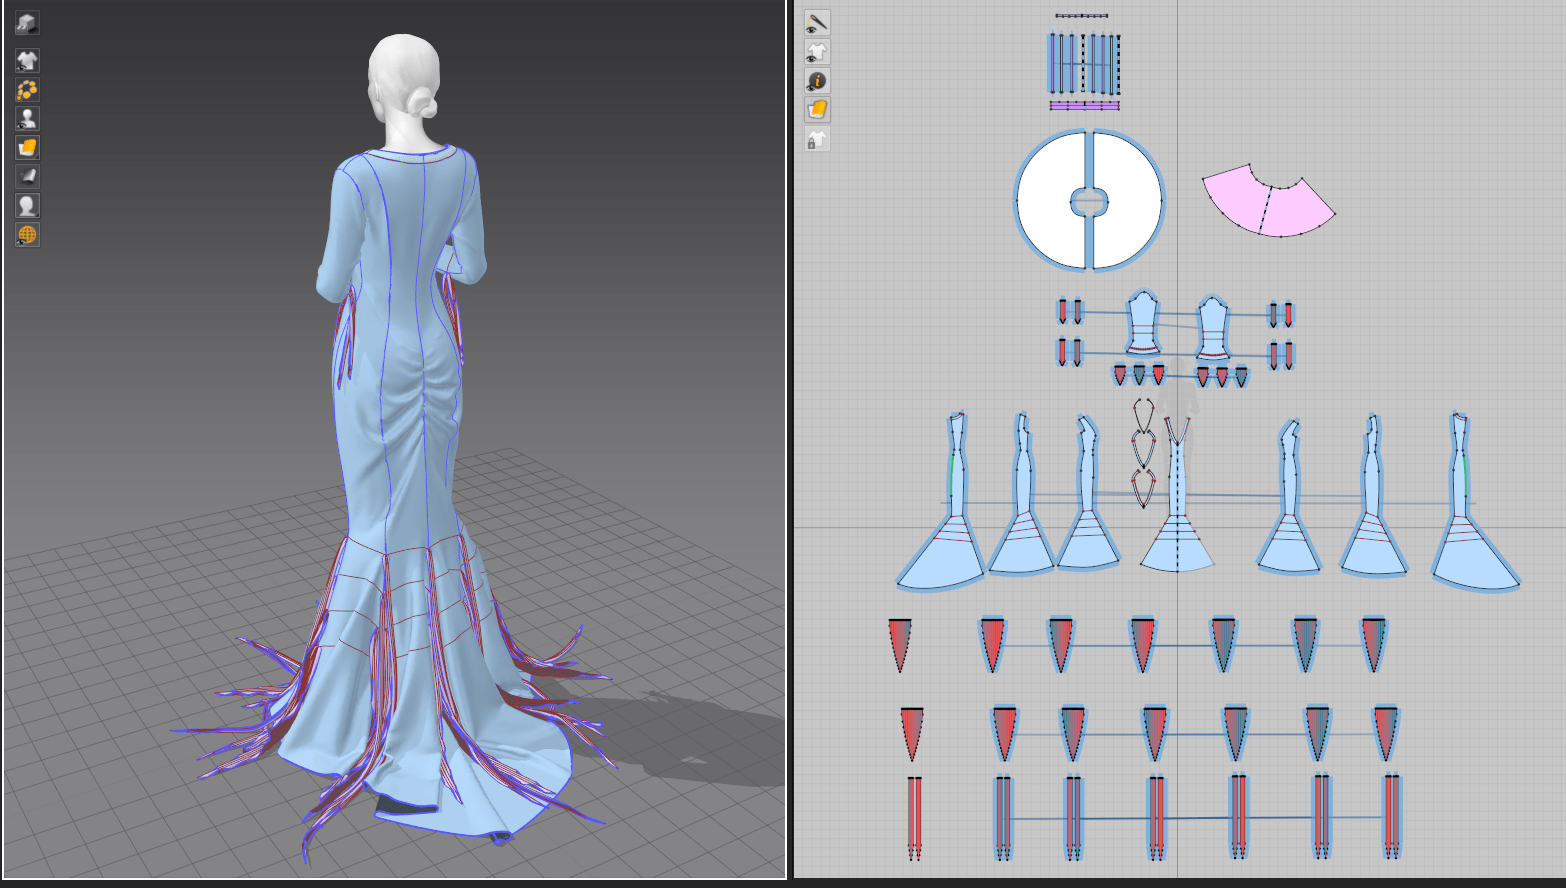
I felt like I had really hit my stride with my discovery of garment design in Marvelous Designer last week, so I knew I wanted Morticia’s fitted black dress to be the star of this assignment. Since I worked partially from a historical patterning book last time (I did some adjusting and fitting work, but didn’t develop the base shapes), I also wanted to tackle patterning completely from scratch. Morticia’s dress is a fairly standard princess-seamed mermaid gown with shapes that I’m familiar with, so I was able to build a basic block pattern from visual memory and get started on fitting.
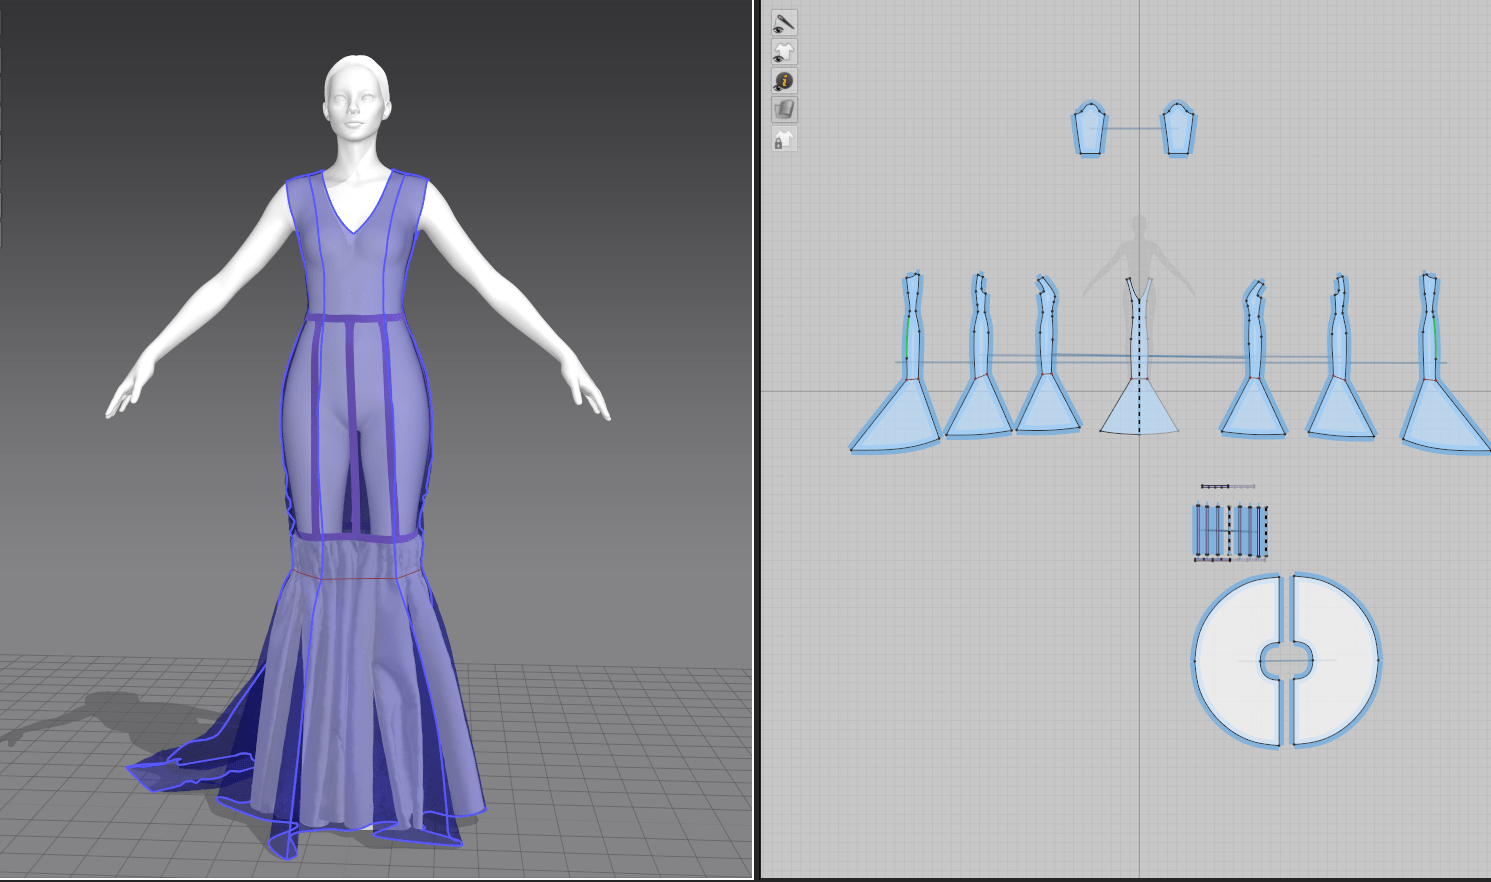
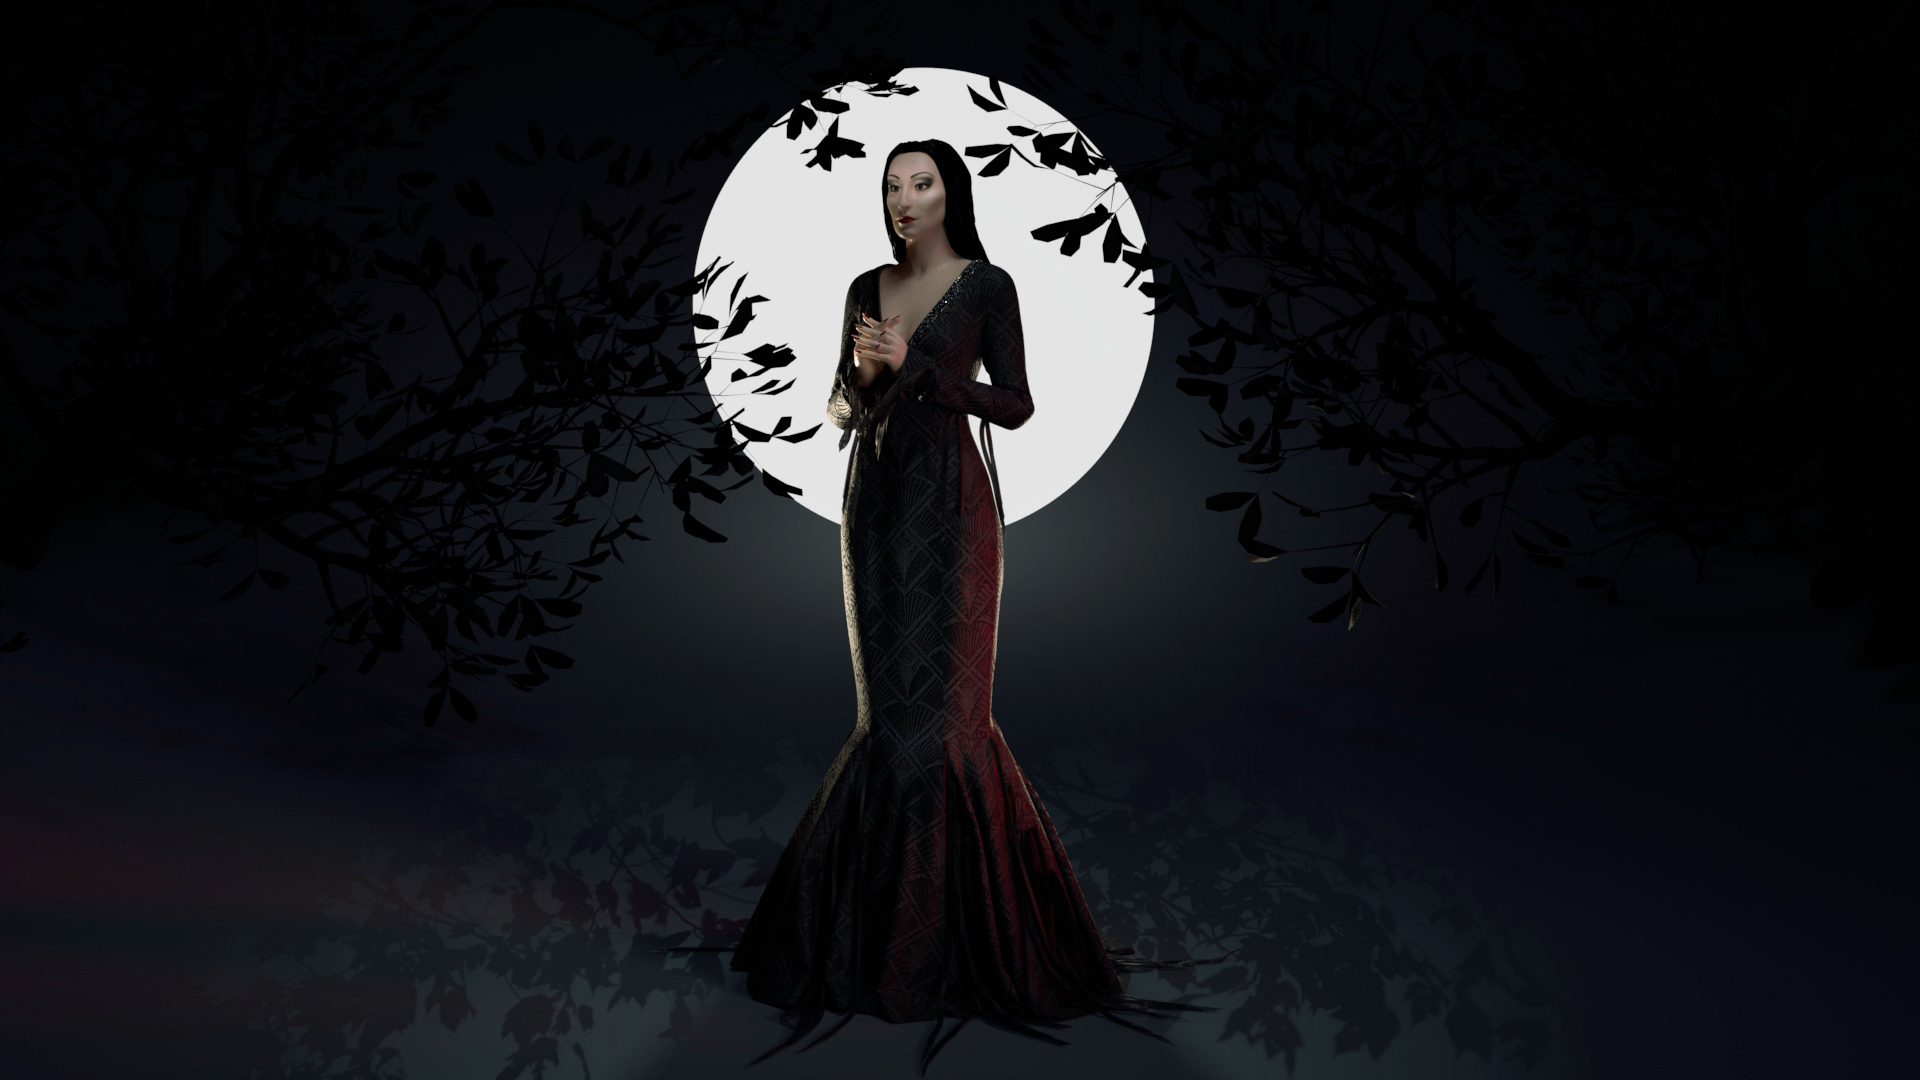
Her base dress came together quickly once I was able to size it onto the standard avatar. It has some slightly unusual princess seams (more typically they curve off to the armscye rather than continuing over the shoulder) and I shifted the angle of the neckline V to sit flatter across her chest, but otherwise it was only minor tweaks. I did end up making the mermaid skirt fuller over several iterations, as I found from watching footage from the movie that the original dress had a lot more volume than it appeared stationary on a mannequin.
Even so, it soon became clear that I needed to add some sort of skirt support in the form of a petticoat to maintain the bell-shaped silhouette of her lower skirt. I was still a bit frustrated with the lack of stiff materials when working on my previous project’s pair of stays, but did have a breakthrough after browsing through still more forum posts: I discovered a feature called ‘solidify’ hidden in the pattern properties menu, where I could drape fabric in low gravity and partially freeze it into shape. I’ll definitely be applying this to the structural elements when I update my previous project!
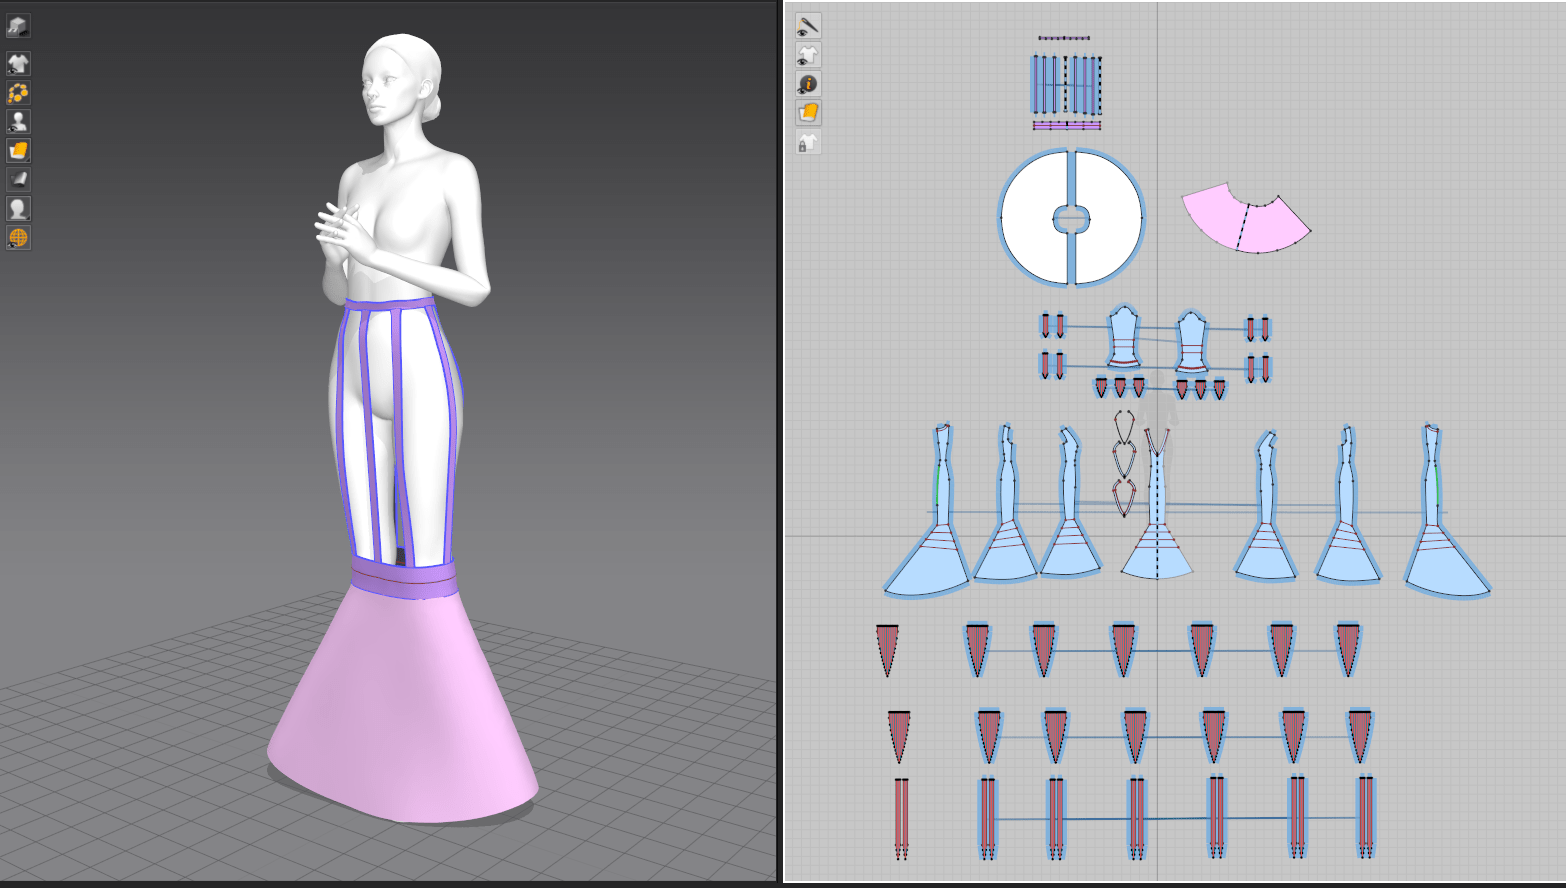

In the end, I gave her two petticoat layers (a stiff cone with very little drape, and a fuller circle skirt on top to soften the support) suspended from tapes at the waist. By setting these pieces to a lower layer than the overall dress, they sat comfortably beneath the skirts with no clipping or conflicts and worked perfectly to keep that shape that I wanted. I later removed them for final exporting, as they just added unseen polygons to the dress that would be exported with a static shape.
Morticia’s dress is also covered in strips of torn chiffon at several points on the sleeve and lower skirt. I struggled to puzzle out exactly what was happening with attachment points (black-on-black reference images only show so much..) but one detail photo showed some of the chiffon was narrowly accordion pleated. Marvelous’s pleating tool works really well for creasing and condensing the fabric but isn’t great at actually sewing the pleats down, so I ended up just using a running gathering stitch along the top edge of all the pieces and letting them fall into their set pleats for a similar effect. From last week, I again used the technique of letting the fabric crease in zero-gravity to set the pleats before sewing it to the garment. I also set the chiffon to a higher layer than the dress, so it would remain on top of the dress without clipping as I arranged the sleeves/skirt.
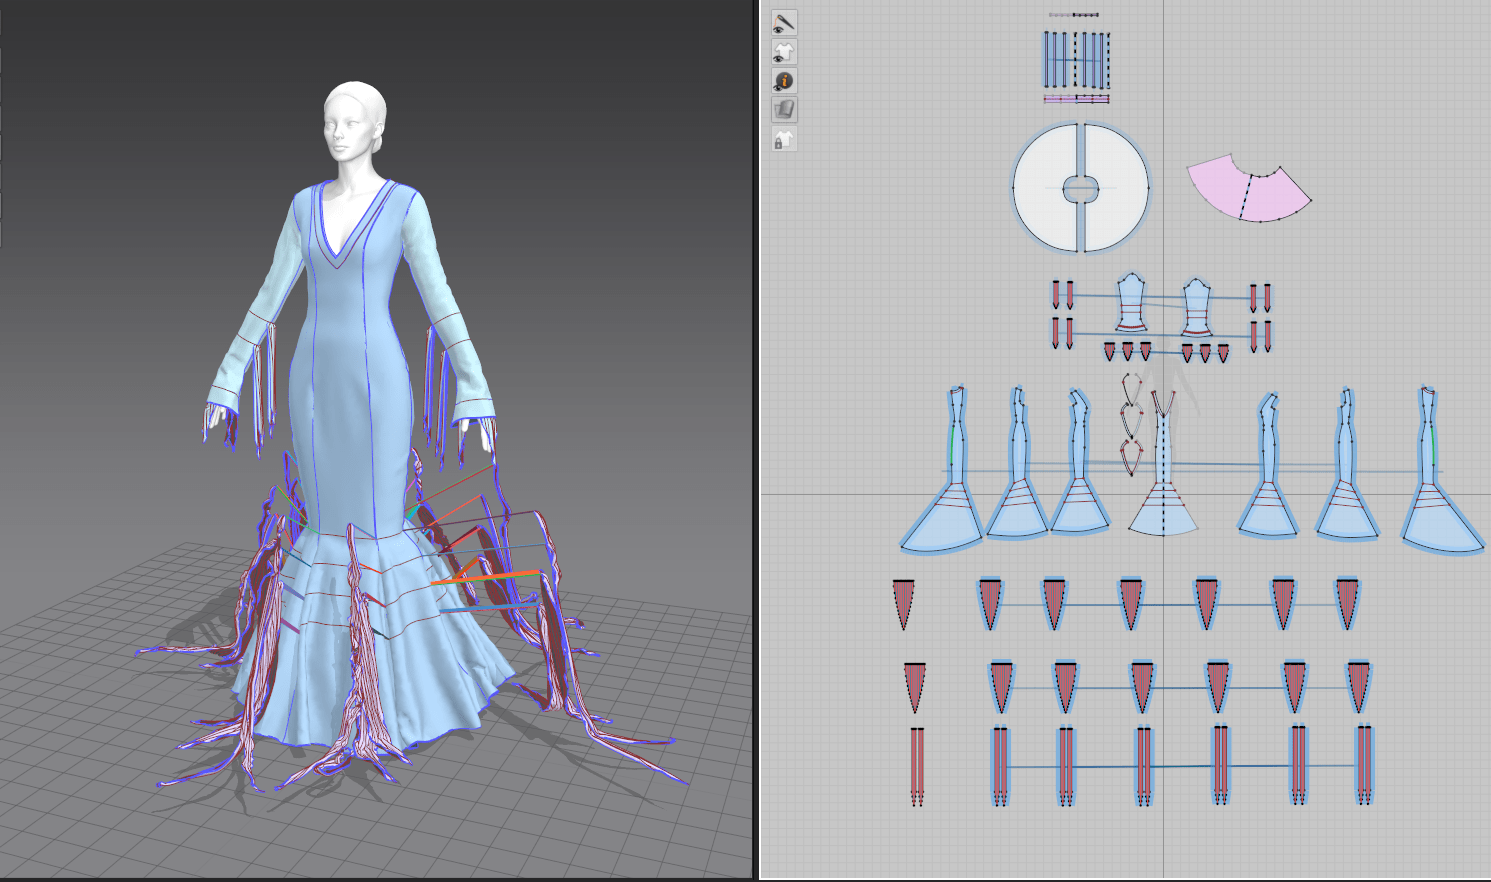
Since the pleats were so narrow, I needed to set the chiffon patterns to a higher poly density, but this meant that my laptop really struggled with the simulation. I ended up having to drape only a few sections at a time, freezing them in between.
Posing
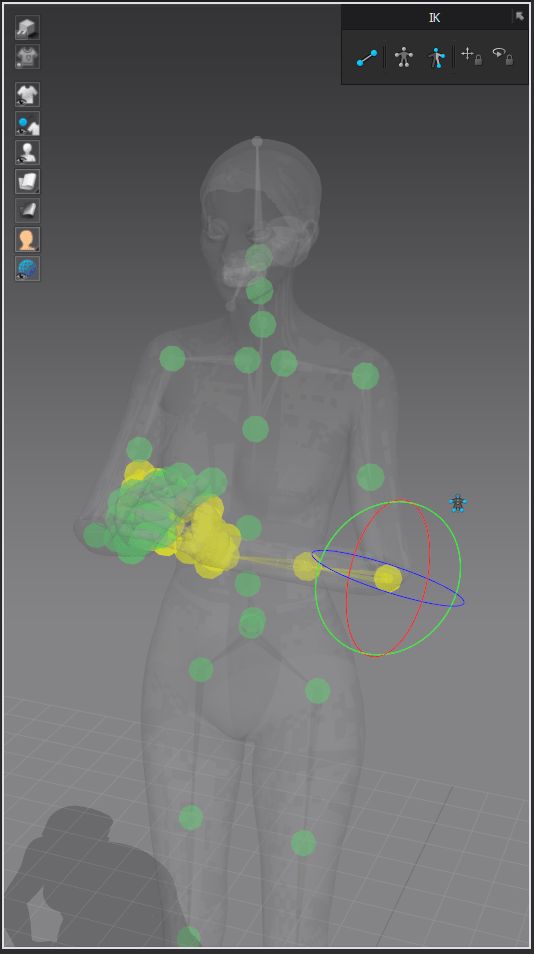
I knew I didn’t have time to create or fully rig a character body (both skills I’ve never done before and learning them was too much to tackle in one week), so instead I focused on one of the pre-made avatars from Marvelous Designer. I had discovered how to adjust various body measurements last week, but since Morticia already has essentially supermodel proportions, I stuck with the default avatar. From there, I did a deep dive into MD’s built-in posing tools rather than pulling the avatar into a separate program. I generally found them to be quite clunky – only certain body parts can be moved with restrictions turned on, so much of the time I was attempting to freely move joints without stretching or rotating them unnaturally. The finger posing was particularly tedious, as they kept deforming once moved past a certain threshold. I think I’ll try DAZ or another dedicated posing program next time!

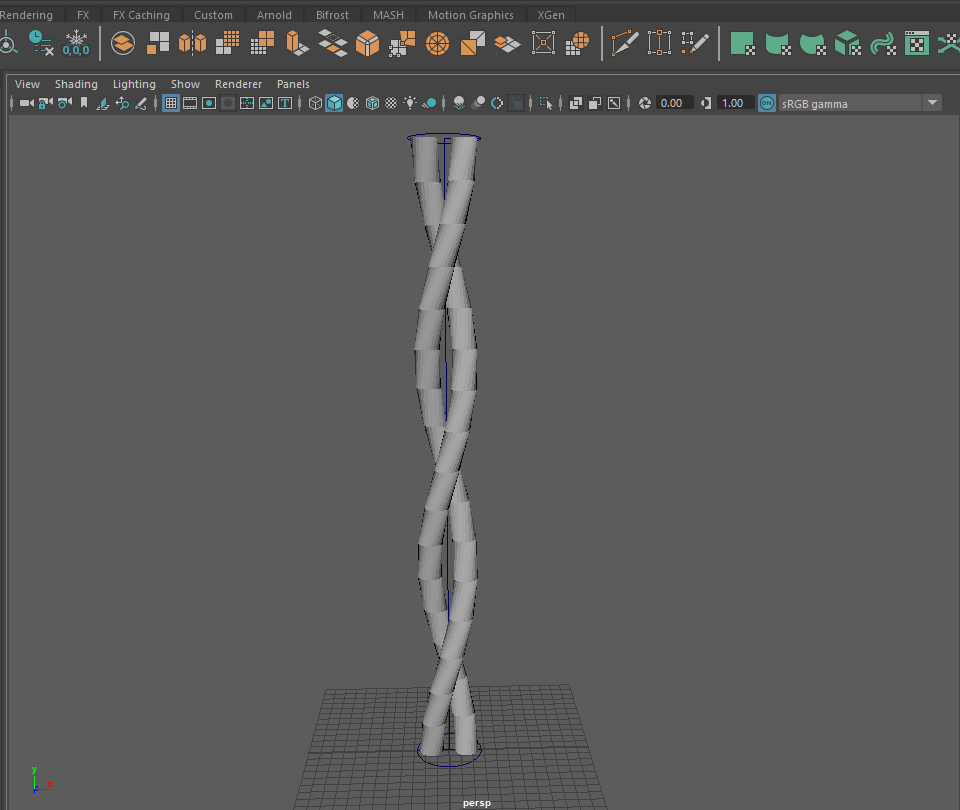
Creating Morticia’s trailing strands of chiffon was another challenge. Simply gathering strips of fabric wasn’t quite giving me the effect I wanted, and looking closer at the reference photos, it was clear that the fabric had some sort of inherent crinkle or pleating effect. To mimic this, I played with the accordion fold tool, but rather than actually creating accordion pleats, I simply stitched the gathered ends to the gown in strategic places. This created a surprisingly accurate draping effect.
For the gathered section on the back of her dress, I used the elastic setting along part of the seam, scrunching the fabric for that ruched look.

UV Creation
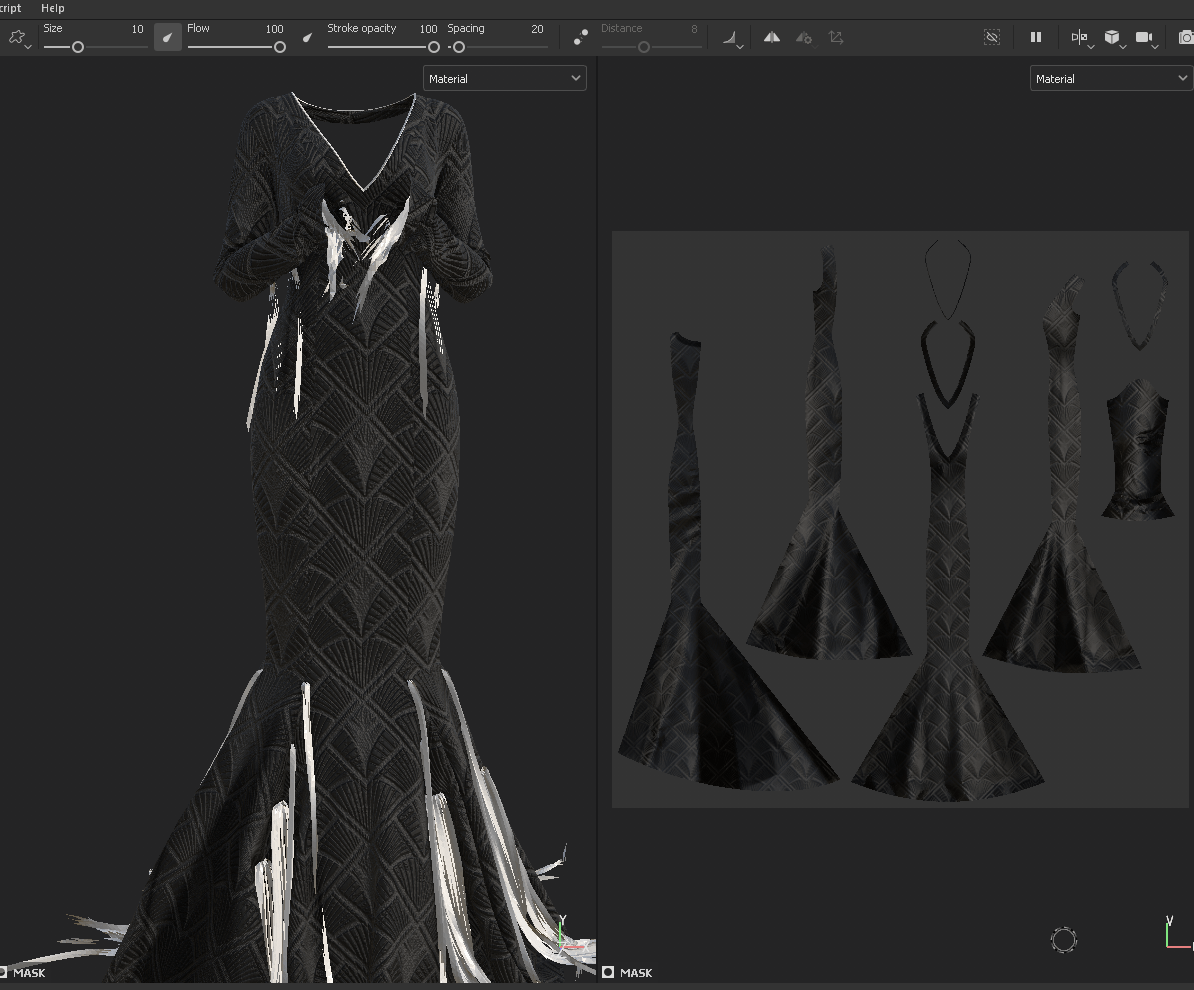
I knew that I wanted to bring the gown into a texturing program, so that meant it needed to be UV’d. Marvelous Designer creates UVs automatically from the pattern pieces, which is an enormously useful feature, but they still needed some work in arranging and scaling correctly. I made the initial mistake of trying to scale up the pieces of the gown with more detail (namely, the center front which has the beaded design); this led to a major mismatch in texture scale, with some threads appearing far larger than others. With this in mind, I re-scaled the UVs proportionately, and even worked out how to stack the symmetrical halves to better utilize UV space.
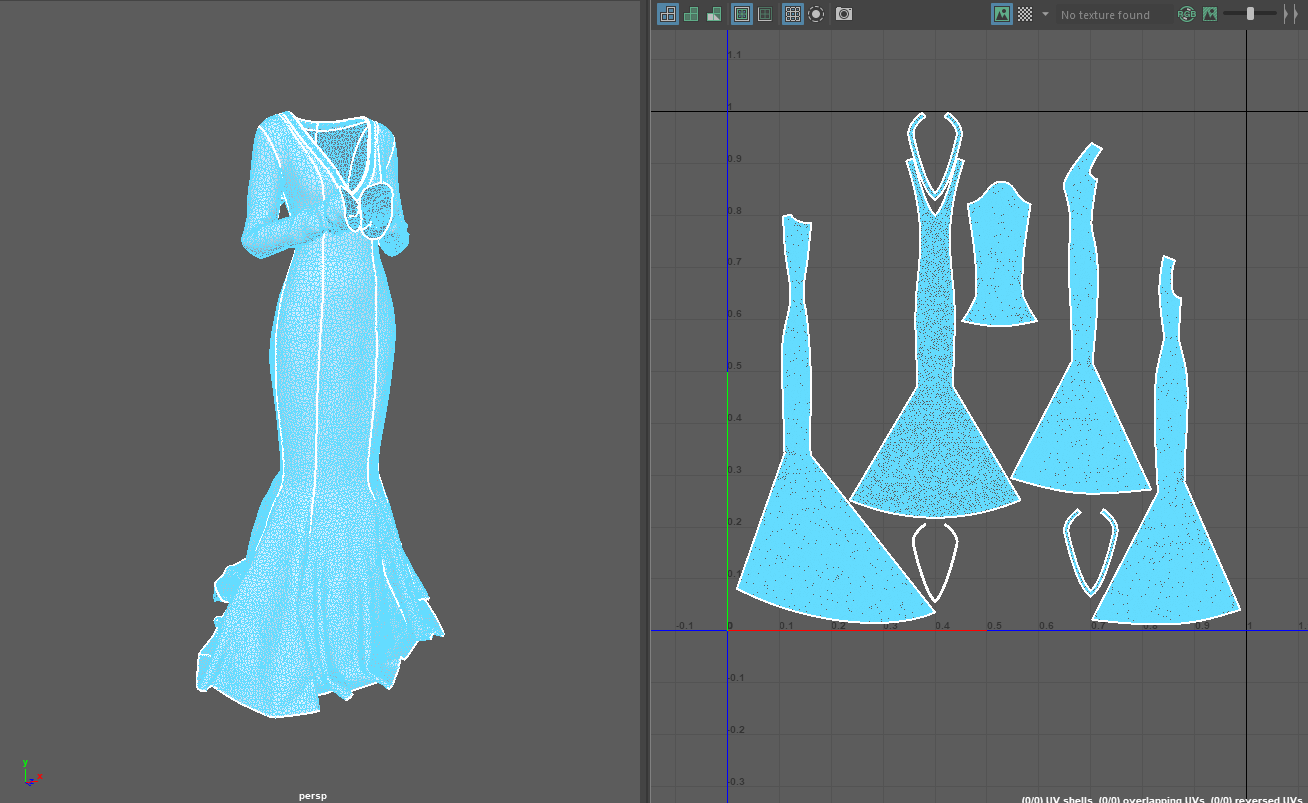
For the chiffon parts, I decided to simply create a shader in my final rendering program rather than create clean UVs, since I’m already familiar with adding transparency to materials in Maya and was running out of time.
Additional Sculpting
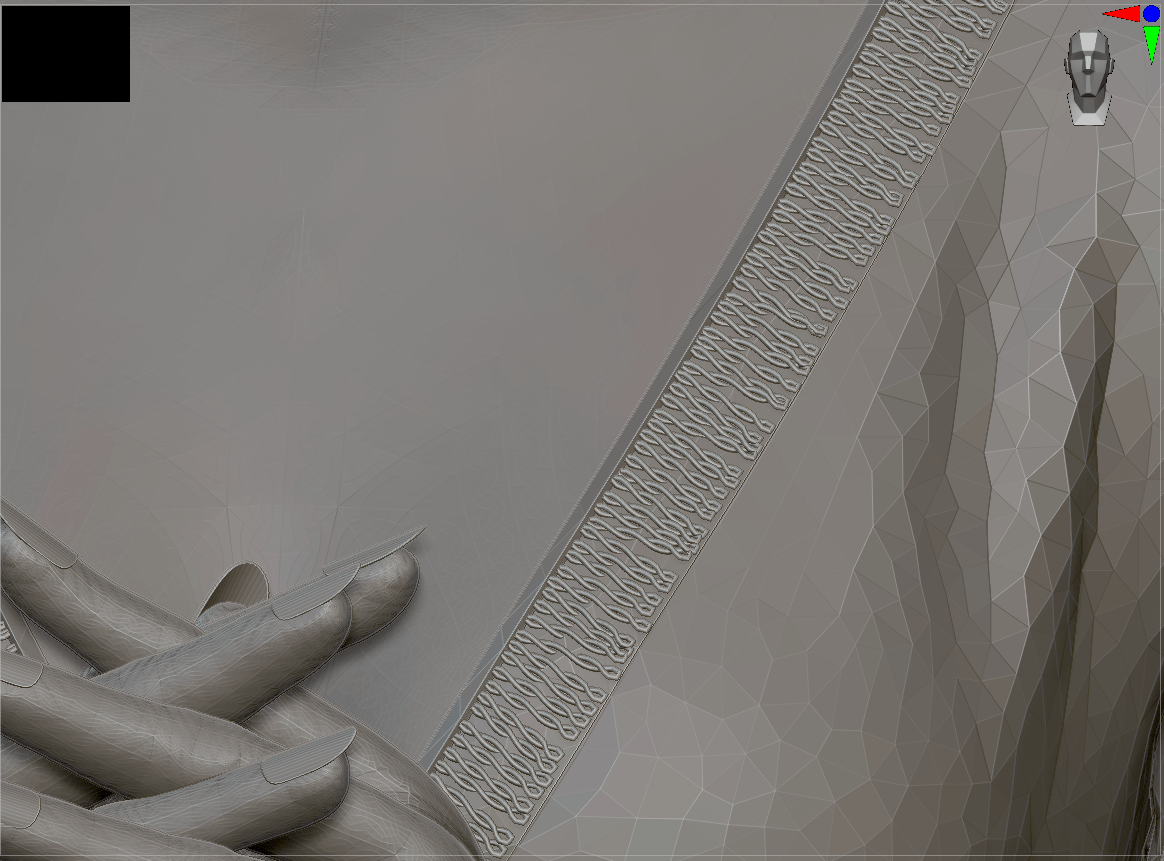
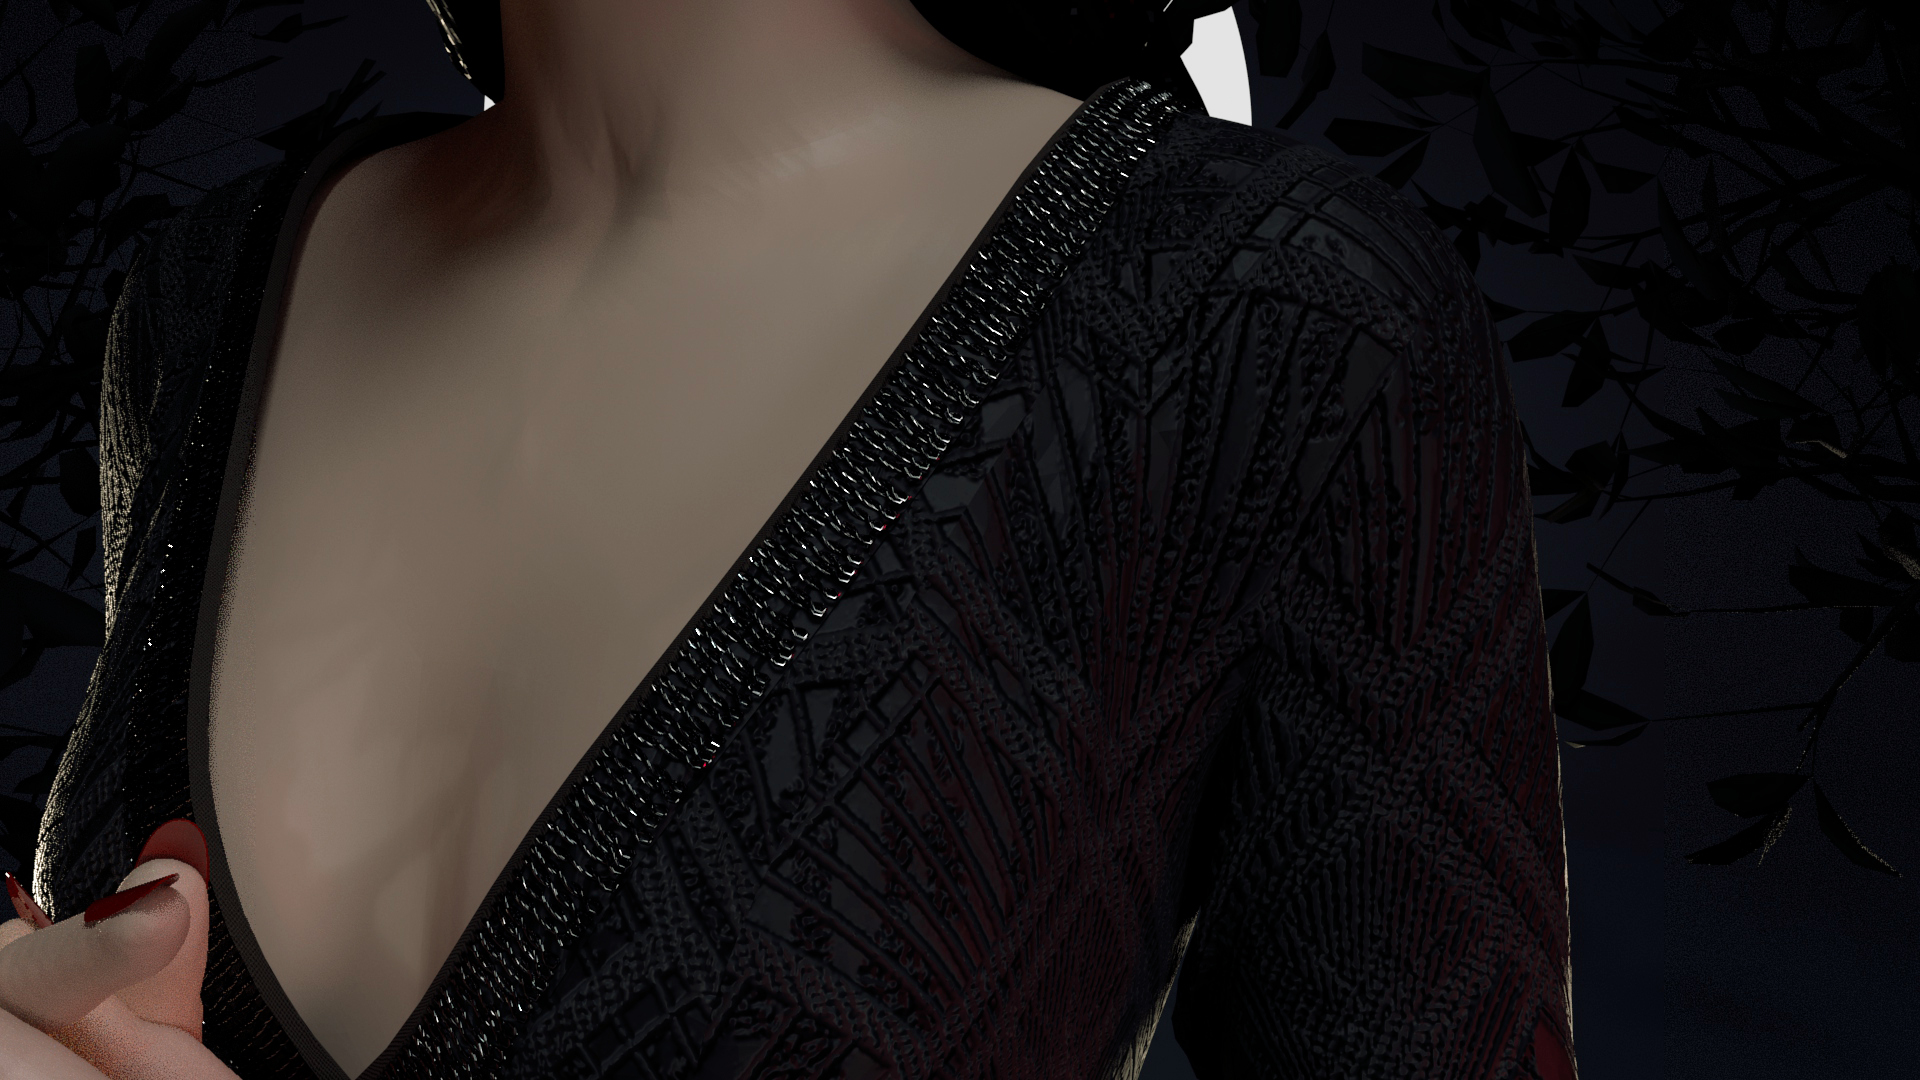
I went back to ZBrush to add the final pieces to the character: her beaded trim, fingernails, and the head sculpt itself. For the beads, I created a custom IMM brush and positioned copies of it along the neckline using nanomesh. With some added randomization, the effect was convincing enough from a distance.
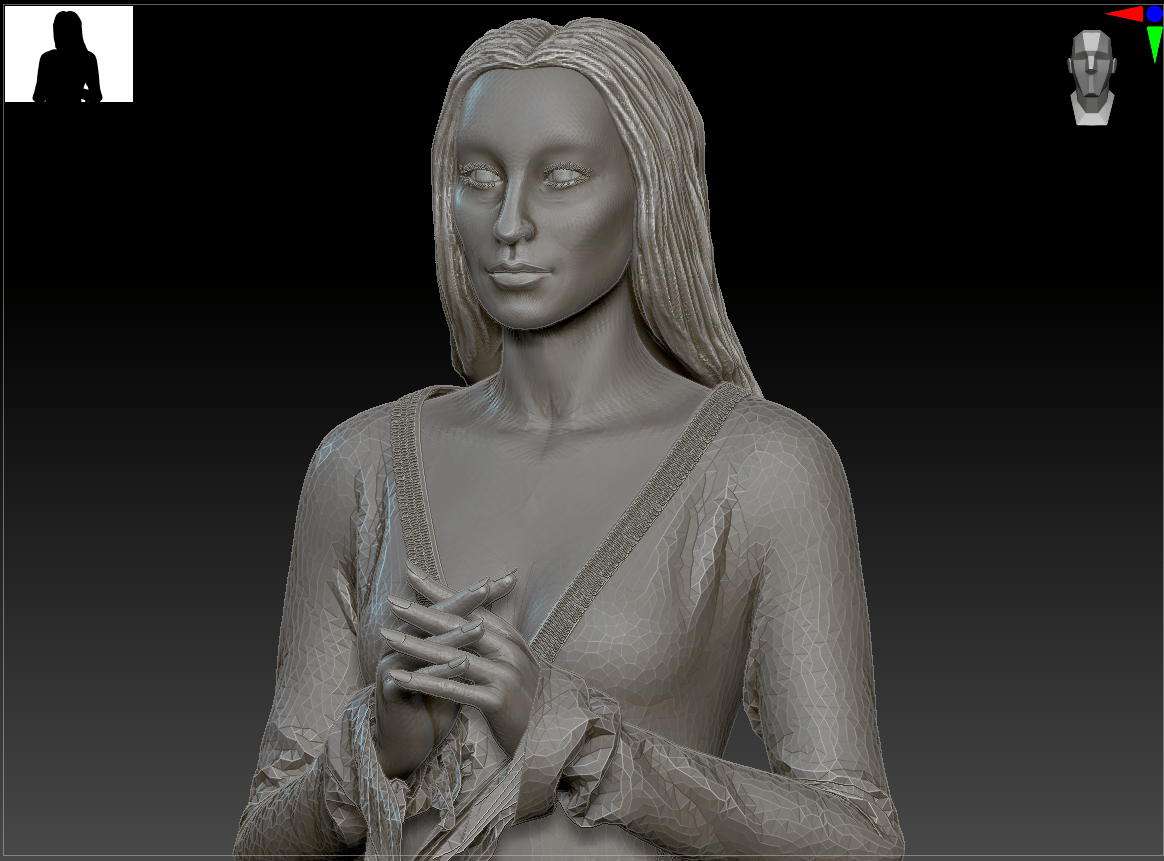
For her head, I ended up modifying the default head from the Marvelous avatar and giving it a quick polypaint in ZBrush. I struggled for a while wanting to do the head from scratch, but with my timeframe and some reassurance from my classmates that even people in the industry use basemeshes, I decided not to reinvent the wheel. This is by far the weakest part of this week’s project, but I had bitten off more than I could chew and was hoping to hide some of the uncanny valley in the dramatic lighting of my render.
For her hair, I initially intended to create more realistic strands in XGen, but a corrupted savefile on the eve of the deadline meant that I had to quickly whip up some sculpted hair in ZBrush. That, too, will hopefully not be so jarring once rendered. If I revisit this project, I absolutely plan to redo both head and hair, and spend more time detailing the body for a less cartoon-y look.

Texturing
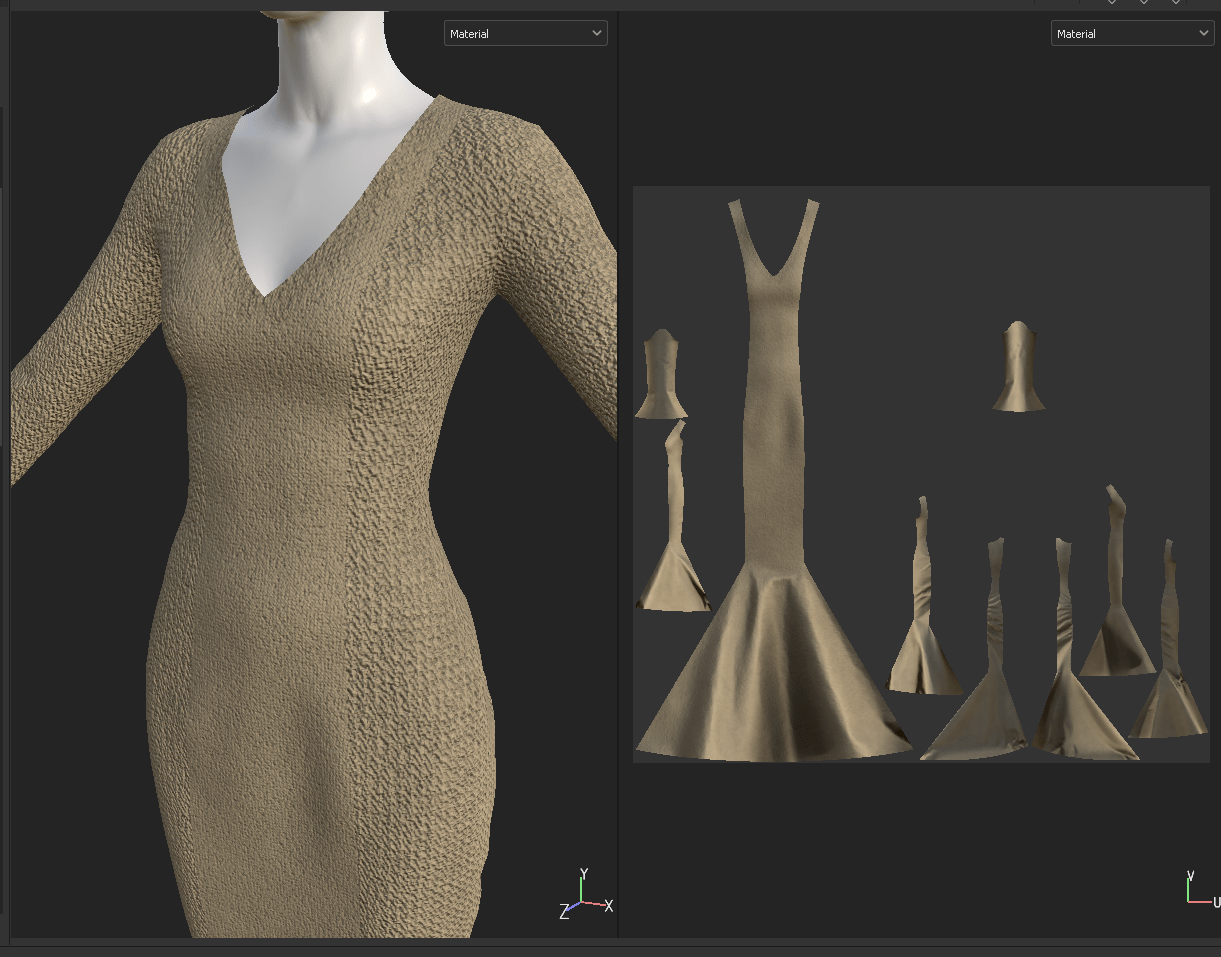
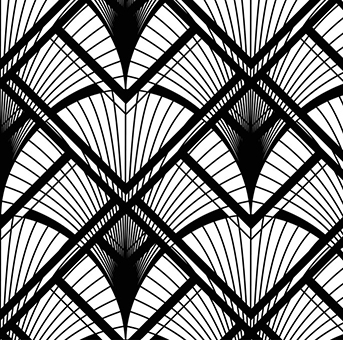
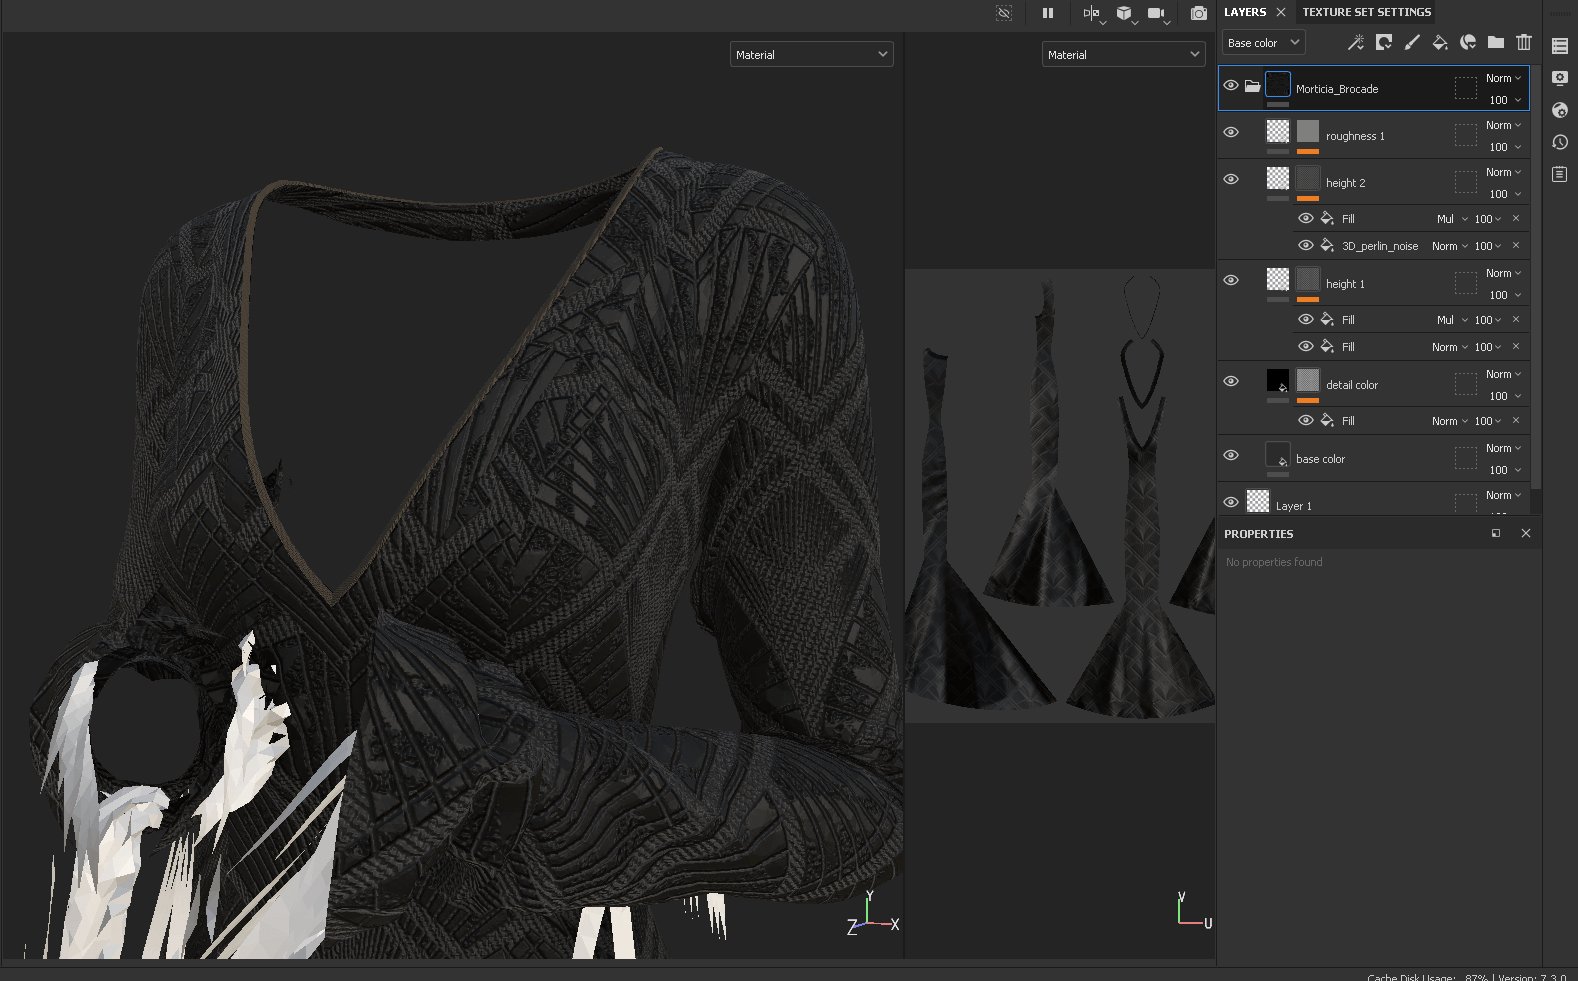
Now for the part I was really looking forward to: textile design in Substance Painter. I spent quite a while searching through vector sites for a similar alpha that makes up her brocade, and ended up settling for an art deco design with similar lines. I ended up dissecting one of the default brocade materials in SP to see how they used masked height maps over textured fabric to create a raised design. Adding layers for roughness and indenting an inverted mask to create the grooves in the fabric, I managed to create a fairly realistic textile design that captured the vibe of the original.
I found working in Substance fairly intuitive based on my familiarity with Photoshop – the layer system and styles are quite similar, and baking was straightforward. In general, I’m super impressed by what’s possible in Substance and look forward to creating more custom textiles in future.
Lighting and Render Setup
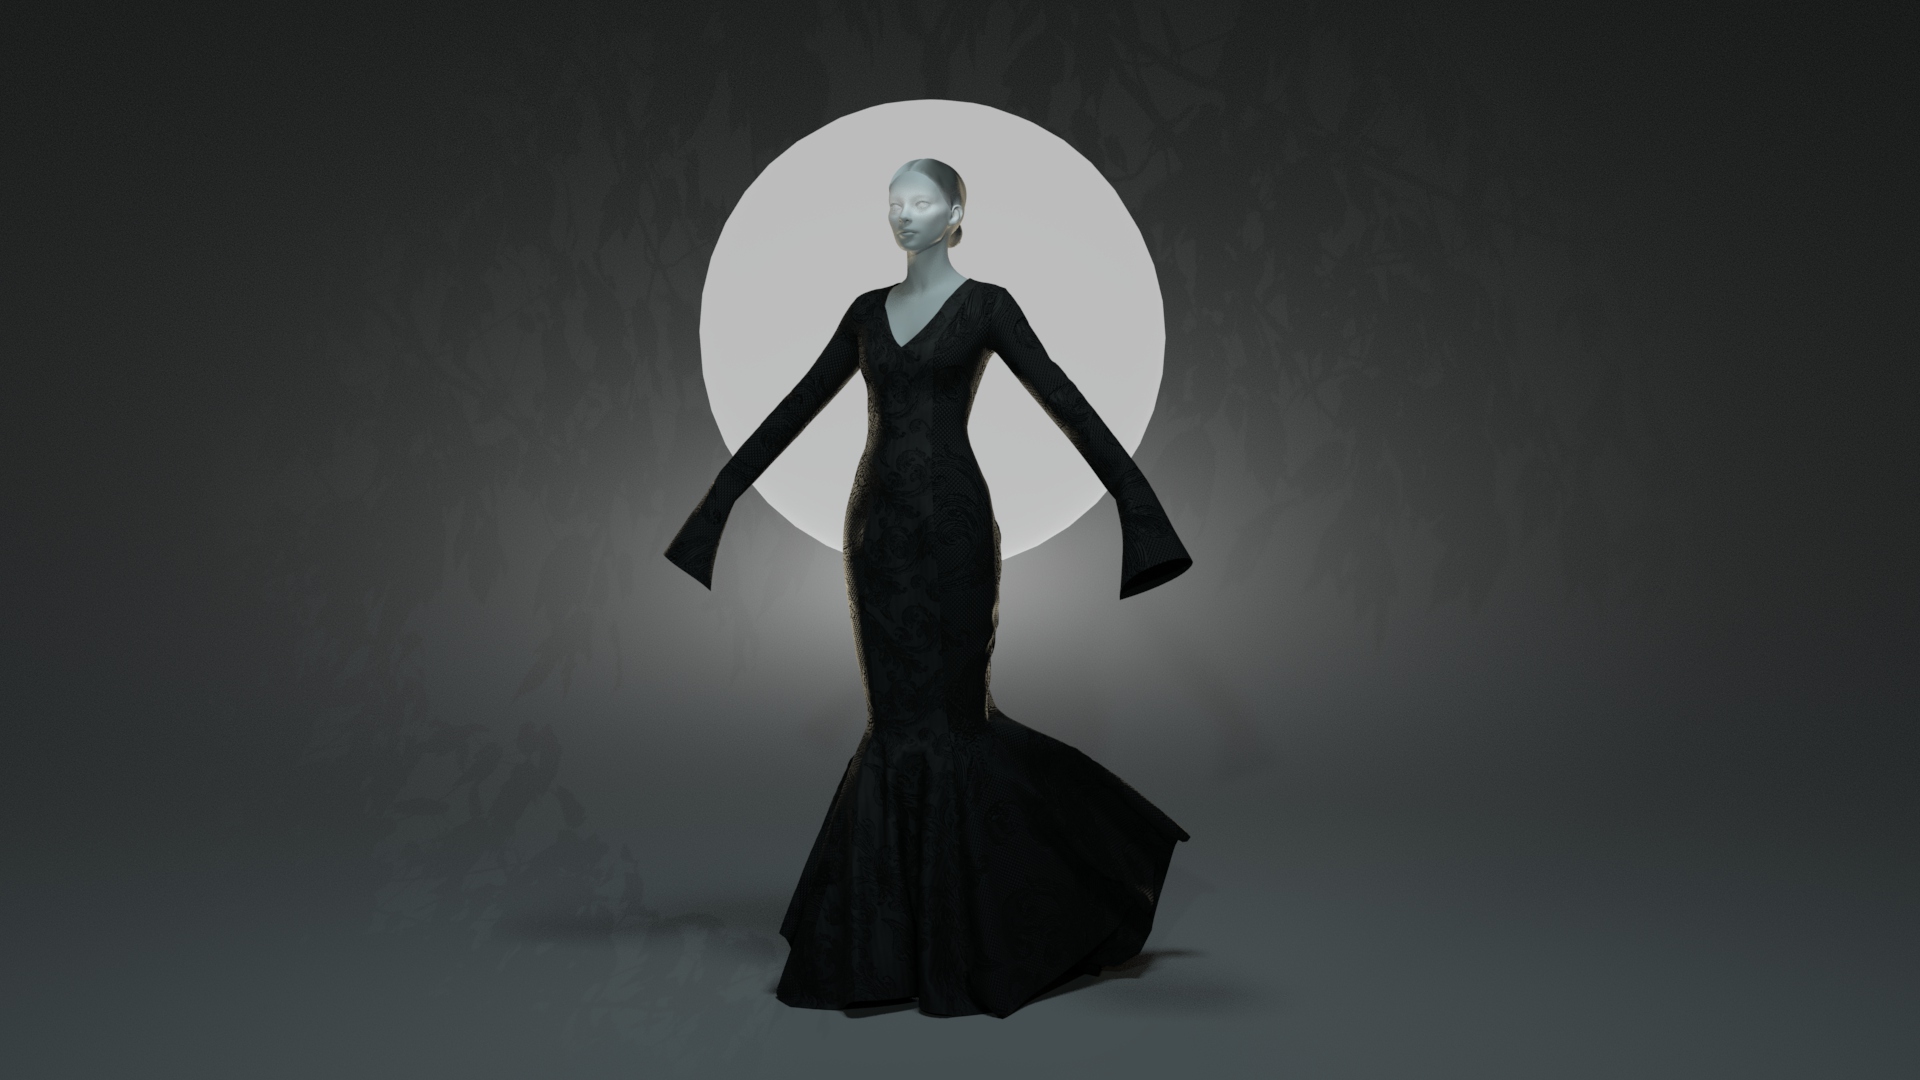
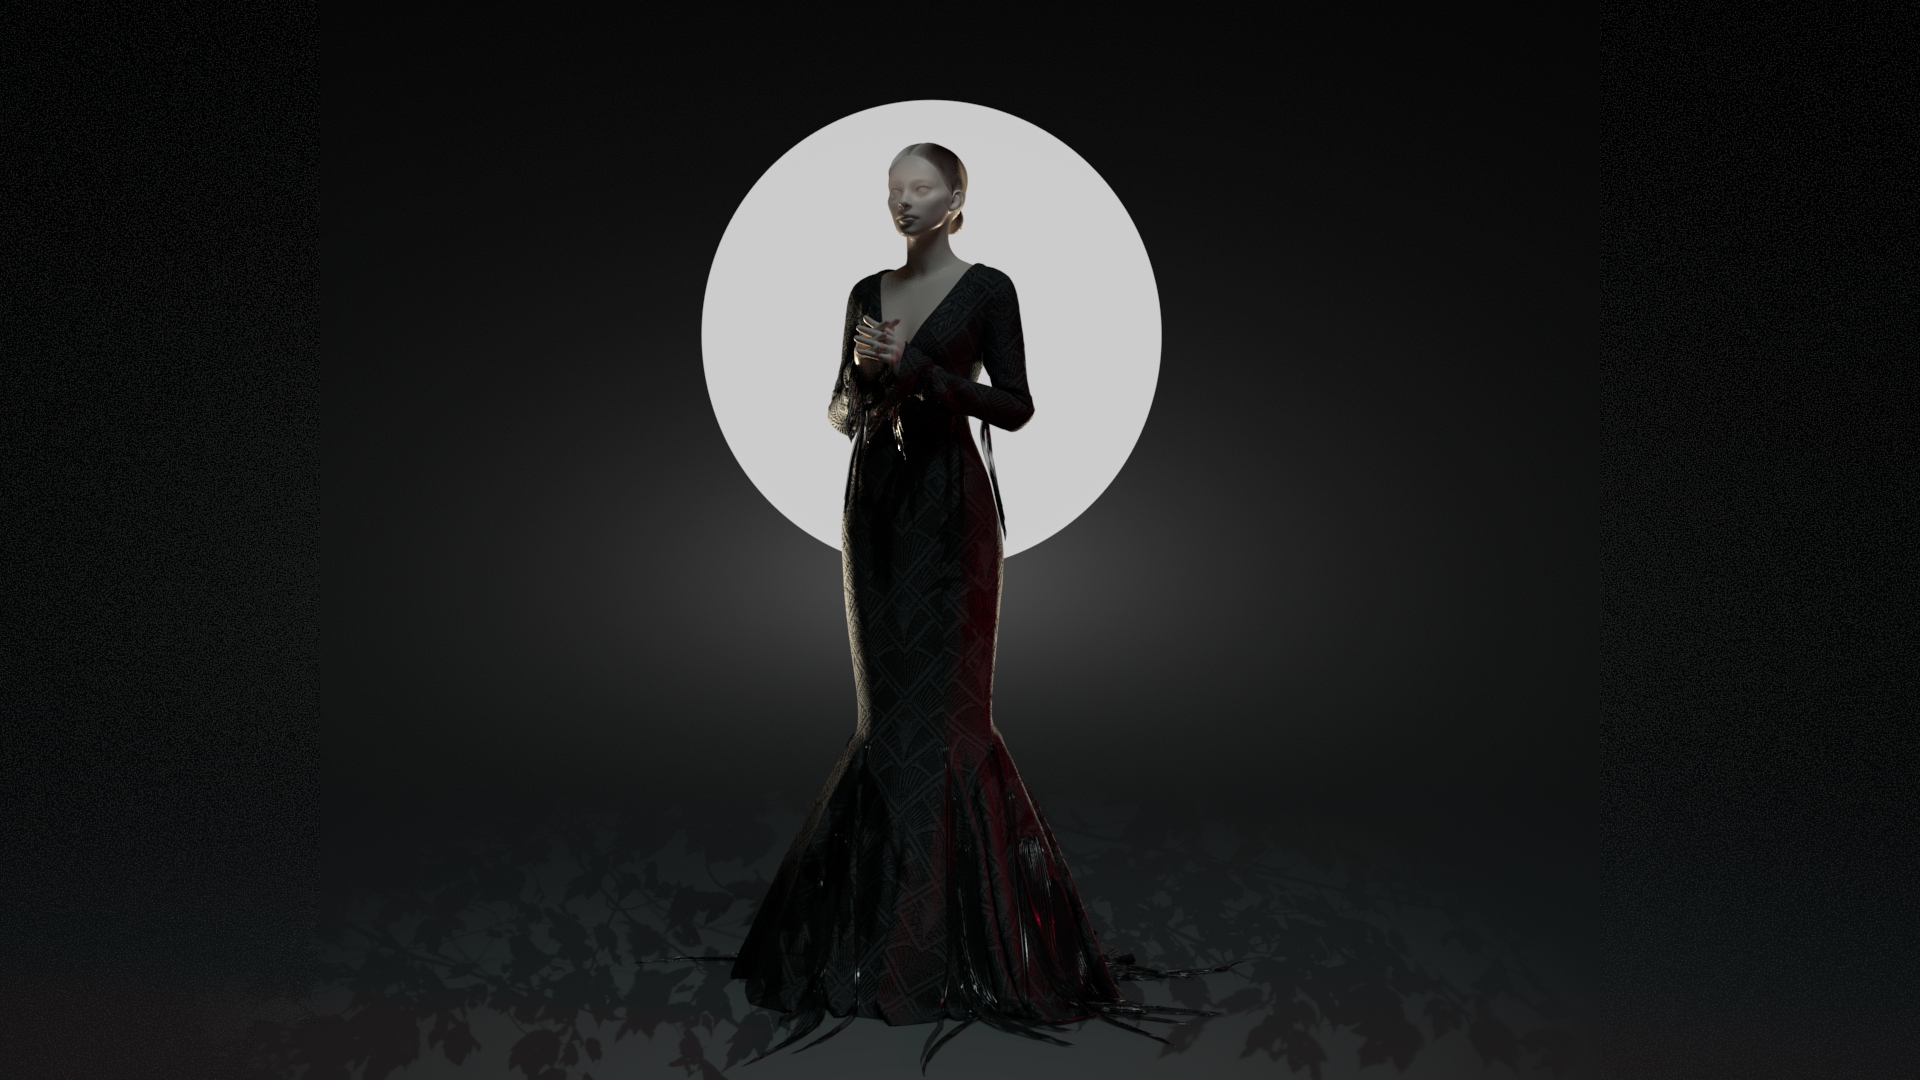
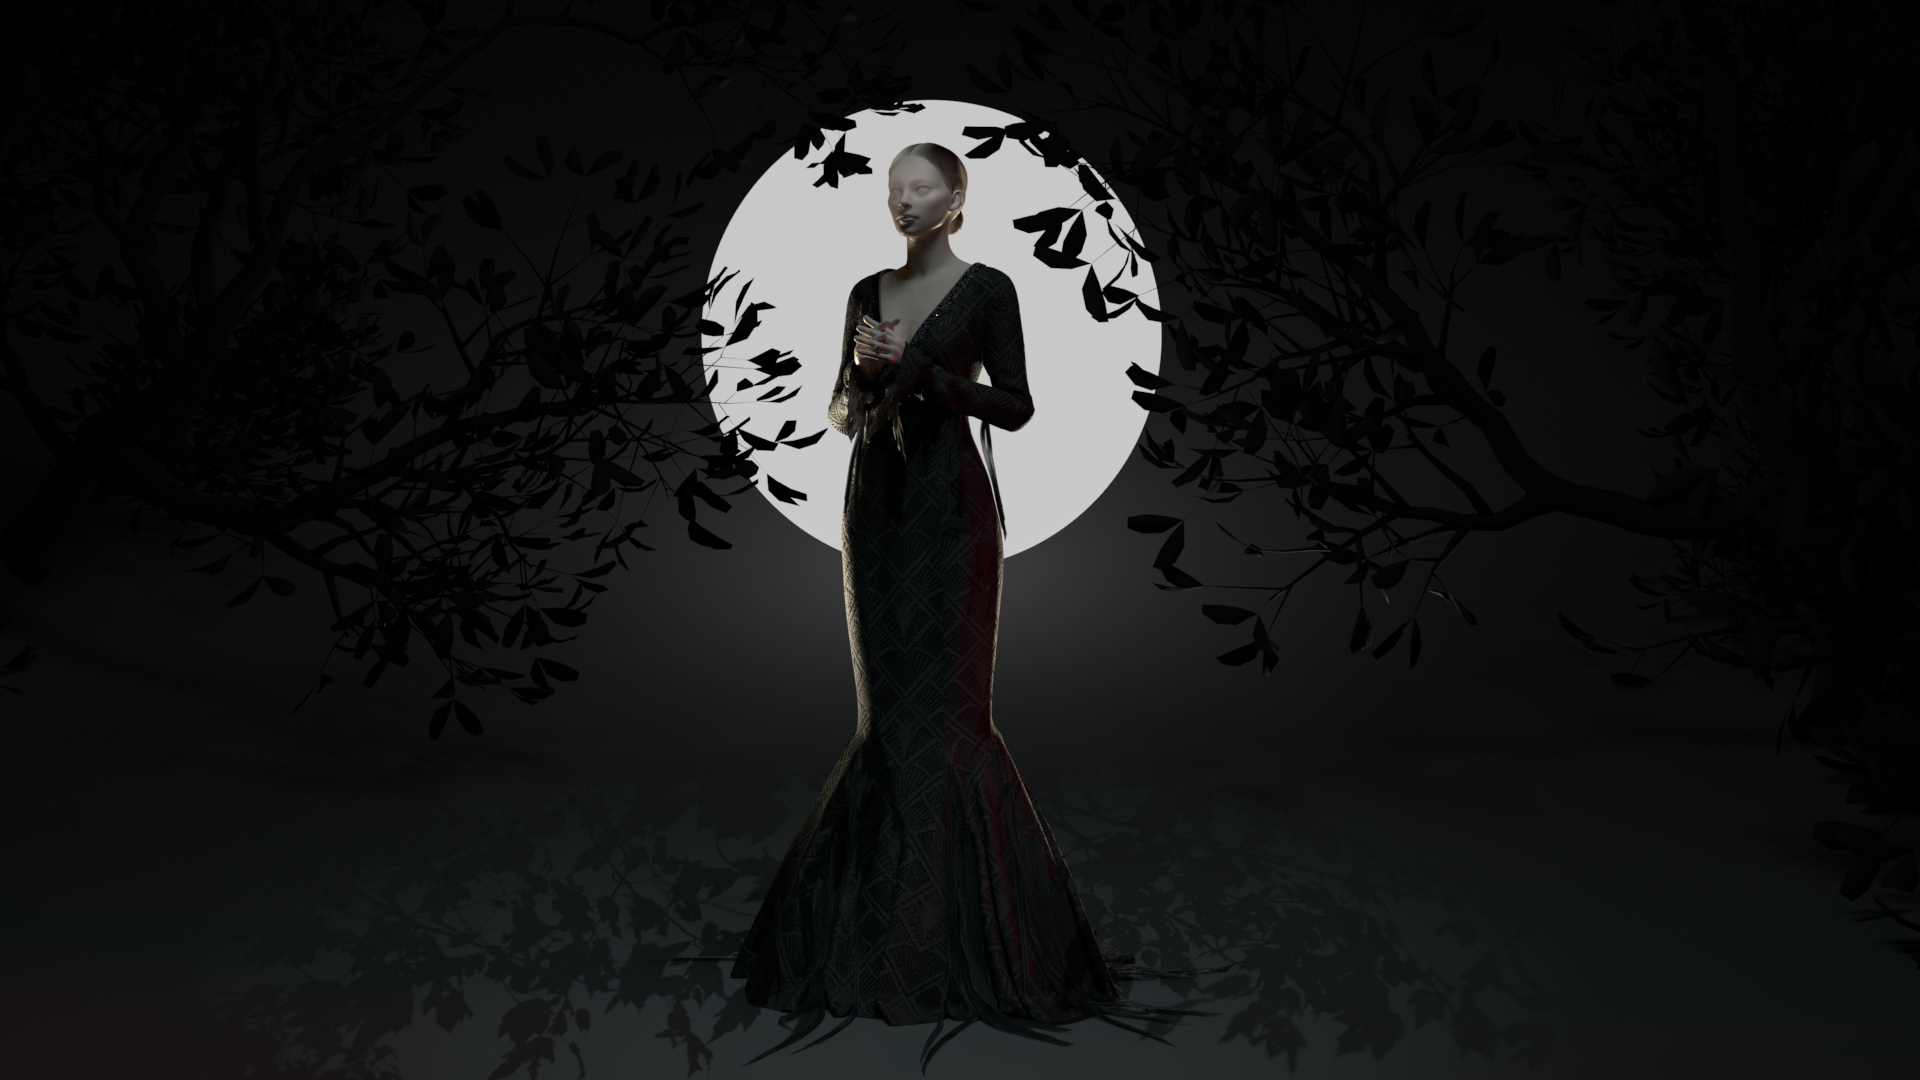
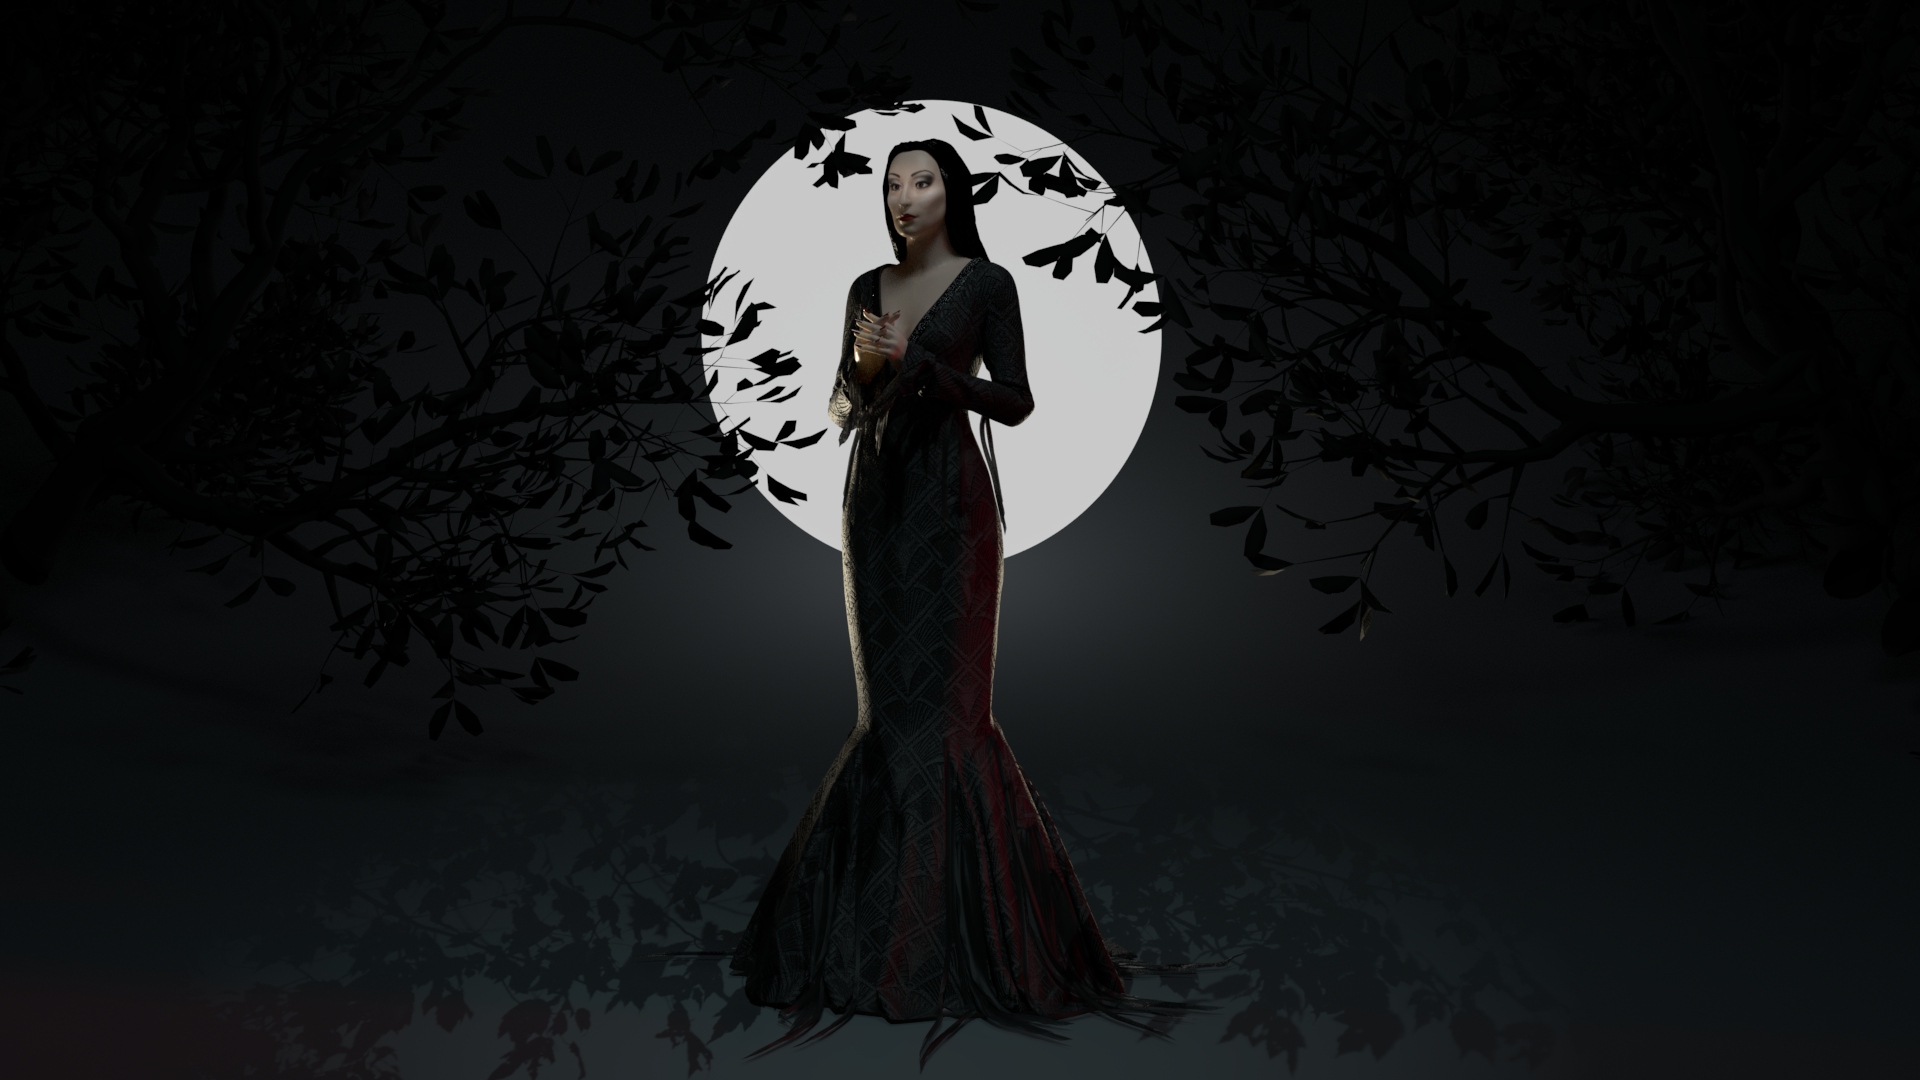
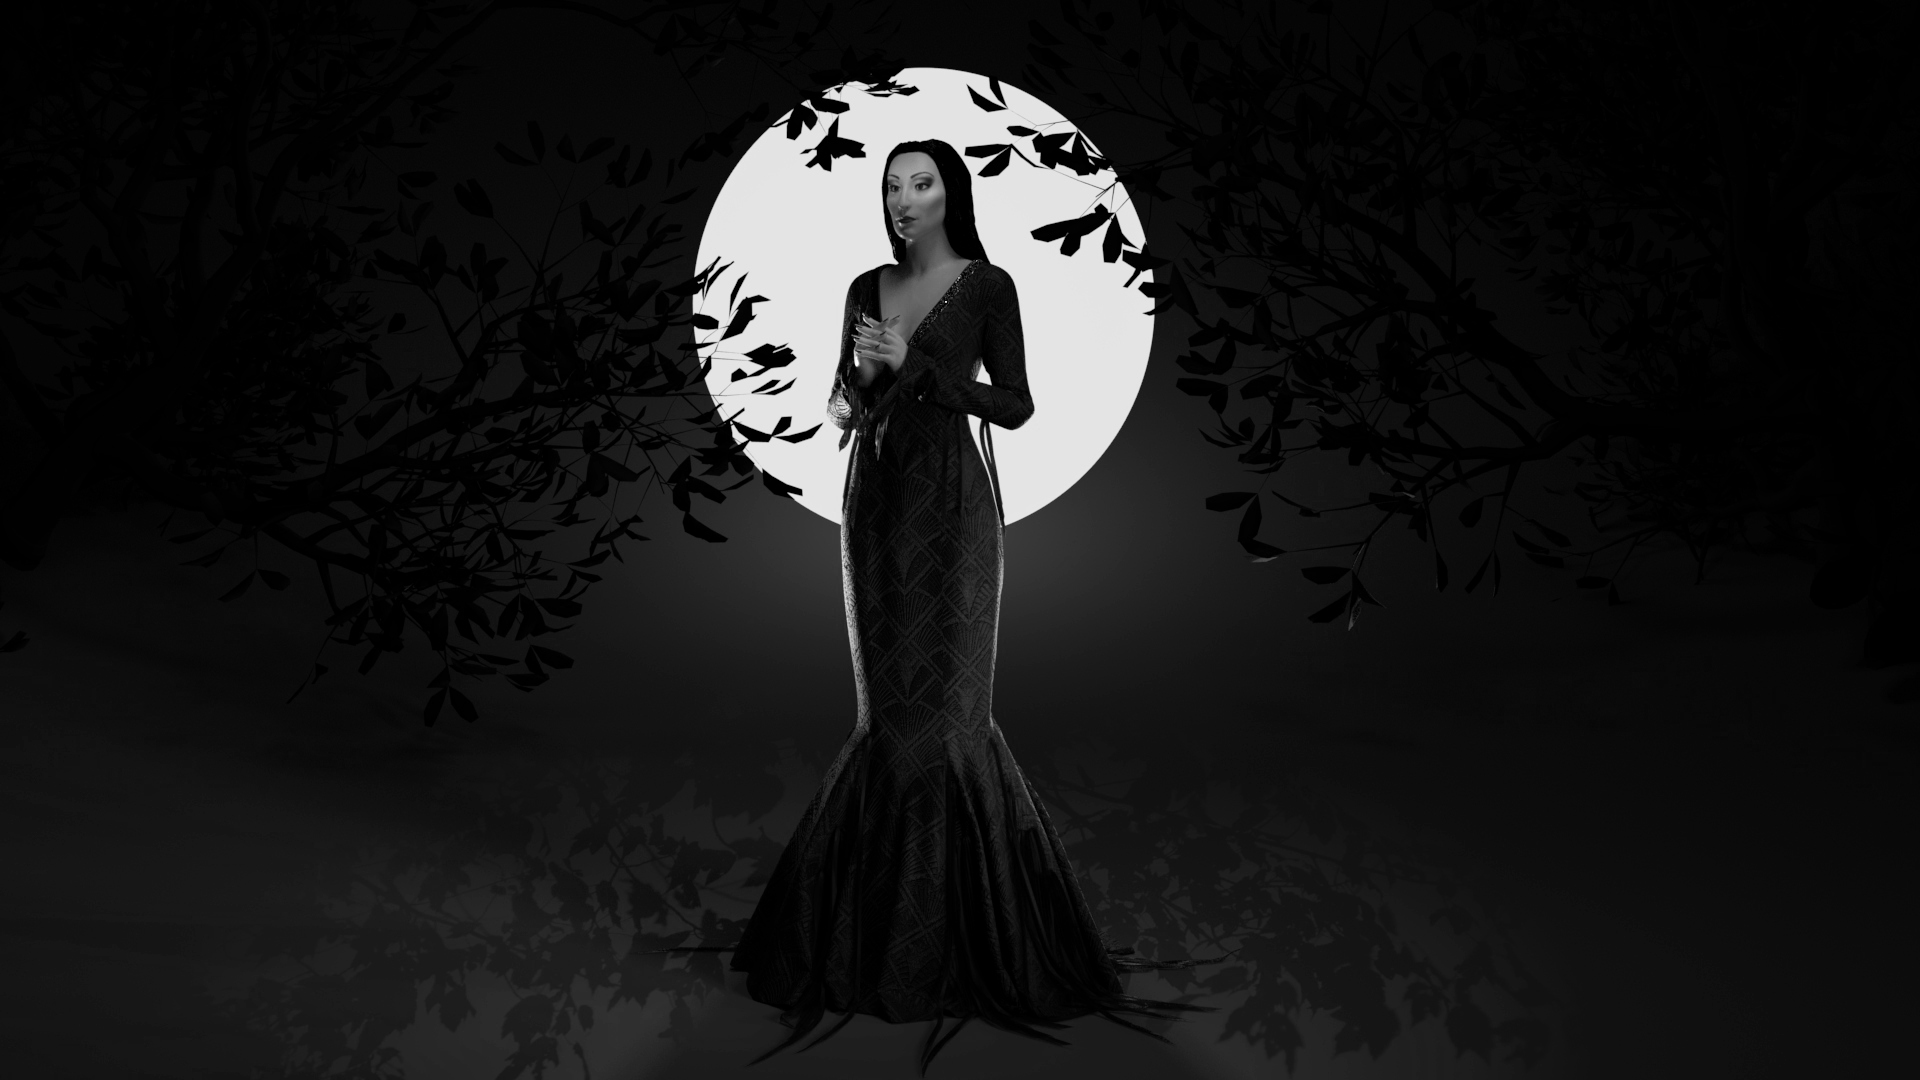
I played around with quite a few ideas for my final render. I wanted to feature Morticia at night without having to place her in a busy interior, but also didn’t want to lose her dress on a dark background. My solution was to place her in front of a ‘moon’ to create a strong silhouette, and add rim lighting to bring out the rest of her dress. I ended up using several slightly tinted lights, mainly from 3/4 direction behind the character, as well as learning about light blocking/excluding certain objects from lighting. She has a light gobo creating a leaf pattern on the ground, and I added more visual interest with a pair of downloaded tree assets (by mozhde_prz on Cubebrush).

Final Renders
I did my final rendering in Maya, taking some close-up shots and a final full landscape render. I do think I could have stood to lighten some parts of the piece as some of the textile design is lost, but generally I think the result is quite striking. Overall, I’m very pleased with how my renders turned out, especially since I was able to hide so many issues with the underlying mesh.

Bibliography
marvelous avatar
textile pattern
