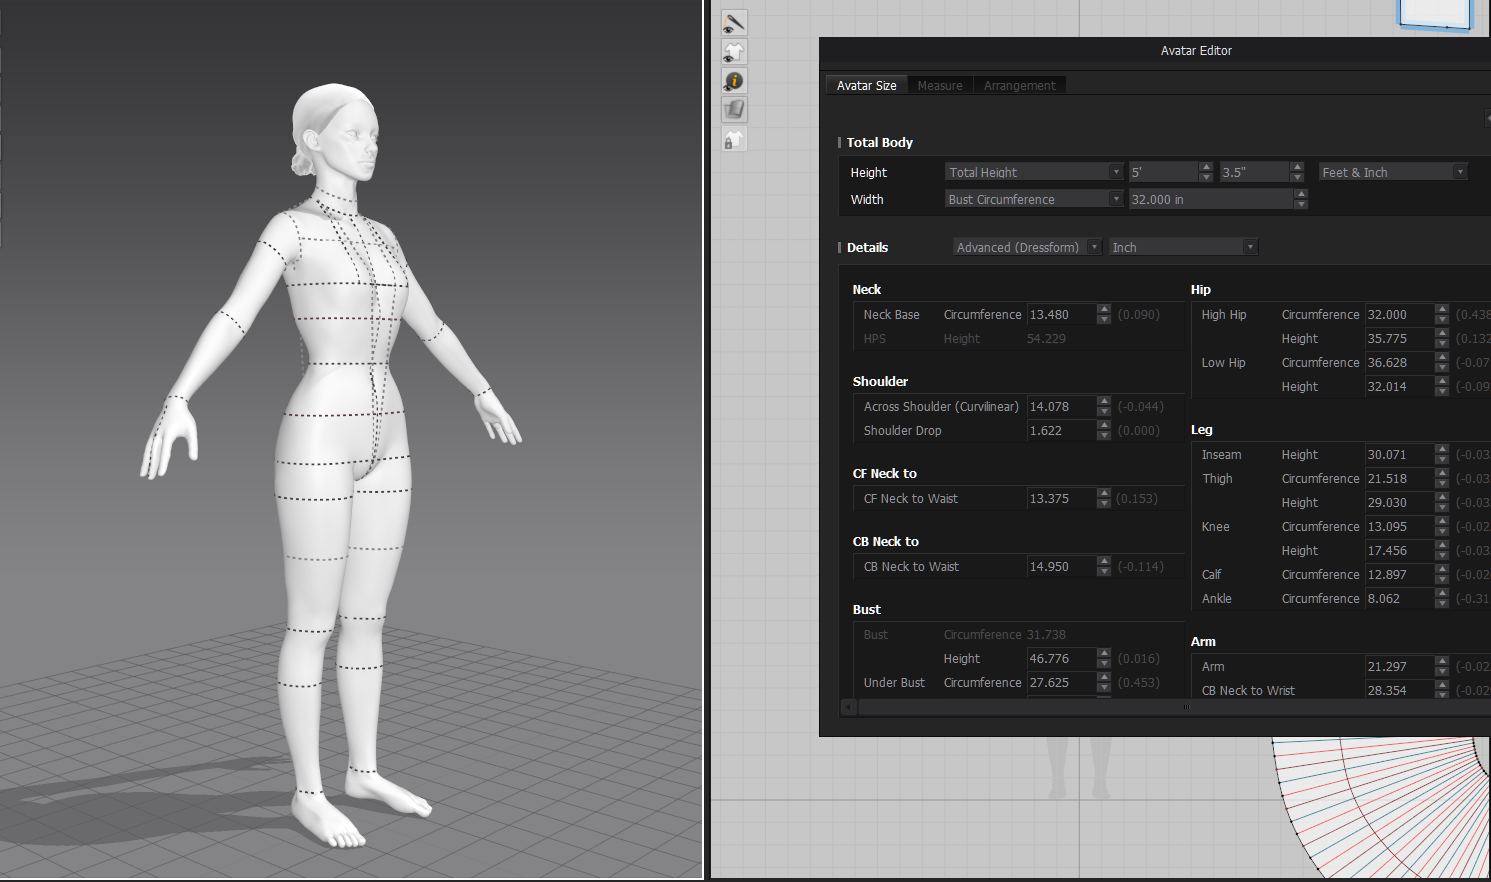
Avatar Edit
Because I’d like to make use of some of the patterns that I’ve already drafted and sewn for myself, my first step was to adjust the default Marvelous Designer mannequin to my measurements. This became quite complex as the built-in adjustment created some very strange warping and bending in the avatar that I needed to resolve; it doesn’t like extreme proportions. Obviously my stays and other foundation pieces can’t actually shape the underlying body, so I had to adjust the body to fit the stays. I ended up setting the basic measurements in place and then playing with the avatar posing system to shift the horizontal trunk lines vertically to approximately my (in-undergarments) proportions.
Foundation Garments
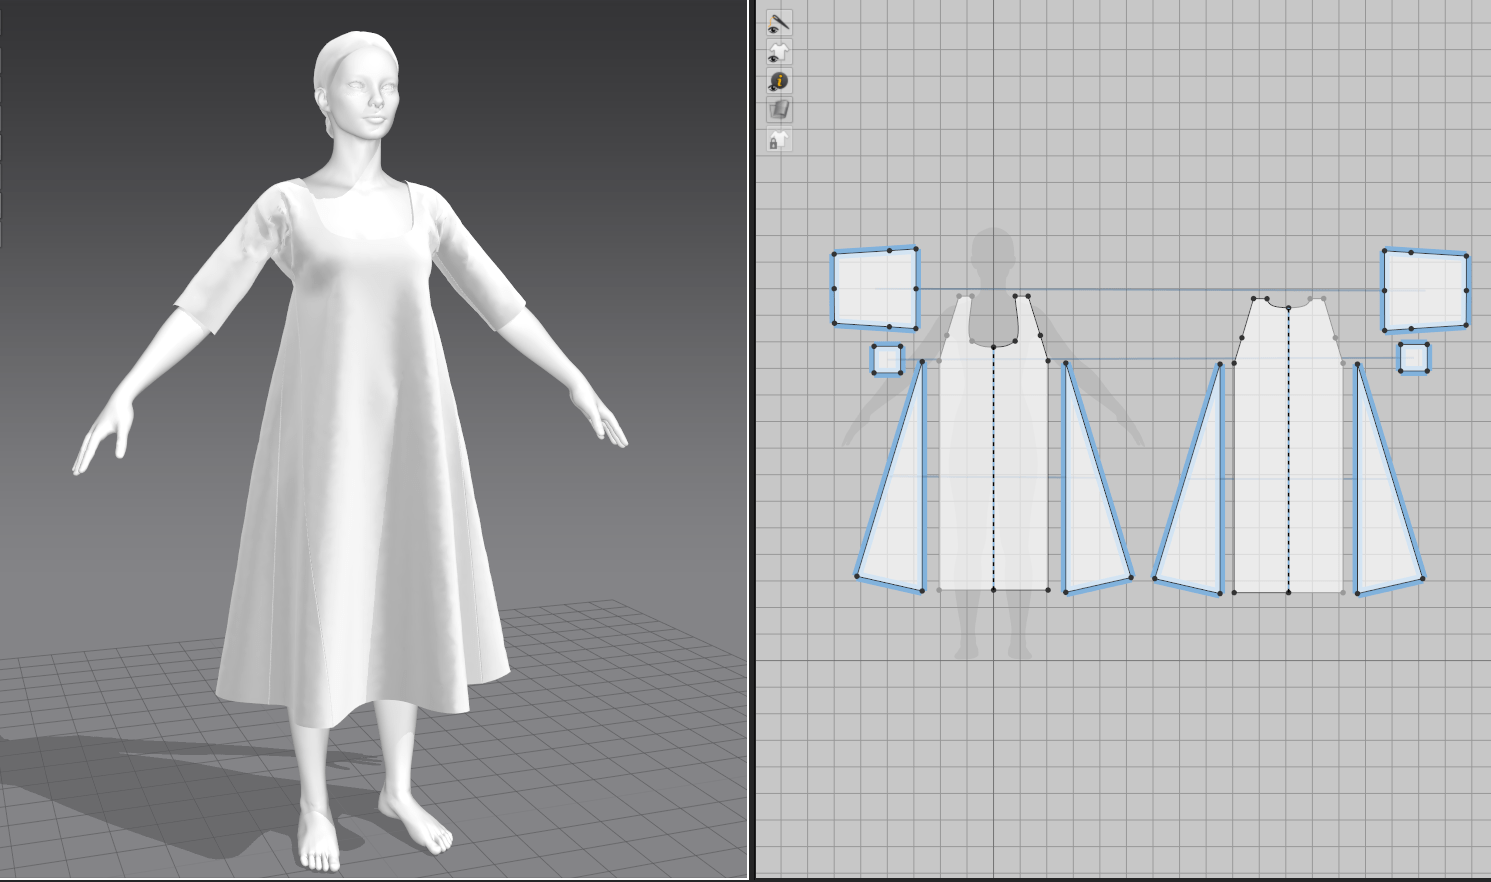
The foundation pieces came together surprisingly quickly, although I did have the advantage of having constructed them in real life and was therefore very familiar with how the pattern pieces should look. I started with the simplest piece, a shift meant to be worn under all the other pieces. This was patterned off a basic grid and had the benefit of not really needing to be fitted apart from proportionately.
The skirt supports I created from the aforementioned Scroop pattern, and I used the pressure function in Marvelous to inflate them like a balloon in lieu of stuffing. Since designers often use Marvelous to create things like duvets and puffer jackets, this is a common technique with quite a few tutorials on the subject.
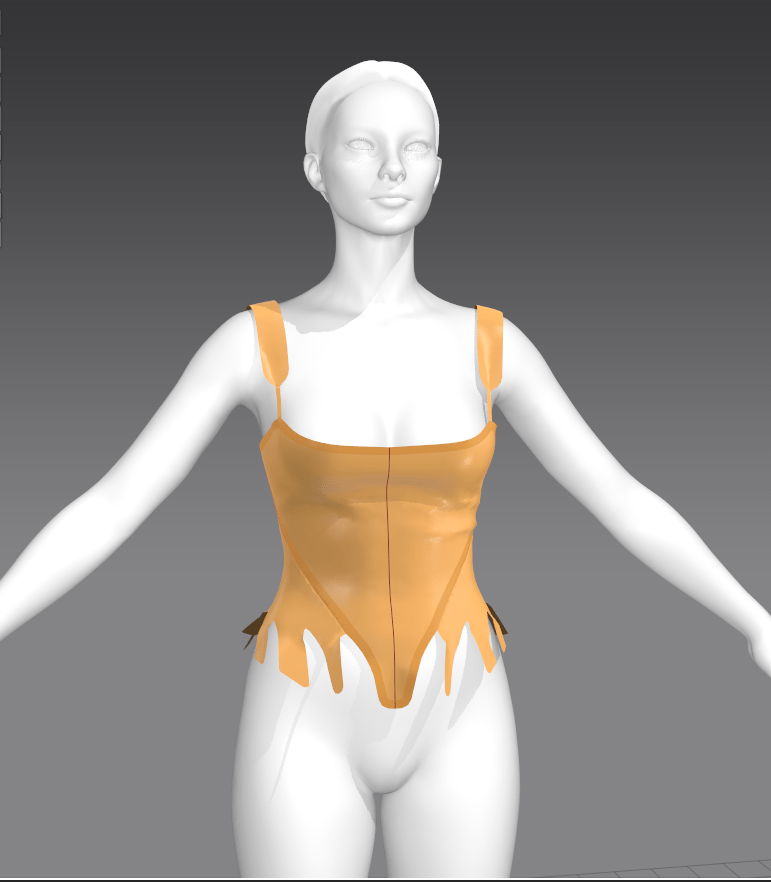
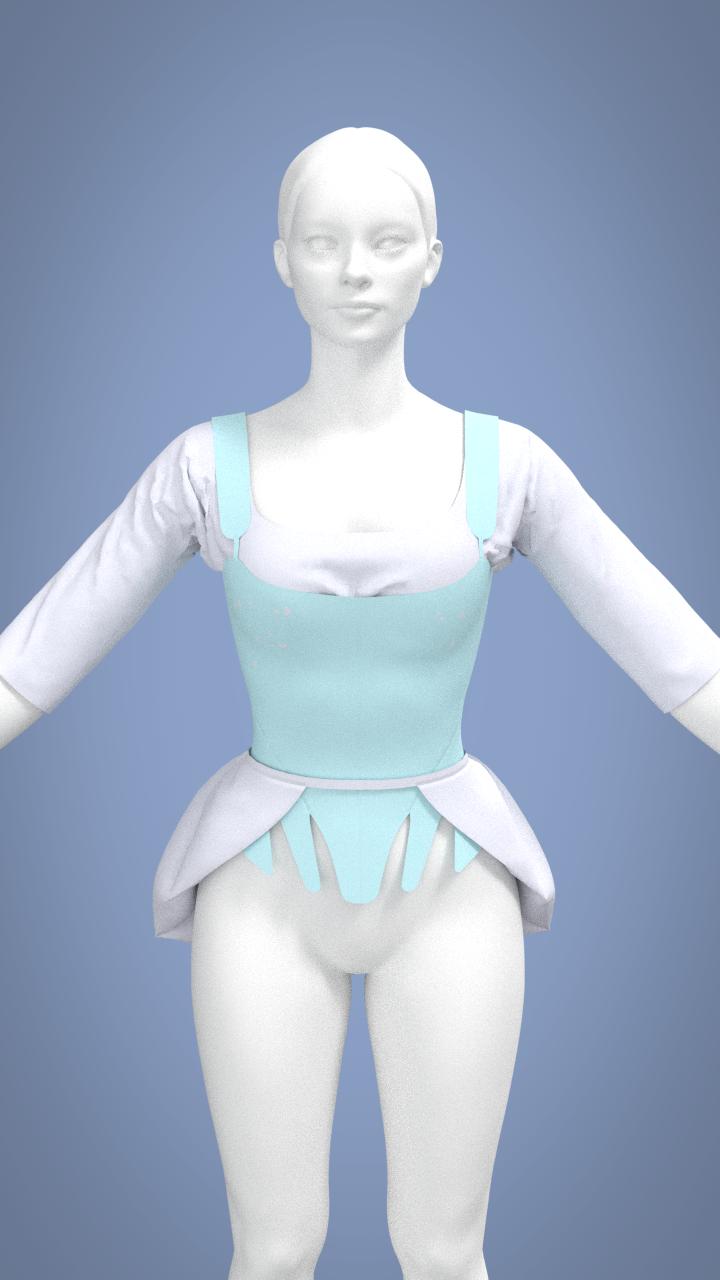
For her stays, I again used my own pattern that I had previously digitized, and because I had already input my measurements, the patterning stage went very quickly. I discovered Marvelous’s layering feature to force the pieces to sit correctly on top of each other (shift under stays under bum roll).


However, my first huge roadblock came in trying to stiffen the stays to how they should be. In real life, stays consist of so many strips of boning laid immediately next to each other that they are essentially the stiffness of cardboard or styrene. Marvelous doesn’t seem to have anything resembling boning, so I set to play with the material properties instead. I ended up throwing every single stiffening feature I could find at the stays in both material and compositing properties, and have a sufficiently stiff end result to continue with the rest of the garments (but will eventually need to adjust them further for accuracy).
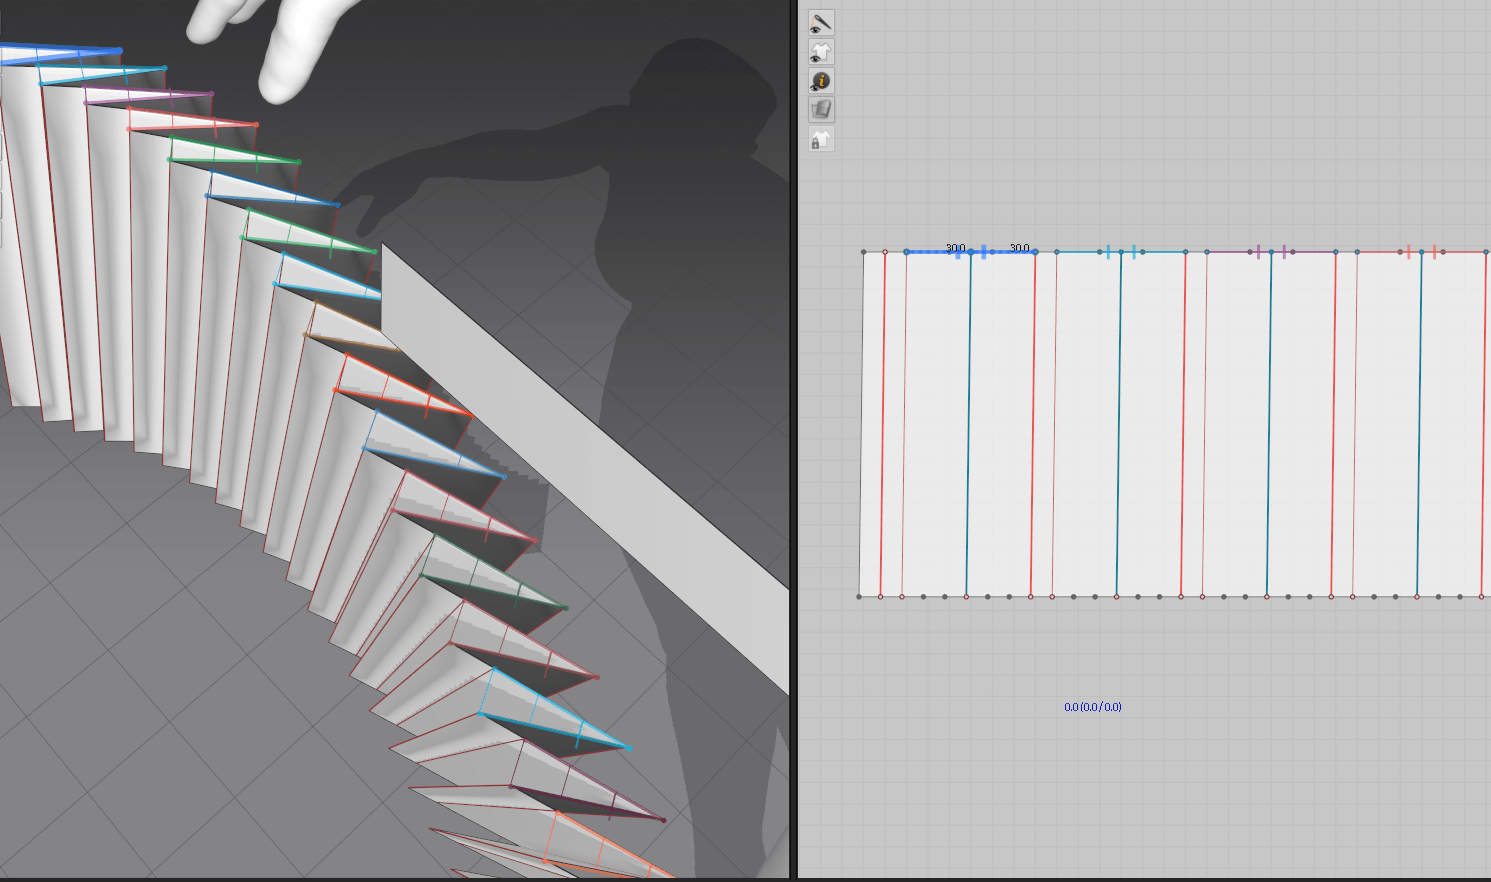
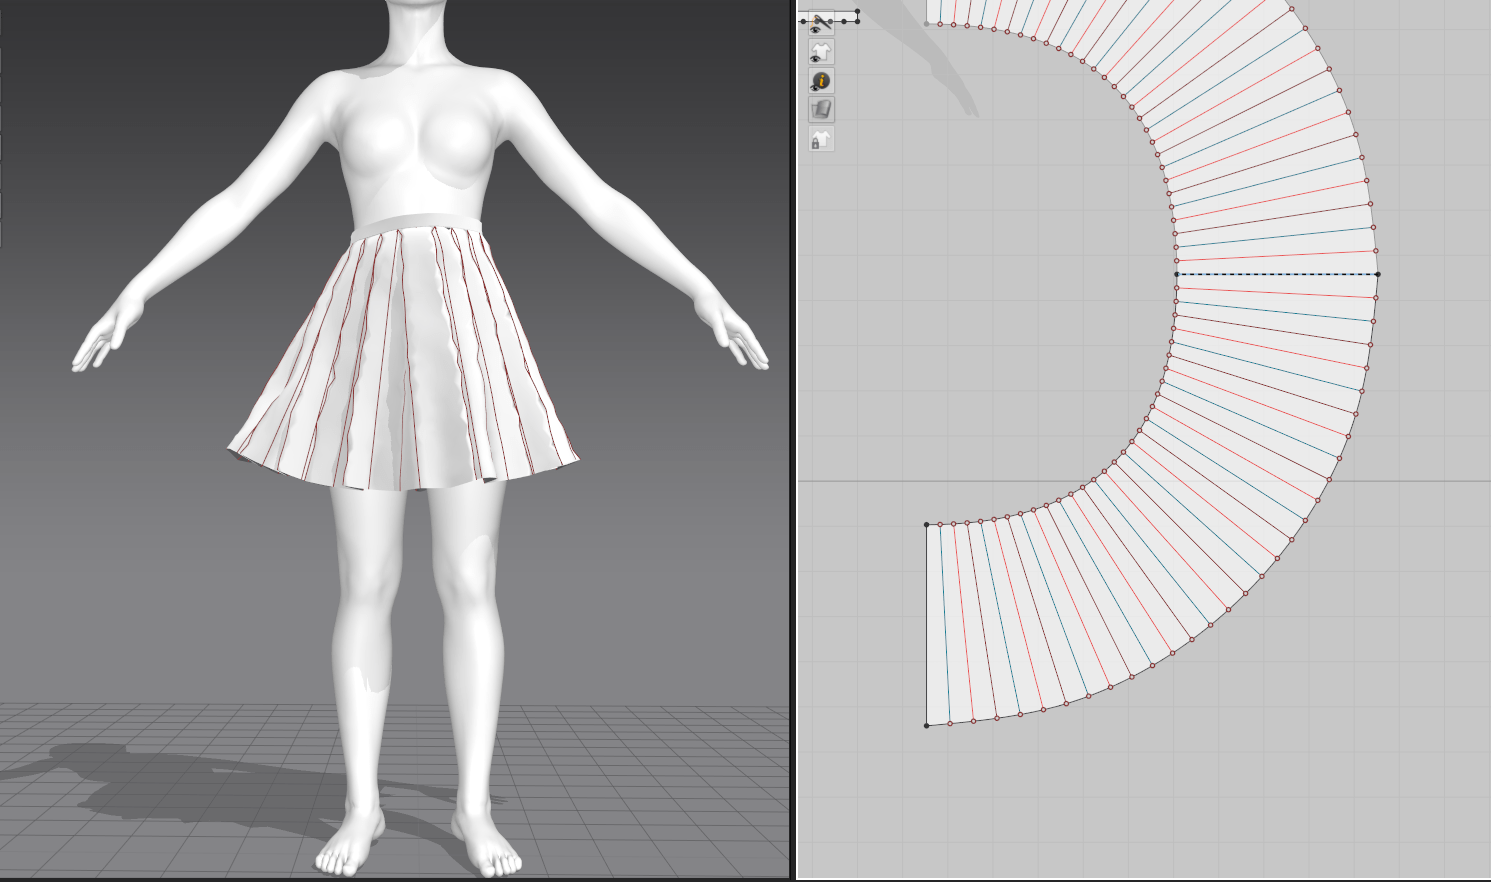
Pleat Tests
The other problem I ran into early was the frustratingly limited pleat system within Marvelous. 18th century garments make extensive use of pleating rather than gathering, with both petticoats and overskirts relying on deep knife pleats for the correct shape. I played around with the automatic pleat folding and sewing tool, and was pretty quickly frustrated that I couldn’t discover a way to make deeper-than-standard pleats, even manually. I decided to compromise and create pleats on a circle skirt instead of a rectangle to mimic the extra fabric at the hemline.