House low-poly
I set myself up for a struggle almost immediately with this project, as I chose to do all of my low-poly pieces in ZBrush rather than a more dedicated hard-surface program. I figured I was learning so much new software this week, I should at least stick partially to something that I knew, but I absolutely need to learn how to sculpt in Maya if I do more pieces like this.
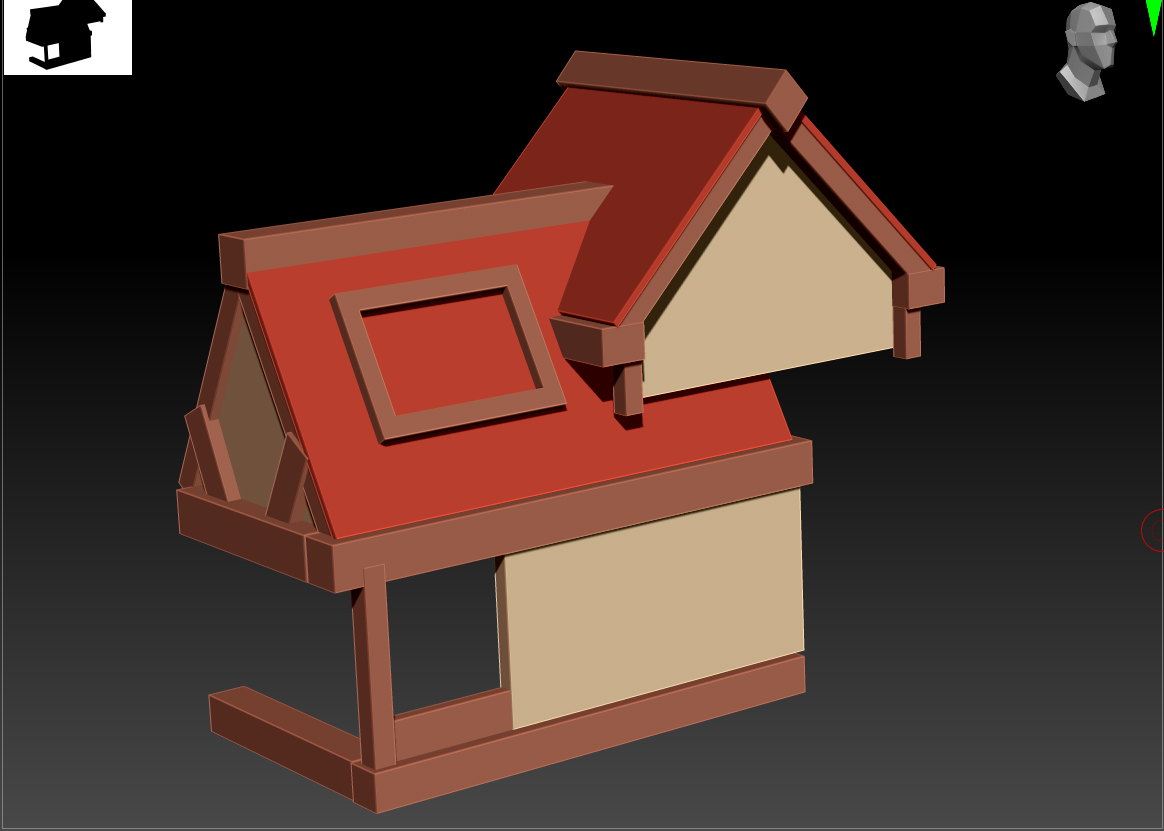
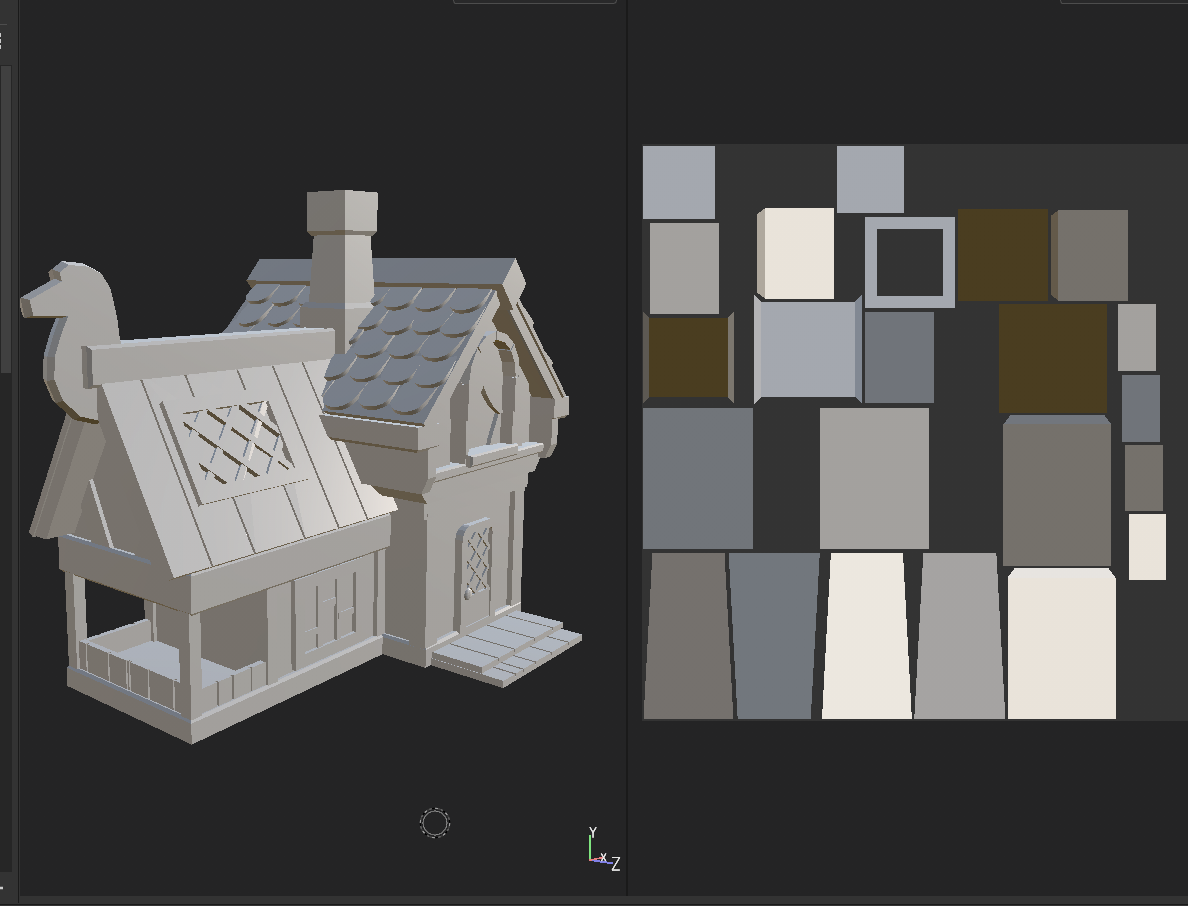
I built all of the general pieces of the house in ZModeler, making use of symmetry and beveling. ZBrush has a major flaw in not saving transformation data to be copied over to other objects, so I had to move and rotate most pieces by eye and using the standard step locks. I discovered partway through that I could set a custom step for the transform tools, which sped up the process. The polypaint was purely to visualize the different sections of the house as I was building it.
The other struggle I had was in how inconsistent and stylized the concept art was – the house itself doesn’t quite follow the rules of perspective and has very few 90-degree angles (to great stylistic effect, but a nightmare to sculpt!). If I revisit this project, I absolutely want to adjust the angles of the pieces to better match the artwork rather than its current state of looking like a Lego house; it’s really lacking some of the charm of the original design.
UVs and Baking
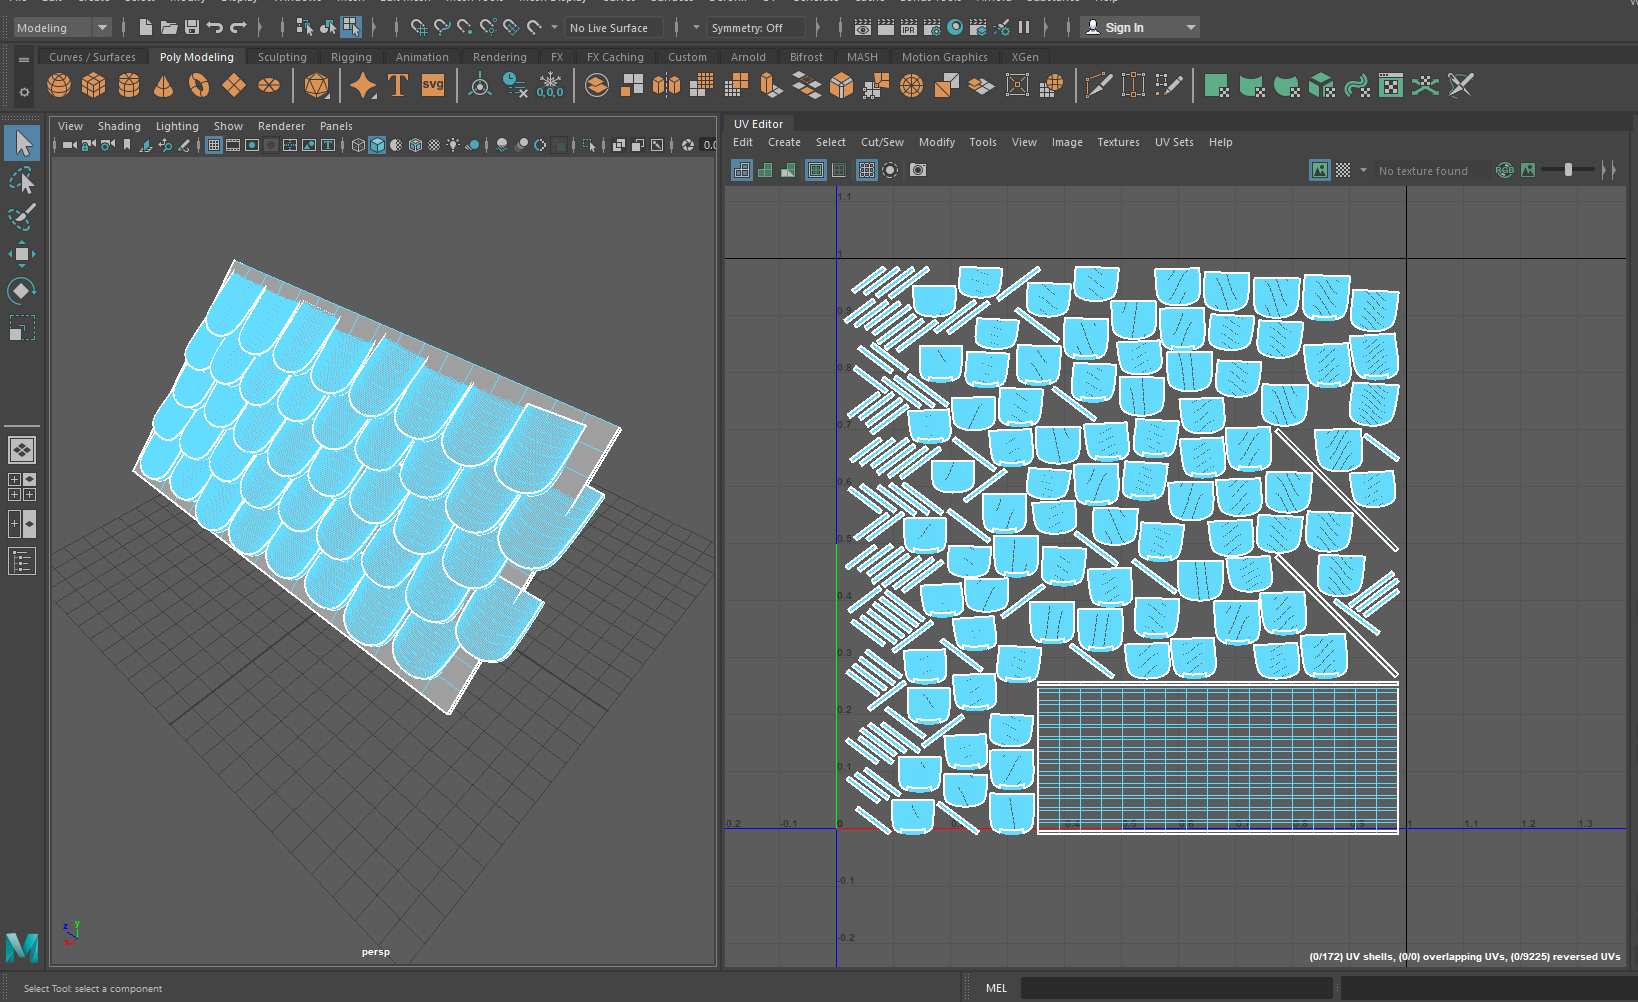
Probably the biggest skill I learned this week was UV creation and the high-poly low-poly pipeline. I had only the slightest familiarity with Maya previously (almost entirely in scene setup and rendering), and had made one set of UVs in ZBrush’s (terrible, sorry!) automatic UV unwrapping tool. For hard-surface, it was clear from reading forum posts about workflows that Maya was the way to go for UVs.
I managed to import my house into Maya in several smaller sections and was quite impressed with the UV creation/unwrapping/layout tools. I’m sure that my UVs aren’t particularly efficient, especially with so many poorly rotated and duplicated parts (e.g. I’m using half the texture for the back side of the roof tiles that will never be seen), but that’s something to improve upon later.
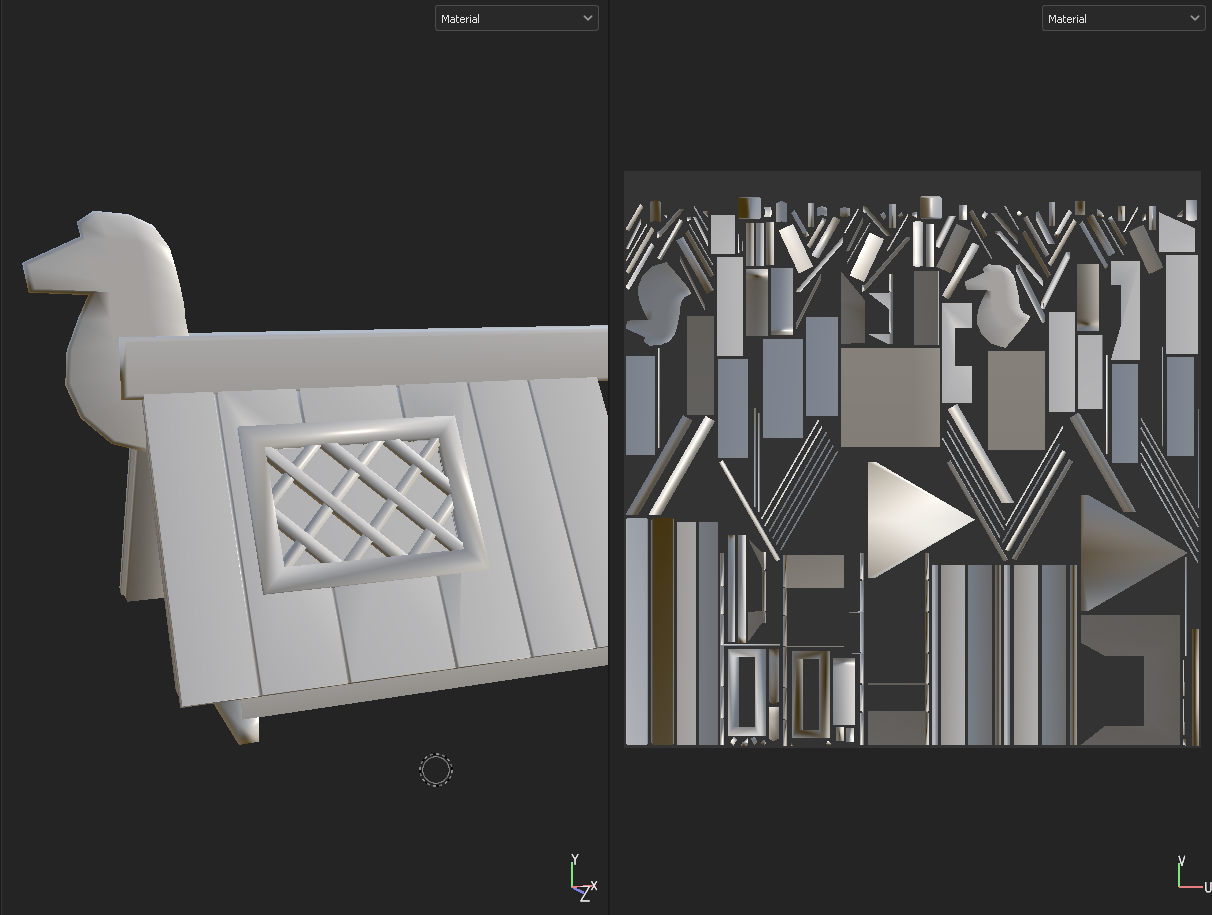
UVs in hand, I pulled the pieces back into ZBrush for additional detail testing. I practiced with scribbles on the roof of the house just to figure out the high-poly low-poly pipeline, and managed to bake these textures down in Substance Painter without much trouble. I did run out of time to do any real detailing for the final piece as I had originally liked (e.g. wood grain, uneven bevels, roof tile texture..), but I’m glad I have this proof of concept. I did end up making a ‘high poly’ version of the house in ZBrush with lightly smoothed bevels and curves, and this was what I input for my final texture baking.
In general, not bad for two major steps of the game asset pipeline that I had never touched before!


Texturing and UE4 Import
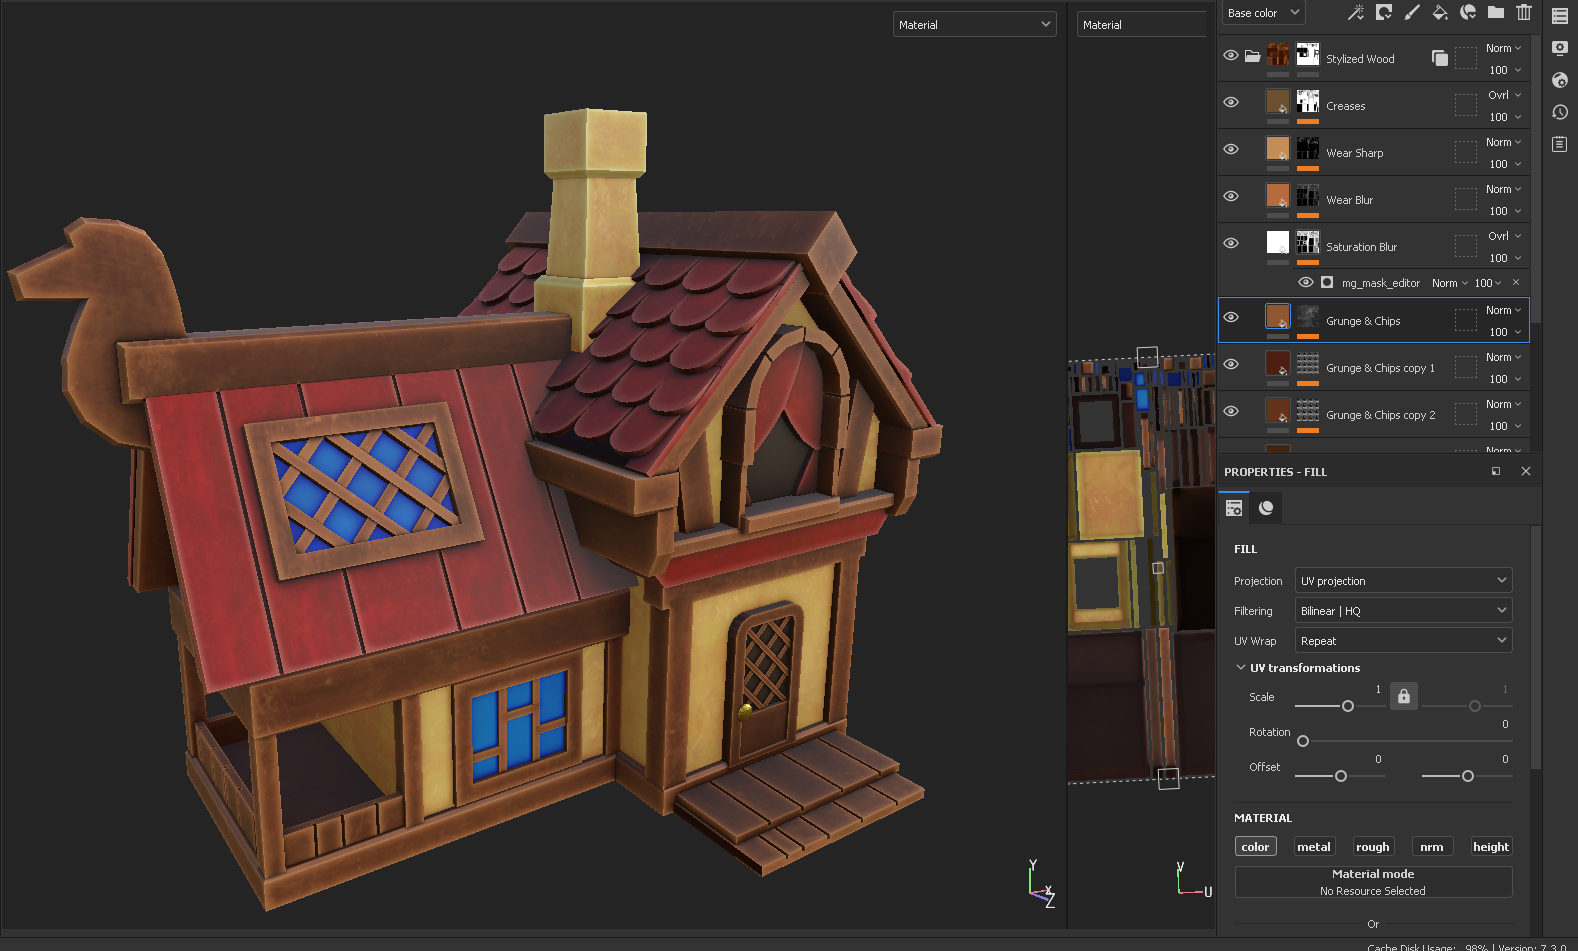
With the deadline drawing nearer and how many new skills I was attempting to learn, my plans for a completely hand-painted texture were out the window. Instead, I experimented with programmatically-generated stylized textures via grunge maps and curvature filters in Substance Painter. I attempted to bring out the highlights and lowlights while also adding some brushstroke texture, but it ended up being too consistent and flat to match the original concept. I was hoping that some of this would be resolved with filters in the final UE4 render.
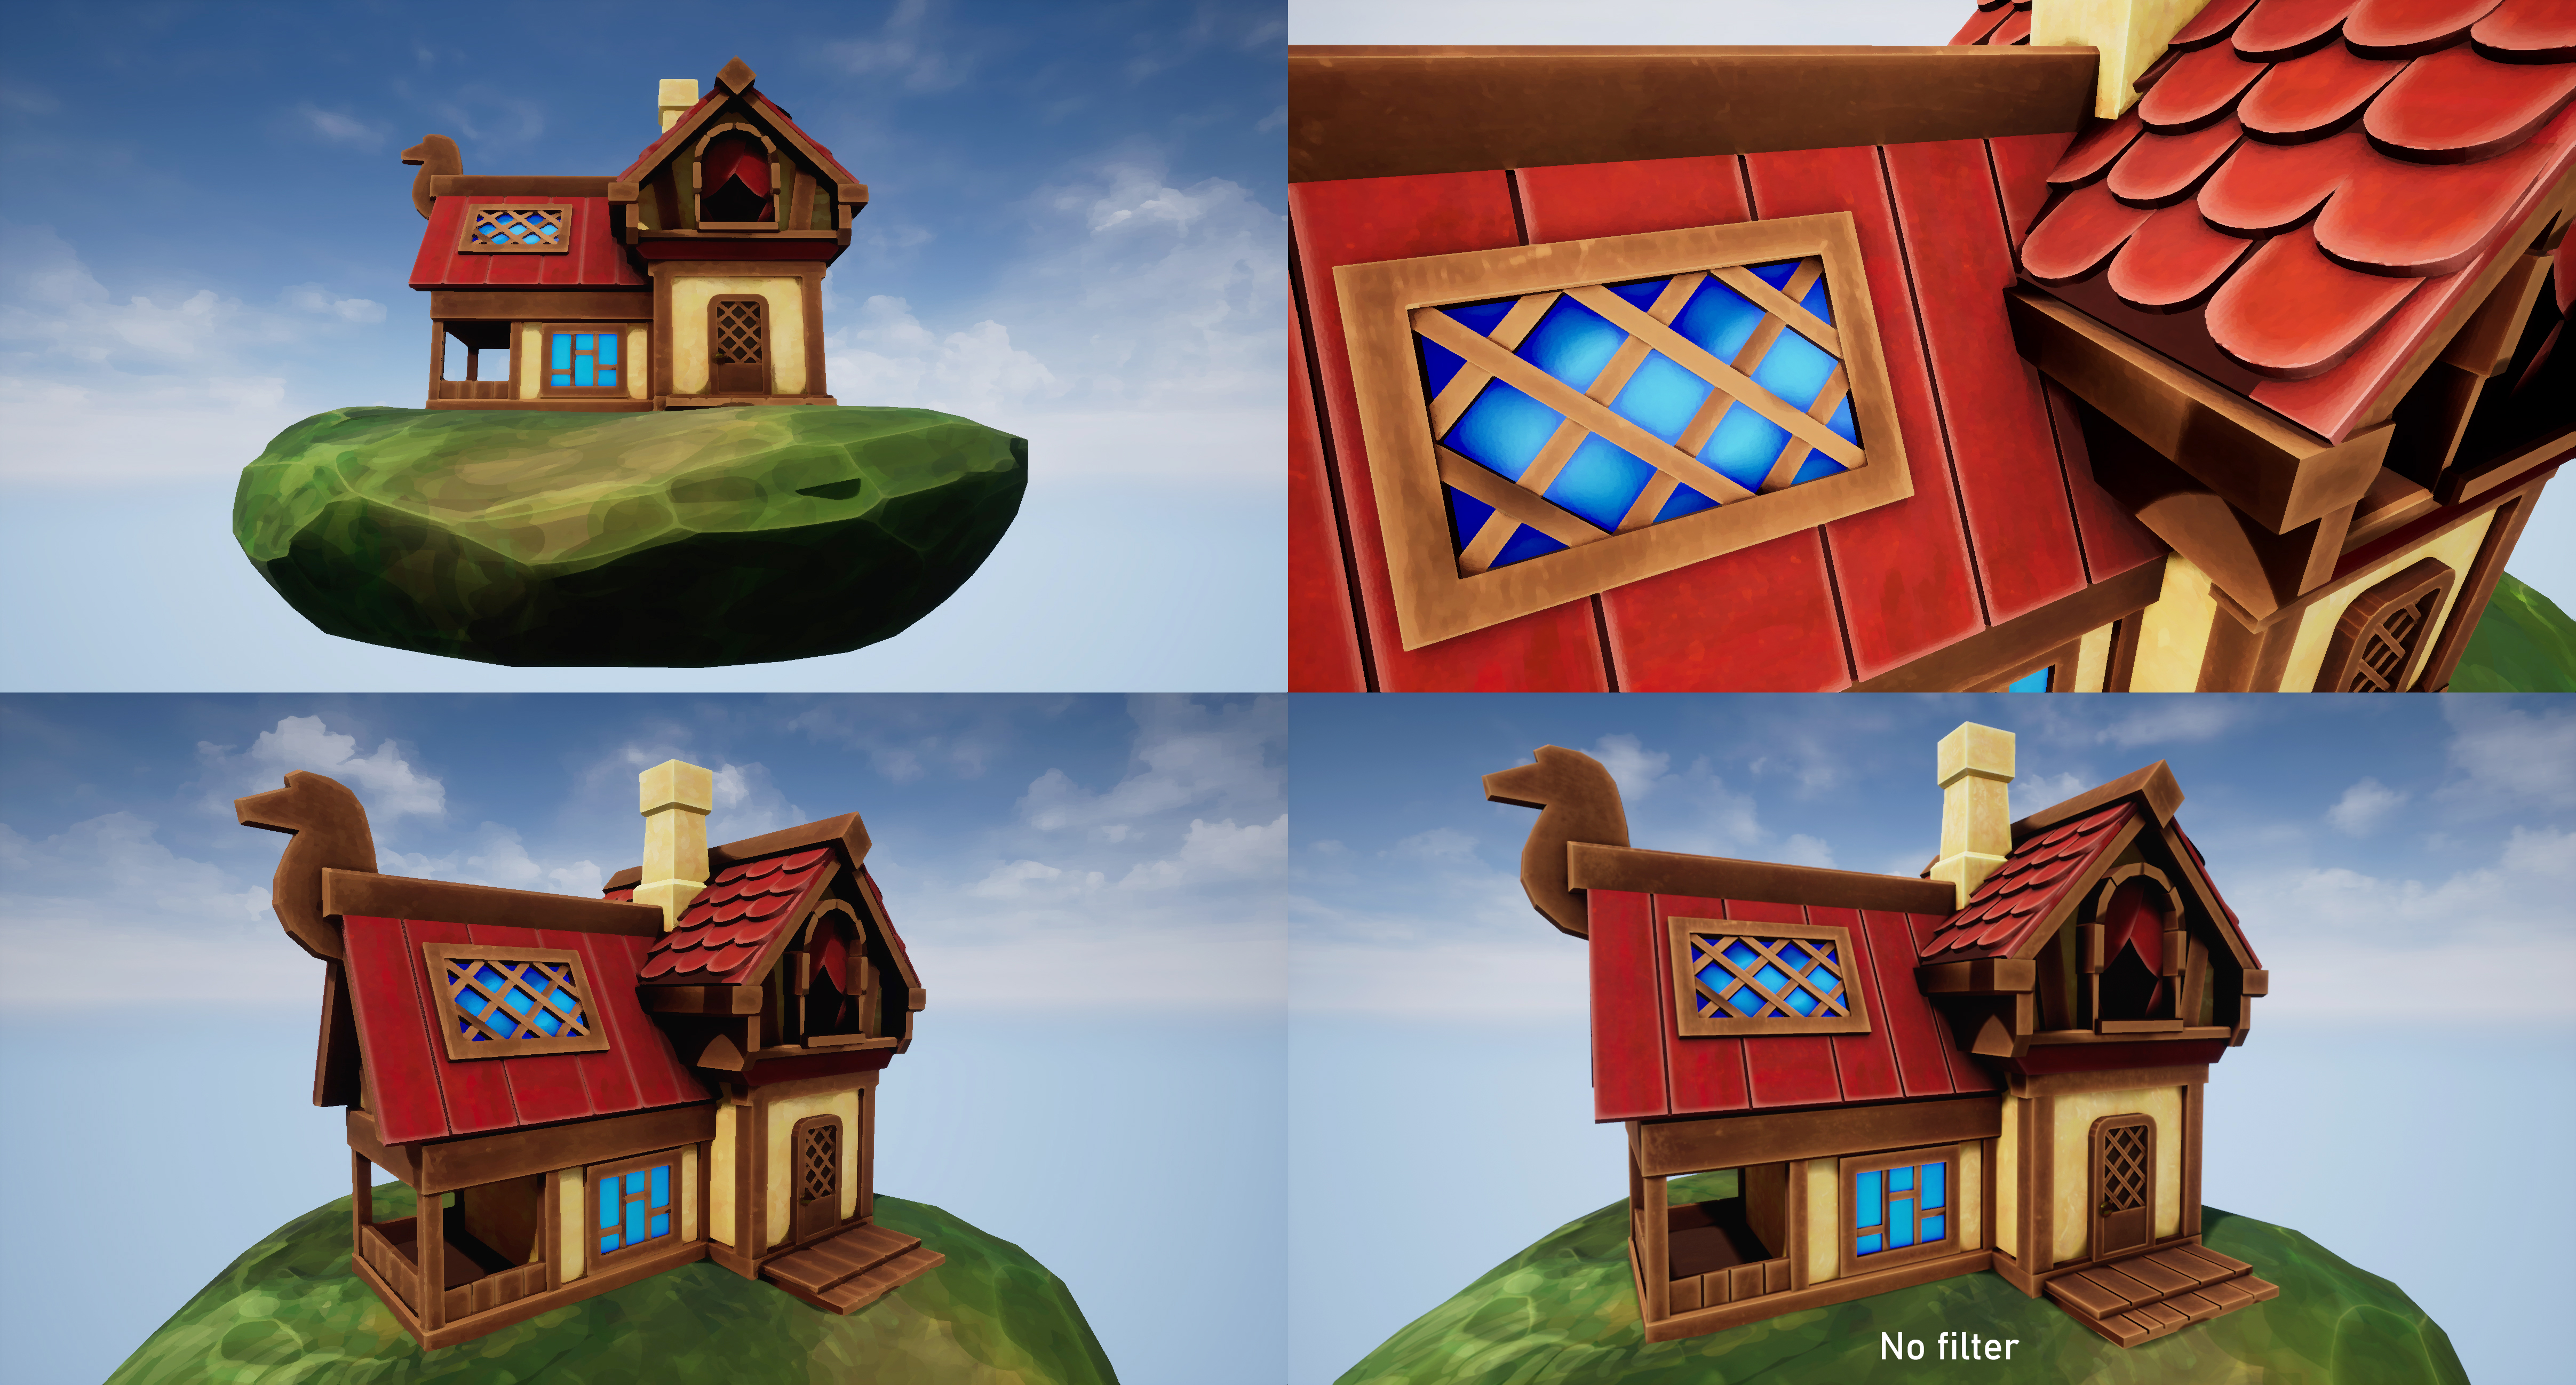
The Kuwahara filter for my final render scene was fairly straightforward, as I closely followed the tutorial mentioned in my previous post. The final effect wasn’t quite what I was going for, as it tended to blur too much of the hard lines that I was hoping to keep; I think it would have looked much better were there more color variation in the underlying house, as it created a very nice effect on the one hand-painted section of my sculpt: the grassy rock. That said, my interest is definitely piqued to see exactly what’s possible with shader customization in Unreal.


Final Renders
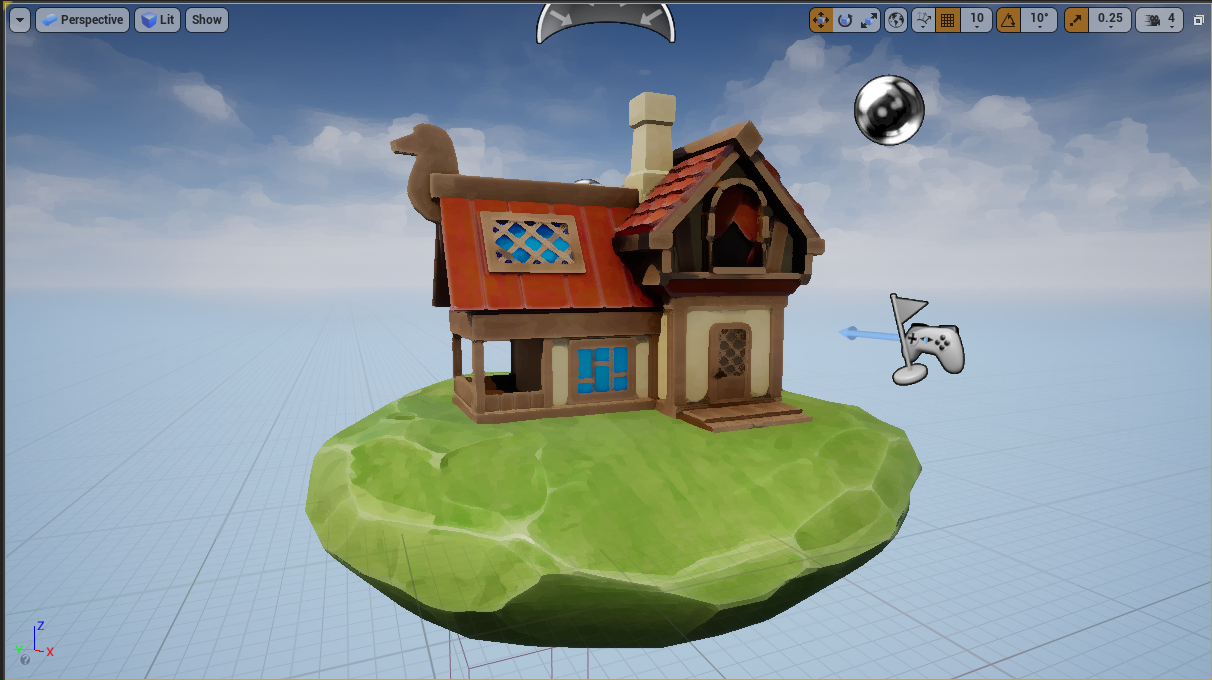
My final renders were pretty straightforward once I figured out how to import all of my textures and set up a basic camera. I used the default sky and scene setup from the UE4 starter scene, and simply replaced all the assets (along with adding my custom filter as an overlay). Once I shot a few high-res screenshots, I pulled them into Photoshop for minor color correction, as they appeared quite dull in my scene; I suspect I had some of my textures in the wrong color space.
Oddly enough, the place I struggled the most with this project was in rendering out a final video – I found UE4’s keyframe system for video recording very unintuitive. It didn’t help that this was recorded at the eleventh hour in a bit of a panic, but still! I found quite a few tutorials for recording character gameplay, but not many for cinematics that travel along a set path. I ended up creating something passable, but pretty wonky in the abrupt directional changes. This is something I’d like to investigate further, since being able to show off assets in action is a major plus for the game-ready workflow.
