Portrait + Likeness
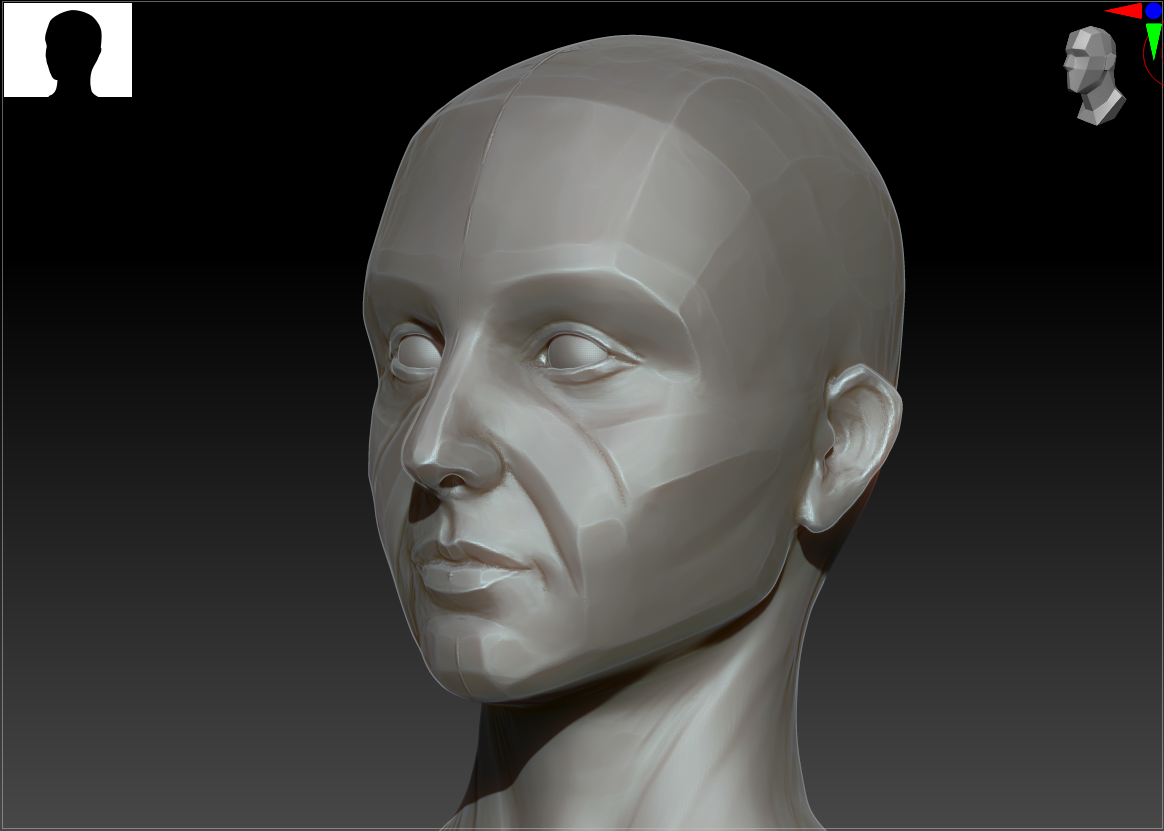
I first wanted this piece to be an exercise in facial/skull anatomy, so I started the face from scratch as a sphere in ZBrush. It’s roughly based on a set of turnaround images I found from a live-sculpting course (Adam Beane Industries, model Tessa) as I wanted to practice likeness as well. She wasn’t the best choice for a learning piece as she happens to somewhat look like me (and I’ve just finished a sculpt of my own head), but I did find that my second time through the sculpting process went exponentially quicker. I’m starting to grasp the basic muscles and proportions, and hopefully will be able to do a bunch more (diverse) speed sculpts in the future.
I did most of the sculpt by eye and comparison to the reference, but did dip my toes into my newly acquired Anatomy for Sculptors (Zarins and Kondrats, 2014) book to understand some of the more complex shapes. I’m currently struggling with losing some of my previous misconceptions when it comes to anatomy, especially in where features sit depth-wise (e.g. I always want to pull the eyes too far forward and on more of a curve around the skull rather than on almost a slice across the face).
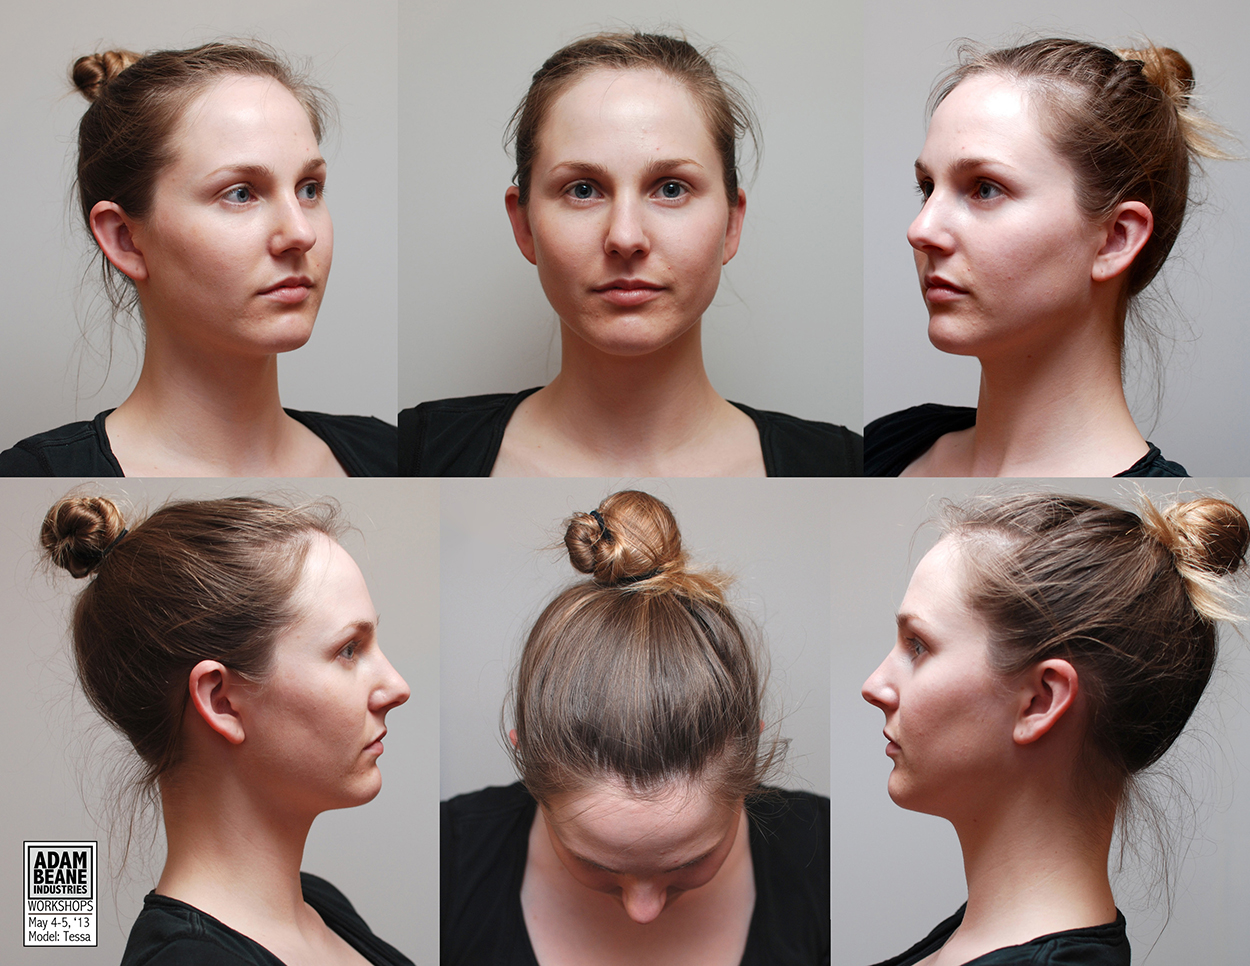
(Beane, 2013) 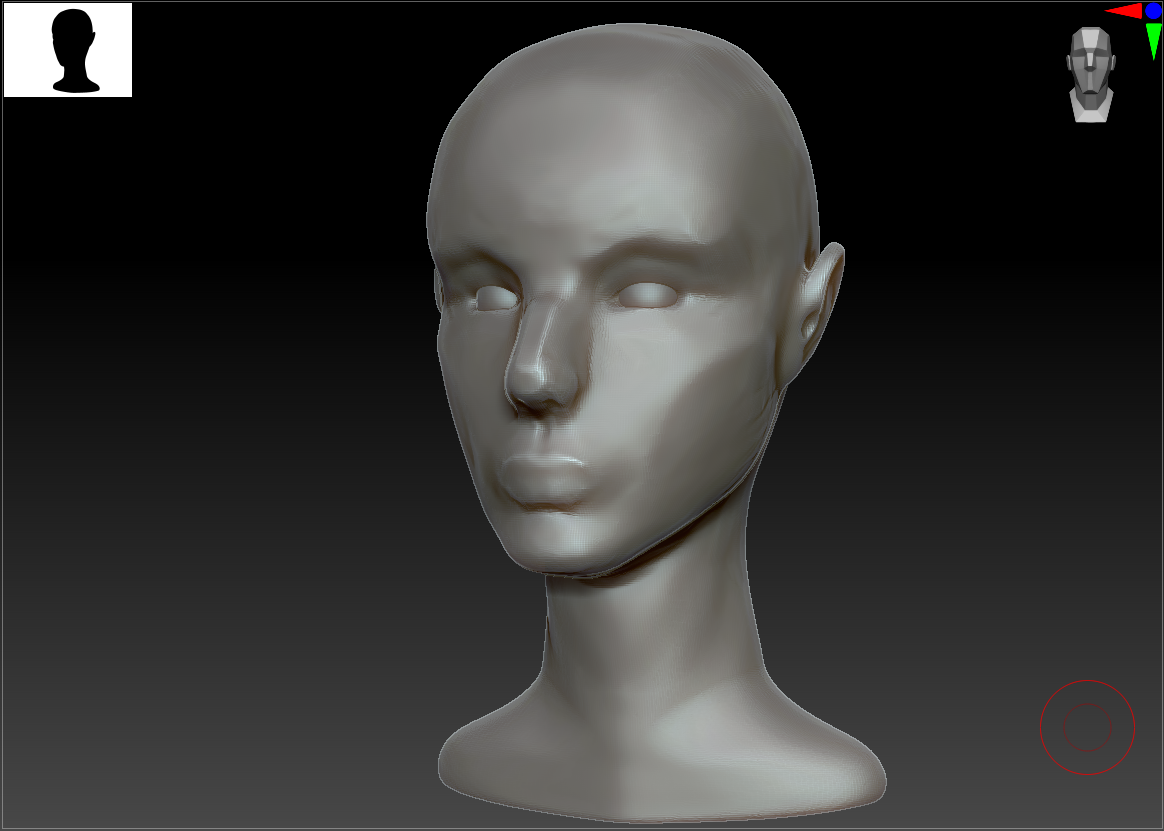


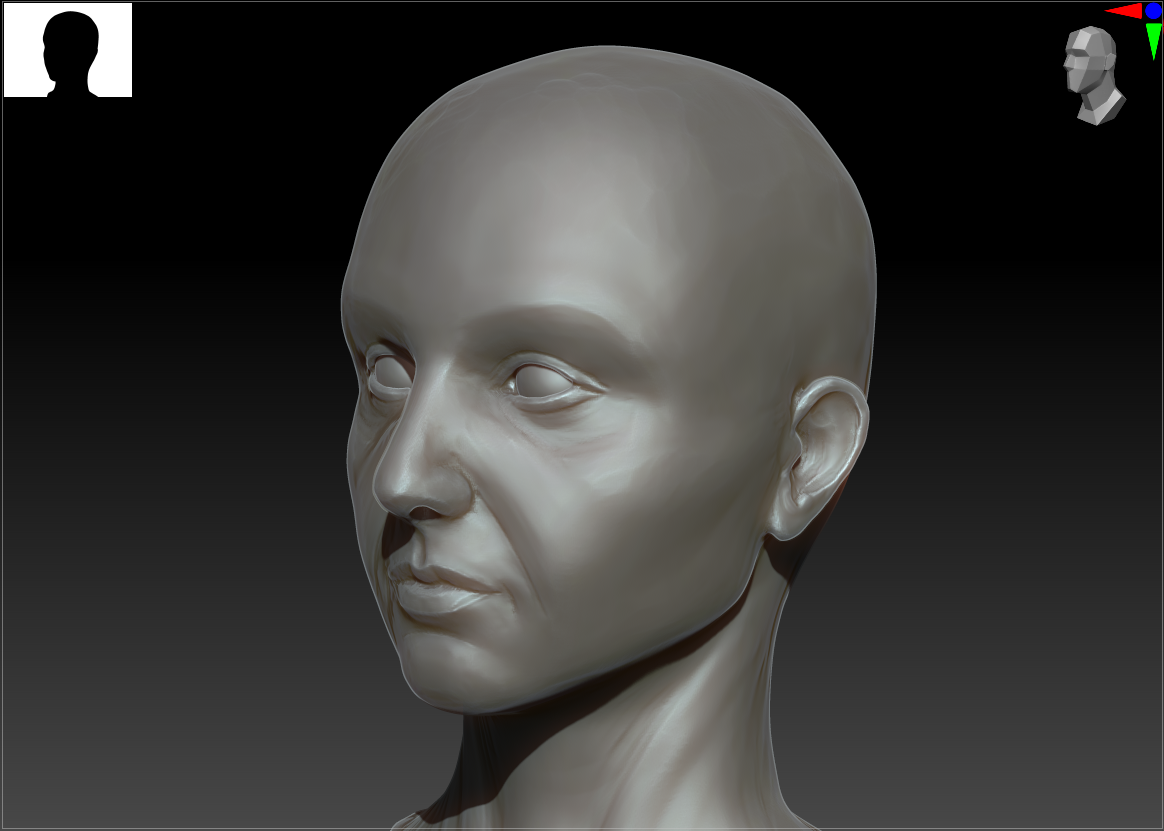
Initial Stylization Tests
My next task was to lean into technical experimentation to achieve these two distinct looks. I started out testing out various brushes on basic spheres. It became quickly (and ironically) apparent that ZBrush wasn’t necessarily the best option for defining planes of the face as it doesn’t have strong retopology features, but I’m not familiar enough with Maya’s retopo yet – that’s something to work on for next time. Instead, I leaned into the trimDynamic and hPolish brushes to try and flatten out major areas. Since I’m not yet familiar with the defining lines of the face, I ended up removing too much material and creating haphazard curves; I later painted the lines on first and that helped enormously. For the clay sculpt, I made use of ZBrush’s new ThickSkin feature and started gouging out and layering on material, trying to emulate finger and sponge marks.
Based on feedback from my discussion with Leo Scazzocchio, I agreed that I wasn’t emphasizing the two styles nearly enough. From a distance and in silhouette, the two heads looked identical – I clearly had to be stronger with my stylization.


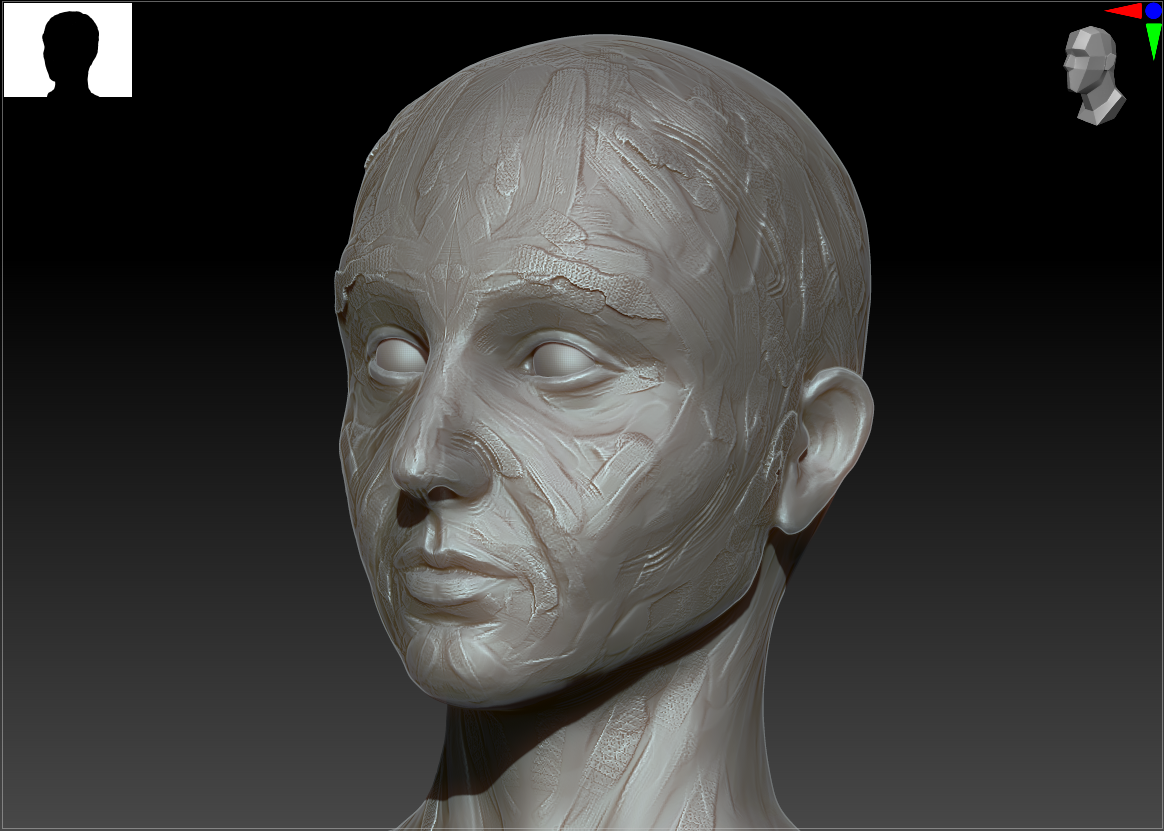
Clay Sculpts WIP
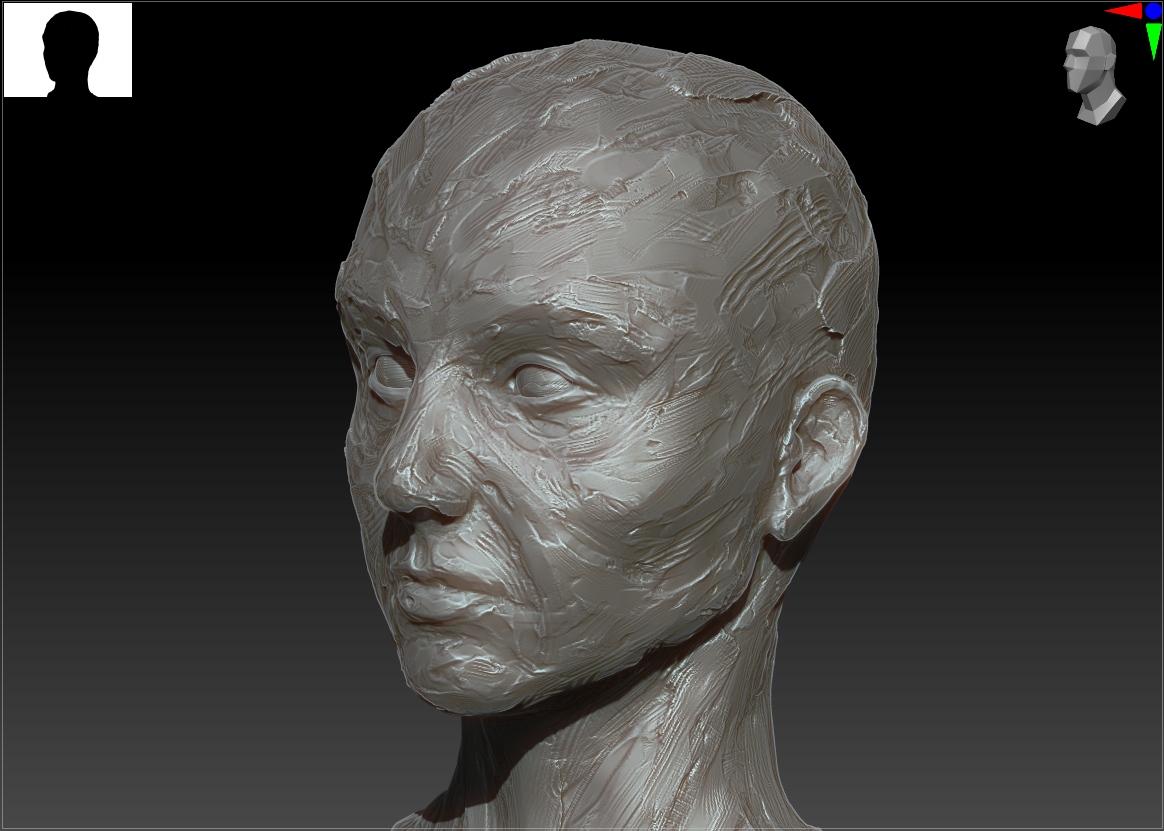
For my second attempt at achieving the clay effect, I made liberal use of the ThickSkin feature in ZBrush to be particularly destructive to the surface without distorting the underlying facial structure. Based on my earlier experiments, I mainly worked with the Fracture and ClayTrim brushes to emulate layers of knife strokes and smoothed clay.
However, the skin texture started out looking less like clay and more like a decaying or diseased corpse. Looking back at the real-world reference images, I noticed that they had larger areas of alternating rough and smooth detail (less uniform), larger indents (finger marks), and a sense of layering on additional material in the bulky areas. Keeping this in mind, I turned up my ThickSkin setting and alternated between layering and flattening brushes to better effect.


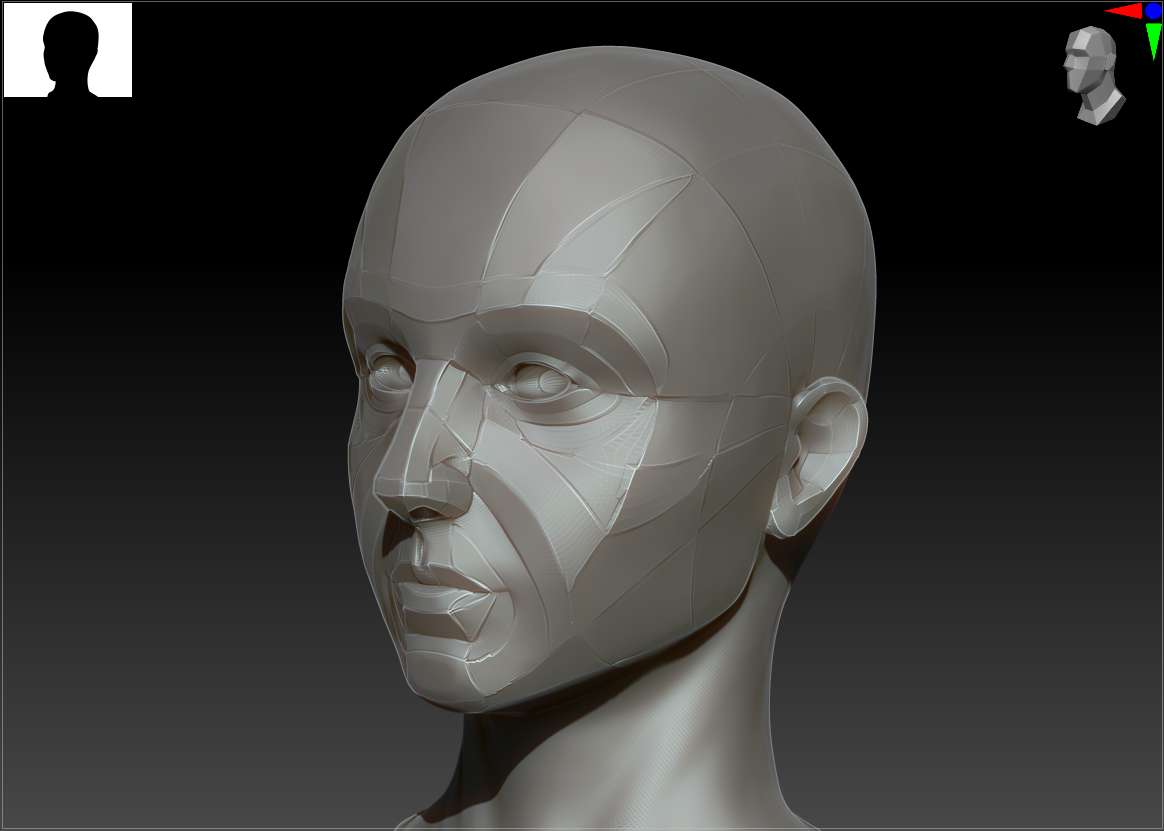
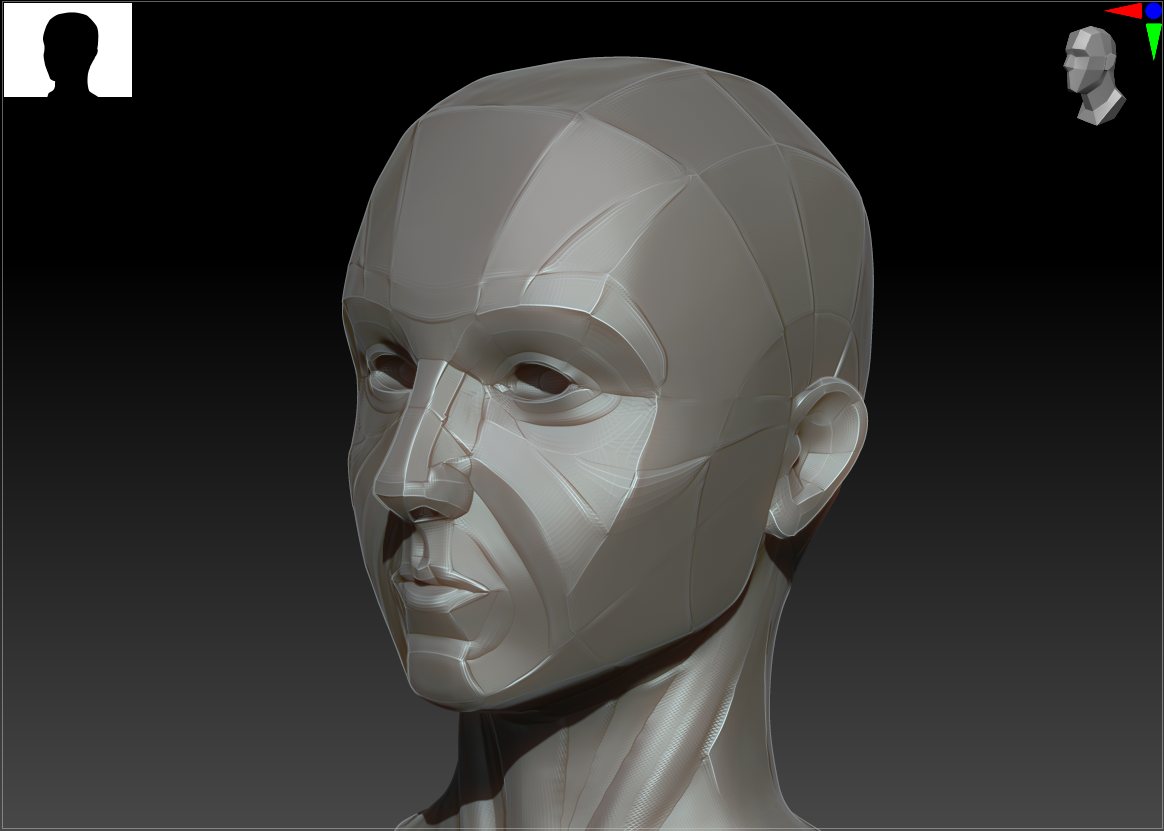
Hard-surface Planar WIP
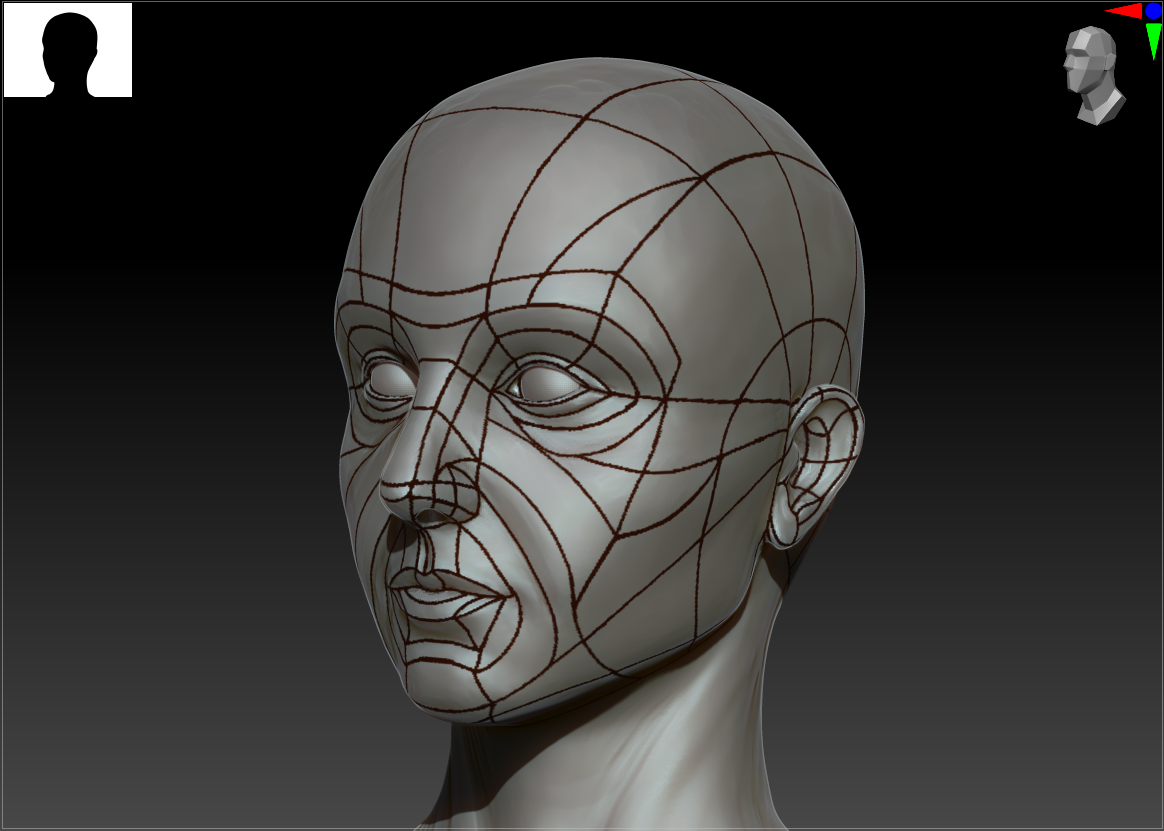
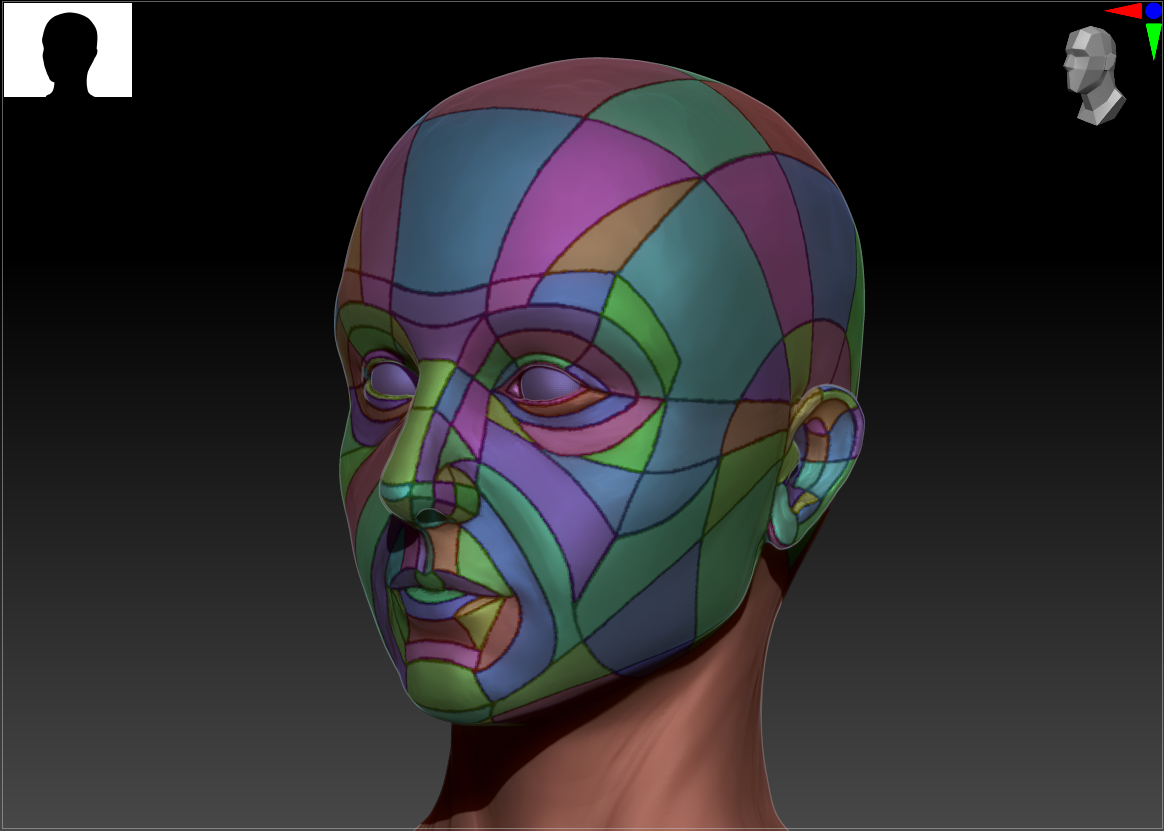
It became clear from my initial attempt at the hard-surface sculpt that I needed a better plan for where to place the planes and their dividing lines on the head. I reverted back to my original clean sculpt and started painting the lines on, looking at my anatomy book for reference. I then ran a plugin to polygroup each section and turned my brush settings to isolate their effect to a single polygroup. This allowed me to flatten and smooth each plane separately without impacting the others.
I did several passes of flattening and then group polishing, occasionally adding additional material to high points for sharper, more defined edges. I ended up reducing the polycount several times to avoid sharp dropoffs between the various planes and doing some manual retopo to clean up the dividing lines.
Given more time, I would fully retopo this piece to achieve even flatter planes, but that’s a skill I’ve yet to pick up.

Bibliography
Beane, A., 2013. Sculpting the Portrait in Cx5 Workshop. [online] Adam Beane Industries. Available at: <https://beane51.rssing.com/chan-5278455/article29.html#c5278455a29> [Accessed 9 October 2021].
Zarins, U. and Kondrats, S., 2014. Anatomy for Sculptors. Exonicus LLC.
